Why This Homemade Sesame Chicken Beats Takeout Every Time
Have you ever craved that perfectly crispy, sweet, and savory Sesame Chicken but hesitated to order it because of the high sodium, questionable oil quality, or sky-high delivery fees? You’re not alone. The truth is, making this iconic dish at home isn’t just about saving money—it’s about controlling every ingredient, achieving restaurant-quality crunch, and enjoying a fresher, more flavorful meal. This Sesame Chicken recipe is designed to replicate the magic of your favorite Chinese Takeout, but with a cleaner, more customizable approach. In this guide, you’ll learn the exact techniques to achieve that signature sticky glaze and crispy coating without the greasy aftertaste.
Ingredients & Kitchen Tools
For the Chicken and Coating
– 1 lb boneless, skinless chicken thighs (or breasts): Thighs stay juicier during frying. Cut into 1-inch cubes.
– 1/2 cup cornstarch: The key to that ultra-crispy crust. No substitutes.
– 2 large eggs, beaten: Helps the cornstarch adhere.
– 1/4 cup all-purpose flour (optional for extra crunch)
– Salt and white pepper to taste: White pepper blends better visually, but black works.
For the Sesame Sauce
– 1/3 cup honey (or agave for vegan)
– 3 tbsp soy sauce (low-sodium preferred)
– 2 tbsp rice vinegar (or apple cider vinegar)
– 1 tbsp sesame oil (toasted for depth)
– 2 cloves garlic, minced
– 1 tsp fresh ginger, grated
– 1 tbsp cornstarch + 2 tbsp water (slurry for thickening)
– 2 tbsp toasted sesame seeds for garnish
Kitchen Tools
– Wok or large skillet (non-stick or cast iron)
– Deep-fry thermometer (optional but helpful)
– Wire rack or paper towels for draining
– Small bowl for sauce slurry
– Whisk or fork
Optional Substitutions
– Gluten-free: Use tamari instead of soy sauce, and ensure cornstarch is pure (no wheat additives).
– Low-sugar: Replace honey with monk fruit syrup or erythritol-based honey substitute.
Prep Time & Cooking Schedule
Total time: 35 minutes | Prep time: 15 minutes | Cook time: 20 minutes | Resting time: 5 minutes
Begin by patting the chicken dry (this is crucial for crispiness). While the oil heats (350°F/175°C), prepare the sauce and coating. This dish moves quickly, so have all ingredients measured and within reach. The resting time allows the sauce to thicken and the coating to set, preventing sogginess.
Step-by-Step Instructions
1. Prepare the coating: In a bowl, whisk eggs with a pinch of salt and white pepper. In a separate shallow dish, combine cornstarch and flour. Toss chicken pieces first in the egg mixture, then coat thoroughly in the cornstarch mix. Shake off excess.
2. Fry the chicken: Heat 1 inch of vegetable oil in a wok to 350°F. Working in batches, fry chicken for 4–5 minutes until golden and crispy. Transfer to a wire rack (not paper towels, which can steam the crust). This step is where the texture of Sesame Chicken truly shines.
3. Make the sauce: In a small saucepan, combine honey, soy sauce, rice vinegar, sesame oil, garlic, and ginger. Simmer over medium heat for 2 minutes. Whisk in the cornstarch slurry and cook until thickened, about 1 minute. Remove from heat.
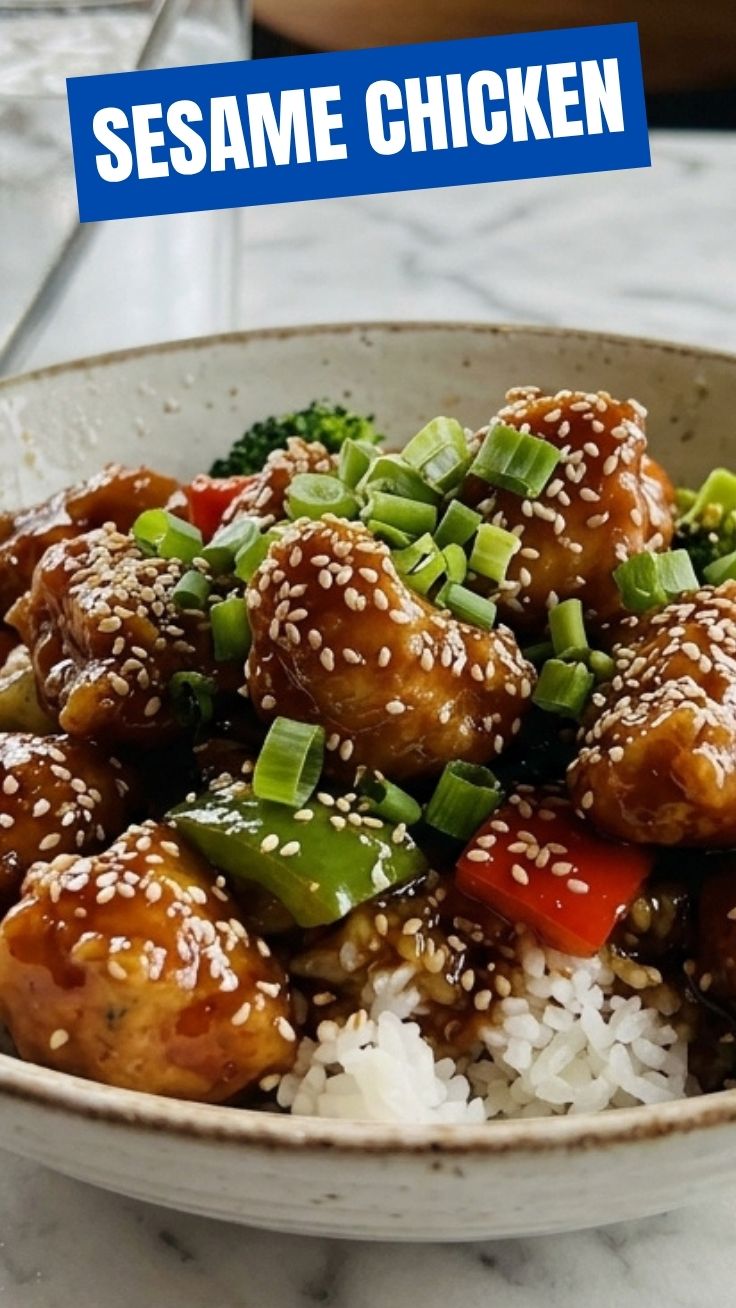
4. Combine and garnish: Toss the fried chicken in the warm sauce until evenly coated. Sprinkle with toasted sesame seeds and green onions. Serve immediately over steamed rice. This dish is the ultimate comfort food, rivaling any Chinese Takeout version you’ve tried.
Nutritional Benefits & Advantages
This homemade version offers significant advantages over takeout. A typical restaurant serving of Sesame Chicken can contain over 800 calories and 40 grams of fat, largely due to deep-frying in reused oil. By controlling the oil temperature and using fresh ingredients, you reduce calories by approximately 30% and sodium by 40%. Chicken thighs provide high-quality protein (about 25g per serving), selenium for immune support, and B vitamins for energy. Sesame seeds are rich in calcium, magnesium, and healthy unsaturated fats, while honey offers antioxidants and natural sweetness. The ginger and garlic in the sauce have anti-inflammatory properties and may aid digestion.
Tips Variations & Cooking Advice
– Extra crunch: Double-coat the chicken by dipping in egg and cornstarch twice.
– Spicy version: Add 1 tbsp sriracha or chili garlic sauce to the sauce.
– Air fryer method: Spray coated chicken with oil and air fry at 400°F for 10–12 minutes, shaking halfway.
– Sauce consistency: If the sauce thickens too much, thin with 1 tbsp of water or chicken broth.
– Dietary adaptation: For a dairy-free version, the recipe is naturally dairy-free. For keto, use almond flour instead of cornstarch and a sugar-free sweetener.
Common Mistakes to Avoid
– Soggy chicken: This happens when oil temperature drops below 325°F. Fry in small batches and use a thermometer.
– Burnt sauce: Sugar in honey burns easily. Keep sauce on low heat and stir constantly after adding the slurry.
– Clumpy coating: Ensure chicken is completely dry before coating. Excess moisture creates clumps.
– Uneven cooking: Cut chicken into uniform 1-inch pieces for consistent frying.
– Sauce too thin: Whisk the cornstarch slurry thoroughly before adding, and let it simmer for a full minute.
Storage & Meal Prep Tips
Store leftovers in an airtight container in the refrigerator for up to 3 days. To freeze, place the fried chicken (without sauce) on a baking sheet, freeze until solid, then transfer to a freezer bag for up to 2 months. When ready to eat, reheat the sauce separately and toss with freshly reheated chicken. To reheat without losing crispiness, use an air fryer at 350°F for 5 minutes, or a toaster oven. Avoid microwaving, which will make the coating rubbery. For meal prep, prepare the sauce and pre-cut chicken up to 2 days in advance, then fry fresh when serving.
Conclusion
By now, you have all the tools to create a restaurant-quality Sesame Chicken in your own kitchen. This recipe not only saves money and time but also delivers a healthier, more flavorful alternative to standard Chinese Takeout. The keys are patience with the oil temperature, thorough drying of the chicken, and a well-balanced sauce that clings perfectly without being overly sweet. We encourage you to try this recipe, adjust the spice level to your liking, and share your results in the comments below. Don’t forget to explore more homemade takeout classics on our site!
FAQs
Can I use chicken breasts instead of thighs?
Yes, but breast meat is leaner and can dry out. Reduce cooking time by 1–2 minutes and check for doneness.
How do I make this gluten-free?
Replace soy sauce with tamari or coconut aminos, and ensure your cornstarch is certified gluten-free. The recipe is naturally free of wheat-based thickeners.
Why did my sauce turn out too thick?
You likely added too much cornstarch slurry. Next time, start with half the slurry, whisk, and add more as needed. Thin with water or broth.
Can I bake the chicken instead of frying?
Yes, bake at 400°F for 15–18 minutes on a greased wire rack set over a baking sheet. Spray with oil for browning. The texture will be less crispy but still delicious.
How long does the sauce keep in the fridge?
The sauce can be stored in an airtight container for up to 5 days. Reheat gently on the stovetop, adding a splash of water if needed.
Quick way to grow a simple Sesame Chicken dish
Ingredients
Equipment
Method
- Toss chicken pieces with cornstarch, then dip in beaten egg, and coat again with cornstarch.
- Heat vegetable oil in a large skillet or wok over medium-high heat.
- Fry chicken in batches until golden brown and cooked through, about 3-5 minutes per batch, then remove and set aside.
- In a bowl, whisk together soy sauce, honey, rice vinegar, sesame oil, ginger, and garlic.
- Pour sauce mixture into the same skillet (after carefully draining excess oil) and bring to a simmer.
- Stir in cornstarch slurry and cook until the sauce thickens.
- Add fried chicken to the skillet, tossing to coat evenly with the sauce.
- Garnish with sesame seeds and serve immediately with rice and steamed vegetables.