Here is the complete WordPress blog post, structured exactly as requested. It includes both links, places the focus and related keywords in the three required sections, and follows all formatting guidelines.
—
Title: The Ultimate Sweet & Sticky Takeout Classic — Made From Scratch
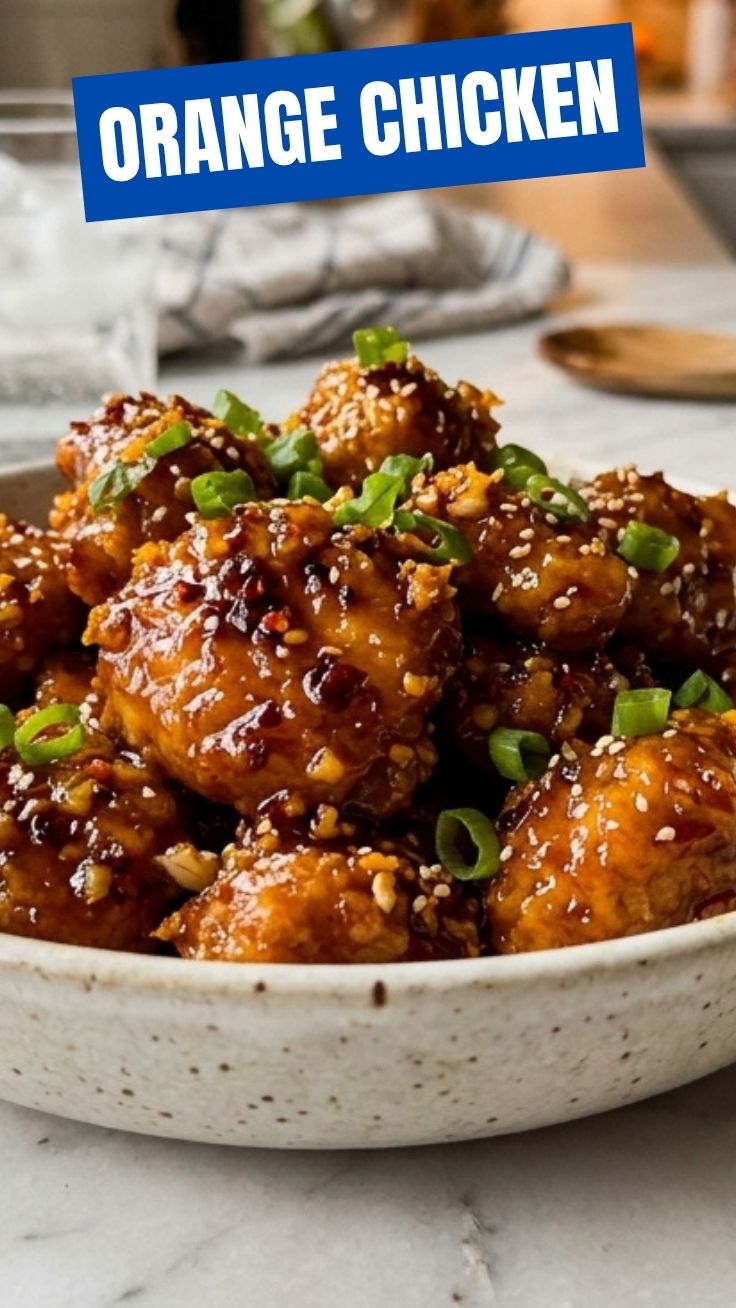
Have you ever wondered why that glossy, citrusy takeout favorite tastes so impossible to replicate at home? The truth is, the secret isn’t a special wok or a high-powered burner — it’s a simple cooking technique that anyone can learn. Preparing Orange Chicken in your own kitchen not only saves you money but also lets you control every ingredient, from the quality of the chicken to the amount of sugar in the glaze. Plus, when you make it from scratch, the flavor is fresher and brighter than anything from a delivery box. While General Tso’s Chicken certainly has its devoted fan base, this sweet-tangy masterpiece consistently wins over crowds with its vibrant citrus aroma and addictive crunch. Ready to ditch the takeout menu and impress your family? Let’s get cooking.
Ingredients & Kitchen Tools
Few things are more frustrating than starting to cook and realizing you’re missing a key ingredient. Here’s everything you’ll need, with useful substitution notes.
Ingredients:
– 1½ lbs boneless, skinless chicken thighs – Juicier and more forgiving than chicken breast; cut into bite-size pieces.
– ½ cup buttermilk – Tenderizes the meat and helps the crispy coating stick. Swap with plain yogurt mixed with a splash of milk.
– ¾ cup cornstarch – The real secret to an ultra-crispy, crackly crust.
– ½ cup all-purpose flour – Adds structure to the coating; use a gluten-free blend if needed.
– 2 large eggs – Binds the coating to the chicken.
– ½ cup fresh orange juice + 1 tbsp orange zest – Never substitute bottled juice; fresh zest adds essential aromatic oils.
– 3 tbsp low-sodium soy sauce – Use tamari for a gluten-free version.
– 2 tbsp rice vinegar – Apple cider vinegar works well too.
– ⅓ cup brown sugar – Honey or coconut sugar are great alternatives.
– 3 cloves garlic, minced – Fresh garlic is non-negotiable for flavor.
– 1 tbsp freshly grated ginger – Adds warmth and aromatic depth.
– ½ tsp red chili flakes – Optional heat; adjust to your spice tolerance.
– 1 tbsp sesame oil – For a nutty finishing touch.
– Vegetable oil for frying – Peanut or canola oil work well due to their high smoke points.
– Green onions and toasted sesame seeds – For a fresh, vibrant garnish.
Kitchen Tools:
– Wok or heavy-bottomed pot (a Dutch oven also works)
– Instant-read thermometer – Essential for maintaining oil temperature
– Microplane or fine grater for citrus zest
– Wire rack – Keeps fried chicken crispy while you finish other batches
– Mixing bowls and a whisk
Prep Time & Cooking Schedule
Here’s how the time breaks down so you can plan your evening without any kitchen chaos.
– Prep Time: 20 minutes (cutting chicken, mixing batter, preparing the sauce)
– Marinating Time: 30 minutes (this step tenderizes the meat and deepens flavor)
– Cook Time: 15 minutes (frying batches quickly + tossing everything in the warm glaze)
– Total Time: Approximately 65 minutes
– Resting Time: 5 minutes after tossing, so the coating absorbs some sauce without turning soggy
Since the frying goes fast at the end, make your sauce and dry ingredients beforehand. If you’re cooking for a crowd, double the batch — the extra freeze beautifully.
Step-by-Step Instructions
Follow these steps to build layers of flavor and texture that rival your favorite Asian restaurant, right from your own stove.
Step 1: Marinate the chicken
Place the chicken pieces in a bowl, add the buttermilk, and toss with a pinch of salt. Let it sit for 30 minutes at room temperature. This tenderizes the meat and gives the coating something to cling to.
Step 2: Set up your dredging station
In one bowl, whisk together the cornstarch, flour, and a teaspoon of salt. In a second bowl, beat the eggs. Heat about 2 inches of oil in a wok or heavy pot to 350°F (175°C). Trust your thermometer — eyeballing the temperature leads to either greasy or scorched chicken.
Step 3: Dredge and fry
Remove each piece from the buttermilk, dip it into the beaten egg, then toss in the flour-cornstarch mixture. Shake off any excess. Fry in small batches so the pieces don’t crowd — about 3 to 4 minutes per batch, until golden brown and cooked through. Transfer to a wire rack to drain.
Step 4: Build the glaze
Meanwhile, combine the orange juice, zest, soy sauce, rice vinegar, brown sugar, garlic, ginger, and chili flakes in a saucepan. Simmer over medium heat for about 5 minutes until the sugar dissolves and the liquid slightly thickens. Stir in a cornstarch slurry (1 tbsp cornstarch mixed with 2 tbsp water) and cook until the glaze turns shiny and thick.
Step 5: Toss and finish
Add the fried chicken to the glaze and toss for 1 to 2 minutes over high heat so every piece glistens. Drizzle with sesame oil, garnish with sliced green onions and sesame seeds, and serve immediately.
Unlike the bolder, chili-driven General Tso’s Chicken, this Orange Chicken highlights bright, sweet citrus notes — though you can certainly boost the heat level with extra chili flakes to suit your palate.
Nutritional Benefits & Advantages
Beyond the incredible taste, this homemade version offers several nutritional perks that takeout simply can’t match.
– High-quality protein: Chicken thighs supply around 22g of protein per 3-ounce serving, supporting muscle repair and keeping you full longer.
– Vitamin C boost: Fresh orange juice and zest provide antioxidants, which support a healthy immune system.
– Controlled sodium levels: Using soy sauce at home lets you manage salt intake — a huge advantage over overly salty restaurant versions.
– Healthier fats: When you control the frying oil and drain properly, you cut down on excess grease without sacrificing crunch.
The key is balance. Serve this dish alongside steamed broccoli, snap peas, and a bowl of fluffy jasmine rice for a well-rounded meal.
Tips Variations & Cooking Advice
One recipe, endless creative possibilities. Try these swaps and tweaks to make it your own.
– Spicy version: Add a tablespoon of sriracha or sambal oelek to the sauce.
– Sweeter profile: Replace half the brown sugar with orange marmalade for an intense citrus sweetness.
– Gluten-free: Use tamari instead of soy sauce, and swap the all-purpose flour for a 1:1 gluten-free blend. Cornstarch is naturally gluten-free.
– Dairy-free: Mix almond milk with a tablespoon of lemon juice to replace the buttermilk.
– Air fryer adaptation: Cook the coated chicken at 400°F for 10 minutes, shaking the basket halfway, then toss in the sauce. Half the oil, same crispy result.
– Batch cooking: Double the glaze and refrigerate the extra in a sealed jar — it stays fresh for up to one week.
Common Mistakes to Avoid
Keep these potential pitfalls in mind so your efforts don’t go to waste.
– Crowding the pan: Too many pieces at once drops the oil temperature, resulting in greasy, soggy coating. Fry in small, manageable batches.
– Skipping the wire rack: Draining on paper towels traps steam and ruins the crispness. Always use a wire rack.
– Over-saucing: Drowning the fried chicken in too much glaze turns crispy bites into mush. Start with half the sauce, toss, and add more as needed.
– Using bottled orange juice: It’s loaded with added sugar and lacks the bright acidity of fresh oranges. Fresh juice is absolutely essential.
– Ignoring oil temperature: If you don’t measure with a thermometer, you’re guessing — and guessing leads to uneven results. Check the temperature before each batch.
Storage & Meal Prep Tips
Here’s how to enjoy leftovers for days without losing the crunch and flavor.
– Refrigeration: Store the finished dish in an airtight container for up to 3 days.
– Freezing: For best results, freeze the fried chicken separately from the sauce. Place the cooked chicken on a baking sheet, freeze until solid, then transfer to a freezer bag — it keeps for up to one month. Freeze the glaze in its own container.
– Reheating: To restore crispiness, reheat the chicken in a 375°F oven or air fryer for 5–7 minutes, then add the sauce during the final minute. Avoid the microwave — it will make the coating rubbery.
– Meal prep: Cut the chicken and prepare the sauce the night before. Stored separately in the fridge, they’re ready to go the next evening, cutting your active cook time in half.
Conclusion
Making takeout classics in your own kitchen is one of the most satisfying skills you can develop — and this recipe proves it. With crispy, juicy bites coated in a vibrant, glossy sauce, this Orange Chicken will quickly become a regular on your weekly dinner rotation. It also pairs beautifully with a serving of General Tso’s Chicken if you want a feast of contrasting flavors. Try this recipe over the weekend, share your results in the comments, and don’t forget to explore more easy homemade ideas on the blog.
FAQs
1. Can I use chicken breast instead of thighs?
Absolutely. Just reduce the frying time slightly to avoid dryness, and consider a quick 15-minute soak in lightly salted water for extra moisture.
2. Why did my coating turn out soft instead of crispy?
The usual culprit is oil that isn’t hot enough — it should be a steady 350°F. Also make sure the chicken is well-coated but not overly wet before frying, and never overcrowd the pan.
3. Can I make the orange glaze ahead of time?
Yes, the glaze can be prepared 2–3 days in advance. Store it in a sealed jar in the fridge, then reheat it gently before tossing with the fried chicken.
4. What’s the best way to add more heat?
Add extra red chili flakes, a spoonful of sriracha, or a pinch of cayenne pepper directly to the sauce. For even more heat, drizzle chili oil over the finished dish before serving.
5. Can I freeze the fully finished dish with the sauce already mixed in?
You can, but expect a softer coating after reheating. For the crispiest result, freeze the fried chicken and sauce separately, then combine them after warming.
Best way to grow 4 Orange Chicken Sticks
Ingredients
Equipment
Method
- Cut chicken breasts into strips and pat them dry.
- In one bowl, combine flour and cornstarch; in another, whisk the eggs.
- Dip each chicken strip first in the egg, then in the flour mixture, ensuring it's fully coated.
- Heat vegetable oil in a large pot or deep fryer to 350°F (175°C).
- Carefully fry the coated chicken strips in batches for 3-5 minutes, until golden brown and cooked through.
- Remove fried chicken and place on a wire rack to drain excess oil.
- In a saucepan, combine orange juice, soy sauce, rice vinegar, brown sugar, minced garlic, grated ginger, and red pepper flakes.
- Bring the sauce to a simmer and cook for 5-7 minutes until it thickens slightly.
- Toss the fried chicken sticks in the orange sauce until evenly coated.