The Ultimate Guide to Perfect Lemon Garlic Chicken: A Bright, Cozy One-Pan Wonder
Have you ever craved a dinner that feels both elegant and effortless, delivering restaurant-quality flavor without a sink full of dishes? If you’ve been searching for a foolproof way to transform simple chicken breasts into a juicy, aromatic masterpiece, you’ve come to the right place. Preparing Lemon Garlic Chicken at home isn’t just about saving money—it’s about controlling the quality of ingredients, tailoring the brightness to your palate, and mastering a technique that works every single time. In this data-driven guide, we’ll explore the science behind the perfect sear, the magic of fresh citrus, and how to nail a dish that’s as versatile as it is delicious. Whether you’re meal prepping for a busy week or impressing guests on a lazy Sunday, this guide will help you unlock the full potential of classic lemon garlic chicken recipes.
Ingredients & Kitchen Tools
Before diving into the cooking process, let’s gather everything you need for success. Using the right tools and ingredients ensures consistent results and fewer mid-recipe surprises.
Ingredients:
– 4 boneless, skinless chicken breasts (about 1.5 lbs): Look for even thickness (6–8 oz each) for uniform cooking. Substitution: Chicken thighs (bone-in or boneless) work beautifully and stay juicier.
– 3 tbsp olive oil or avocado oil: High smoke point oils prevent burning during searing. Substitution: Butter for richer flavor (watch heat closely).
– 4 cloves garlic, minced: Fresh garlic is non-negotiable for that pungent, sweet aroma. Avoid: Pre-minced jarred garlic (less flavor intensity).
– 1 large lemon (zest + 2 tbsp juice): Use organic lemons if zesting. Substitution: 2 tbsp bottled lemon juice + 1/2 tsp lemon extract.
– 1/2 cup chicken broth (low-sodium): Helps deglaze the pan and creates a light pan sauce. Substitution: Dry white wine for acidity.
– 1 tsp dried oregano or thyme: Earthy herbs balance the citrus. Substitution: 1 tbsp fresh herbs.
– Salt and black pepper to taste: Season generously—chicken needs adequate salt to enhance flavor.
– Optional garnish: Fresh parsley, lemon slices, or red pepper flakes.
Kitchen Tools:
– Large cast-iron skillet or heavy-bottomed stainless steel pan: Retains heat perfectly for a golden crust.
– Instant-read thermometer: Crucial for avoiding overcooking (target 165°F/74°C).
– Tongs: For flipping chicken without piercing the meat (locks in juices).
– Microplane or zester: For fine lemon zest without bitter pith.
– Cutting board and chef’s knife: For mincing garlic and zesting lemon.
Prep Time & Cooking Schedule
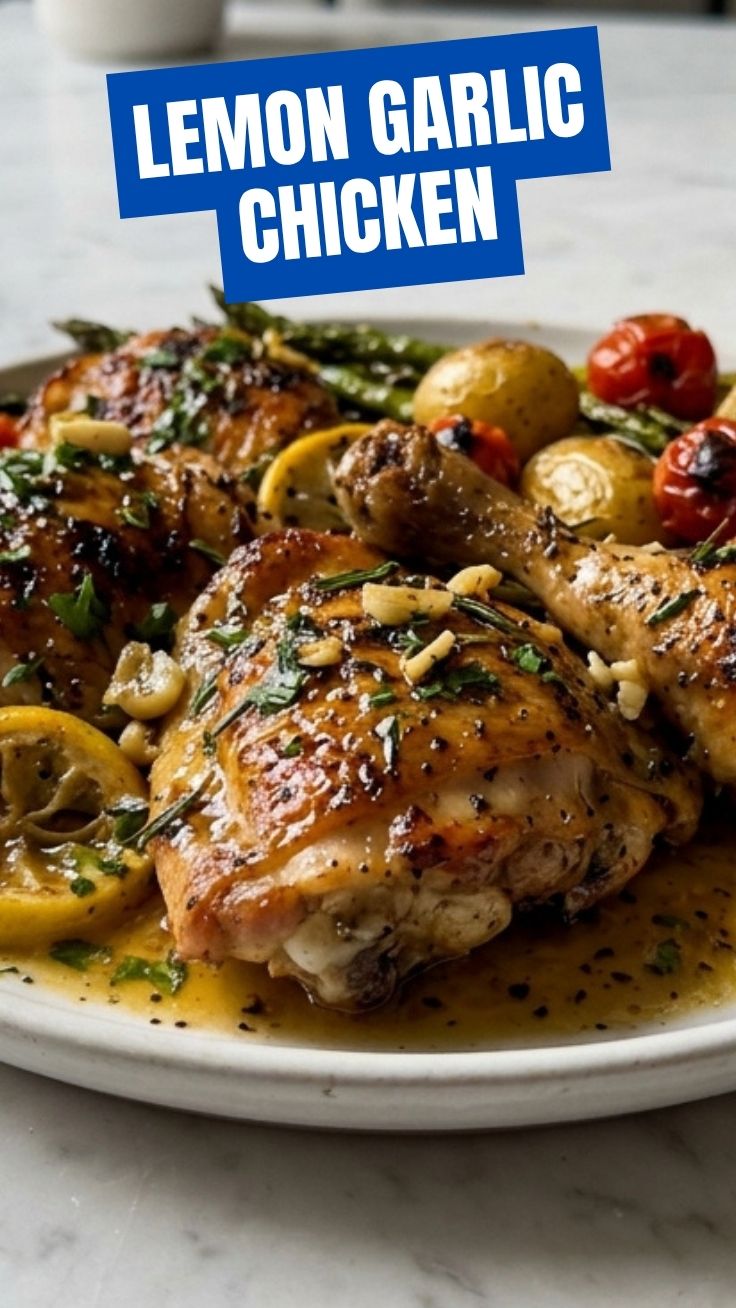
Planning your timeline is the secret to a stress-free cooking experience. Here’s a clear breakdown to help you schedule effectively:
– Active prep time: 15 minutes for mincing garlic, zesting and juicing the lemon, and patting chicken dry.
– Optional marinating time: 30 minutes to 2 hours (if desired). Marinating for 30 minutes at room temperature is sufficient; longer marinating (8+ hours) can make chicken slightly mushy due to lemon acid.
– Total cook time: 20–25 minutes (searing + oven finish). This dish is ideal for a 30-minute dinner from start to table.
– Resting time: 5 minutes after cooking. This step is critical—skipping it causes juices to run out, leaving chicken dry.
Pro tip: Prep all ingredients before turning on the stove. This “mise en place” approach reduces stress and ensures you don’t burn garlic while searching for the lemon juice.
Step-by-Step Instructions
Follow these steps for perfectly seared, tender chicken with a bright, savory sauce. Pay close attention to temperature and timing for the best results.
Step 1: Pat chicken dry with paper towels. This removes excess moisture, which is the enemy of a golden crust. Season both sides generously with salt and pepper. Let sit at room temperature for 10 minutes (this helps cook evenly).
Step 2: Heat 2 tbsp olive oil in your skillet over medium-high heat until shimmering (about 2 minutes). Carefully place chicken in the pan—don’t overcrowd (cook in batches if needed). Sear for 4–5 minutes per side until deep golden brown. Listen for: A steady sizzle; if it’s silent, the pan isn’t hot enough. Texture cue: The chicken should release easily from the pan when properly seared.
Step 3: Reduce heat to medium. Push chicken to one side, add remaining 1 tbsp oil and minced garlic. Cook garlic for 30 seconds until fragrant (don’t let it brown—bitter). Add lemon zest, lemon juice, and chicken broth. Stir to deglaze, scraping up browned bits from the pan bottom.
Step 4: Return chicken to the center of the pan. Sprinkle dried oregano over top. Bring liquid to a gentle simmer, then cover with a lid. Cook for 8–10 minutes, or until an instant-read thermometer registers 160°F (carryover cooking will bring it to 165°F).
Step 5: Remove chicken to a plate and tent with foil. Rest for exactly 5 minutes. Meanwhile, increase heat to medium-high and let sauce simmer uncovered for 1–2 minutes to thicken slightly. Spoon sauce over chicken before serving.
Remember, the magic of this dish lies in balancing acidity and richness. If you’re exploring other variations, many top-rated lemon garlic chicken recipes follow a similar technique, though you might find slight differences in herb ratios or cooking methods. Garnish with fresh parsley and extra lemon slices for visual appeal.
Nutritional Benefits & Advantages
This dish isn’t just delicious—it’s a nutritional powerhouse that fits into balanced eating plans. Here’s why it deserves a regular spot on your menu:
– High protein, low fat: Chicken breast provides about 31g of protein per 4-ounce serving with only 165 calories (skinless). This supports muscle maintenance and satiety.
– Vitamin C boost: Half a lemon’s juice offers 18% of your daily vitamin C, supporting immune function and collagen production for healthy skin.
– Garlic’s bioactive compounds: Allicin in garlic may help lower blood pressure and reduce inflammation when consumed regularly.
– Heart-healthy fats: A moderate amount of olive oil provides monounsaturated fats that support cardiovascular health.
– Low carb versatility: Naturally gluten-free and keto-friendly (under 5g carbs per serving).
Dietary advantages: This recipe is dairy-free, nut-free, and can be made soy-free. It’s a perfect option for those following Paleo, Whole30, or Mediterranean diet guidelines.
Tips Variations & Cooking Advice
Customize this dish to your preferences or dietary needs with these proven adjustments:
Flavor variations:
– Herb explosion: Add 1 tbsp each of fresh rosemary and thyme during the simmer stage.
– Spicy twist: Include 1/2 tsp red pepper flakes or sliced jalapeño with the garlic.
– Creamy version: Stir in 2 tbsp heavy cream or full-fat coconut milk at the end for a luxurious sauce.
Ingredient swaps:
– Chicken thighs: More forgiving (stay juicy even if slightly overcooked). Cook 2–3 minutes longer per side.
– Skin-on breasts: Sear skin-down first for 6 minutes, then flip and continue. Yields crispier exterior.
– Boneless pork chops: Follow same technique; use internal temp of 145°F.
Alternative cooking methods:
– Instant Pot: Sear on sauté mode, then pressure cook for 6 minutes with natural release. Reduces total time to 20 minutes.
– Sheet pan: Toss chicken with all ingredients, bake at 425°F for 20–25 minutes, flipping halfway.
Dietary adaptations:
– Gluten-free: Use tamari instead of soy sauce if adding, and ensure broth is certified gluten-free.
– Low-sodium: Use low-sodium broth and reduce salt in the seasoning.
Common Mistakes to Avoid
Even experienced cooks can stumble with this dish. Here are the most frequent errors and how to avoid them:
1. Skipping the dry pat-down: Wet chicken steams instead of sears. Critical fix: Use paper towels and let the surface air-dry for 5 minutes.
2. Overcrowding the pan: Too many breasts release moisture and lower pan temperature—resulting in gray, rubbery chicken. Cook in batches if needed.
3. Flipping too early: If chicken sticks, it’s not ready. Wait until it naturally releases (usually 4–5 minutes).
4. Burnt garlic: Garlic burns quickly after 30 seconds. Always add it after reducing heat, and never leave it unattended.
5. Skipping the rest: Cutting into chicken immediately causes juice loss—10% of moisture escapes. Invest 5 minutes of patience.
Storage & Meal Prep Tips
Maximize your effort with smart storage strategies that preserve texture and flavor:
– Refrigeration: Store cooled chicken in an airtight container with the sauce for 3–4 days. The acid actually helps preserve freshness.
– Freezing: Place individual chicken pieces in freezer-safe bags (remove as much air as possible). Freeze for up to 3 months. The garlic flavor intensifies slightly during storage.
– Reheating: For best results, reheat in a covered skillet with 2 tbsp broth over medium-low heat for 5–7 minutes. Avoid microwave (makes chicken rubbery). For meal prep: Cook chicken separately and add fresh sauce after reheating to maintain brightness.
– Separate sauce: If prepping for a week, store sauce in a small jar and add to chicken just before serving. This prevents the chicken from absorbing too much acidity and becoming mushy.
Conclusion
Mastering this bright, cozy Lemon Garlic Chicken is about understanding the balance of heat, acidity, and technique—qualities that elevate any home cook. By focusing on proper searing, precise temperature control, and using fresh ingredients, you can consistently deliver a restaurant-quality meal in under 30 minutes. Whether you’re building a rotation of family-friendly dinners or exploring other lemon garlic chicken recipes for variety, this guide gives you the tools to customize and troubleshoot like a pro. Now it’s your turn—grab a skillet, squeeze a lemon, and experience the satisfaction of perfectly cooked chicken. Share your results or ask questions in the comments below!
FAQs
1. Can I use bottled lemon juice instead of fresh?
Yes, but the flavor will be less vibrant and more acidic. Use 1.5 tbsp bottled juice (typically more concentrated) and add a pinch of sugar to balance. Fresh zest is irreplaceable—omit if using bottled.
2. Why is my chicken tough and dry?
Most likely due to overcooking. Use an instant-read thermometer and remove chicken at 160°F. Also, ensure you’re not pressing down on the chicken while searing (this squeezes out juices).
3. Can I make this dairy-free?
Absolutely. The base recipe is dairy-free as written. Avoid adding butter; stick with oil. If using cream variations, substitute full-fat coconut milk for a creamy sauce.
4. How do I prevent the sauce from being too sour?
Add a pinch of sugar or honey (1/2 tsp) to balance acidity. Alternatively, use one less tablespoon of lemon juice and add 1 tablespoon of additional broth.
5. Can I double the recipe?
Yes, but use two pans to avoid overcrowding, or cook in batches. If using one pan, chicken will steam instead of sear. Adjust cooking time by 1–2 minutes if pieces are larger.
Lemon Garlic Chicken
Ingredients
Equipment
Method
- Pat the chicken dry with paper towels, then season it generously with salt and pepper on all sides and set aside.
- Heat the olive oil in a large skillet over medium-high heat, then carefully place the seasoned chicken in the hot pan and sear until golden brown on both sides.
- In the same skillet, add the minced garlic, fresh lemon juice, lemon zest, and dried oregano, stirring well to combine all ingredients.
- Reduce the heat to medium-low, pour in the chicken broth, cover the skillet, and let it simmer for 15-20 minutes, or until the chicken is thoroughly cooked and tender.
- Garnish the finished lemon garlic chicken with freshly chopped parsley and serve immediately for the best flavor.