The Secret to Perfect Homemade Salsas and Dips: Your Ultimate Guide!
Are you tired of bland, store-bought dips that lack zest and freshness? Imagine crafting vibrant, flavorful salsas and dips right in your own kitchen, bursting with garden-fresh ingredients and personalized to your taste. Preparing homemade versions isn’t just about saving money; it’s about unlocking a world of culinary possibilities, ensuring quality control, and adding a touch of homemade love to every meal. This comprehensive guide will empower you to create exceptional salsas and delectable dips, transforming simple ingredients into extraordinary culinary experiences. Throughout this post, we’ll explore the art of crafting the perfect Guacamole, ensuring your dishes always stand out.
Ingredients & Kitchen Tools
Crafting outstanding salsas and dips requires a selection of fresh ingredients and a few fundamental kitchen tools. Here’s what you’ll need:
- Ripe Avocados (3-4 large): Crucial for creamy dips. Look for Hass avocados that yield slightly to gentle pressure.
- Red Onion (1/2, finely diced): Adds a sharp, piquant flavor.
- Tomatoes (2-3 Roma, deseeded and diced): Provides freshness and a subtle sweetness. Deseeding prevents a watery salsa.
- Cilantro (1/2 cup, chopped): Essential for an authentic, fresh taste.
- Jalapeño (1, deseeded and minced): For a kick of heat. Adjust to your spice preference.
- Lime (2, juiced): Brightens flavors and prevents avocado from browning.
- Salt (to taste): Enhances all other flavors.
- Black Pepper (to taste): Adds depth.
- Cumin (1/2 tsp, optional): For an earthy aroma.
- Garlic (1 clove, minced, optional): Enhances savory notes.
Kitchen Tools:
- Large Mixing Bowl: For combining all ingredients.
- Fork or Potato Masher: For mashing avocados.
- Sharp Knife: For precise dicing and mincing.
- Cutting Board: A stable surface for chopping.
- Citrus Juicer: To efficiently extract lime juice.
- Spatula: For mixing and scraping.
Prep Time & Cooking Schedule
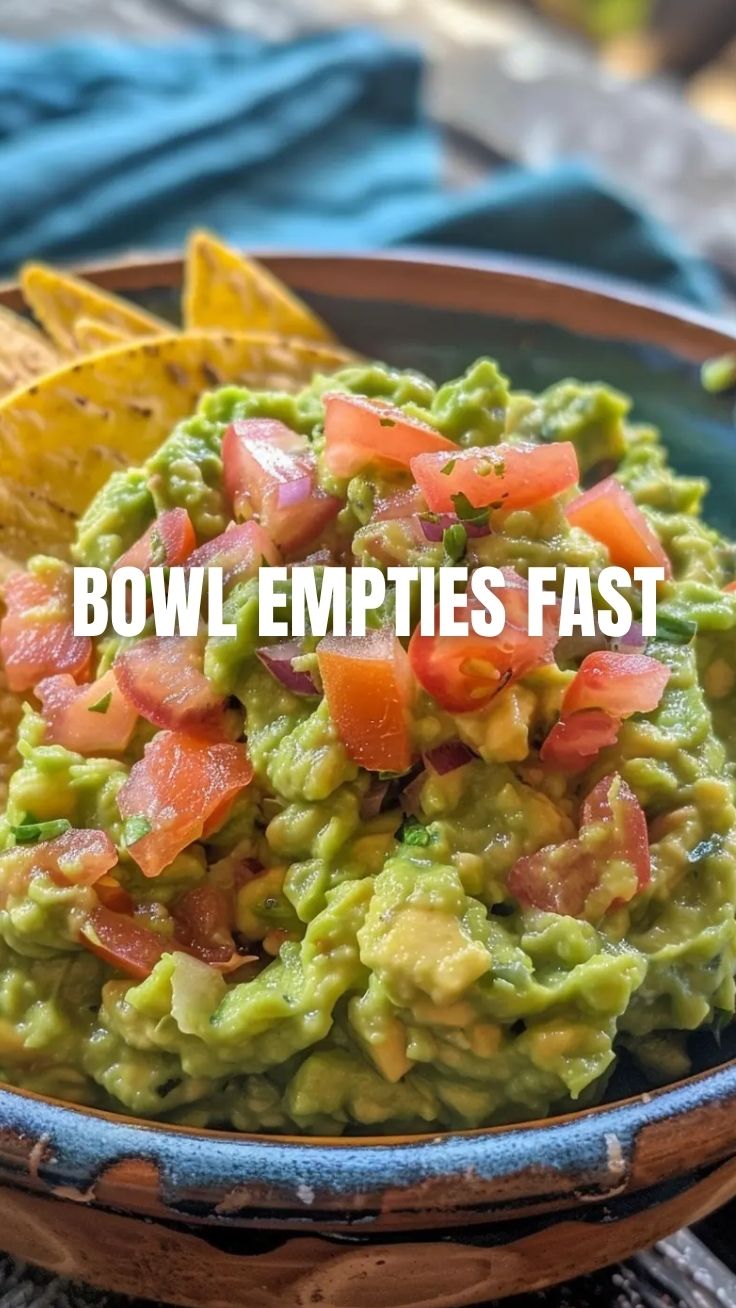
Making fresh salsas and dips is usually a quick affair, perfect for last-minute gatherings or meal prepping.
- Prep Time: 15-20 minutes (depending on your chopping speed). This includes dicing vegetables and mashing avocados.
- Cook Time: 0 minutes (no cooking required!).
- Resting Time: 10-15 minutes (optional, but recommended). Allowing the dip to rest lets the flavors meld beautifully. You can prepare this just before guests arrive or an hour before serving to let the flavors deepen.
Step-by-Step Instructions
Follow these simple steps to create a perfect Guacamole and a delightful Avocado dip every time:
1. Prepare the Avocados: Cut the avocados in half, remove the pits, and scoop the flesh into a large mixing bowl. Using a fork or potato masher, gently mash the avocados to your desired consistency. Some prefer it chunky, others smooth.
2. Add Aromatics: Add the finely diced red onion, deseeded and diced tomatoes, minced jalapeño, and chopped cilantro to the bowl with the mashed avocado.
3. Season Generously: Squeeze in the fresh lime juice. Add salt, black pepper, and optional cumin and minced garlic. Start with a smaller amount and adjust to taste.
4. Combine and Mix: Gently fold all the ingredients together until well combined. Be careful not to overmix, as this can make the dip watery.
5. Taste and Adjust: Taste a small spoon of your creation. Adjust salt, lime juice, or spice levels as needed. This step is crucial for perfect flavor balance.
6. Serve or Chill: Serve immediately with tortilla chips, vegetable sticks, or as a topping. If not serving immediately, cover tightly with plastic wrap directly on the surface of the dip to prevent browning, and refrigerate for up to an hour for flavors to meld.
Nutritional Benefits & Advantages
Homemade salsas and dips, especially those based on avocado, offer a wealth of nutritional benefits. Avocados are rich in monounsaturated fats, known for their heart-healthy properties and ability to help lower bad cholesterol levels. They are excellent sources of dietary fiber, vitamins K, C, B6, E, folate, and potassium. The fresh vegetables like tomatoes, onions, and cilantro contribute antioxidants, vitamin C, and other essential nutrients, boosting immunity and overall well-being. Opting for homemade versions also means you control the amount of sodium and unhealthy additives found in many store-bought options.
Tips Variations & Cooking Advice
- Spice Level: For more heat, leave some seeds in the jalapeño or add a pinch of cayenne pepper. For less heat, omit the jalapeño entirely.
- Flavor Boosts: Experiment with additions like roasted corn, black beans, diced mango, or pineapple for a tropical twist in your Avocado dip.
- Texture: If you prefer a smoother consistency, use an immersion blender for a few pulses. For a chunkier texture, mash less.
- Gluten-Free/Dairy-Free: Most salsas and avocado dips are naturally gluten-free and dairy-free, making them excellent choices for various dietary needs.
- Serving Suggestions: Beyond chips, serve your dip with grilled fish, chicken, tacos, quesadillas, or as a healthy spread on sandwiches and wraps.
Common Mistakes to Avoid
- Over-mashing Avocados: Leads to a slimy, unappetizing texture. Aim for some chunks.
- Not Enough Lime Juice: Crucial for both flavor brightness and preventing oxidation (browning).
- Forgetting to Taste: Always taste and adjust seasonings. What’s perfect for one might be bland for another.
- Adding Watery Ingredients: Deseed tomatoes and drain any excess liquid to prevent a watery dip.
- Exposure to Air: Leaving the dip uncovered will quickly result in the avocado turning brown. Press plastic wrap directly onto the surface.
Storage & Meal Prep Tips
Homemade dips are best enjoyed fresh, but they can be stored.
- Refrigeration: Store leftover Guacamole in an airtight container in the refrigerator for up to 2-3 days. To minimize browning, place a layer of plastic wrap directly on the surface of the dip, ensuring no air pockets. You can also add a thin layer of lime juice or water on top before sealing.
- Freezing: Freezing avocado dips is generally not recommended as it changes the texture and can make it watery upon thawing.
- Reheating: No reheating needed! Serve chilled or at room temperature. Stir well before serving after refrigeration.
Conclusion
Mastering the art of crafting fresh, flavorful salsas and dips is an invaluable culinary skill that elevates any meal. From the creamy richness of Guacamole to the refreshing zest of an Avocado dip, homemade versions offer unparalleled taste and nutritional benefits. We encourage you to try this recipe, experiment with variations, and discover the joy of creating these delightful accompaniments in your own kitchen. Share your culinary creations and favorite twists in the comments below, or explore our other recipes for more inspiration!
FAQs
Q1: How do I prevent my guacamole from turning brown?
A1: The key is lime juice and minimizing air exposure. Press plastic wrap directly onto the surface of the dip, ensuring no air pockets, or add a thin layer of lime juice/water on top before sealing tightly.
Q2: Can I make this a day in advance?
A2: While best fresh, you can prepare the base components (diced onions, tomatoes, cilantro) a day ahead. Mash the avocados and combine all ingredients just before serving for the freshest taste and best color.
Q3: What can I use instead of jalapeño for heat?
A3: If you don’t have jalapeños, you can use a pinch of cayenne pepper, a dash of hot sauce, or even a finely minced serrano pepper for more intense heat.
Q4: My dip is too watery. What went wrong?
A4: This often happens if tomatoes are not deseeded or drained properly. Ensure you remove the watery pulp from tomatoes and don’t over-mash the avocados, which can release excess liquid.
Q5: What are good serving suggestions beyond chips?
A5: Try it with crunchy vegetable sticks (carrots, celery, bell peppers), as a topping for tacos, burgers, or grilled chicken, or as a healthy spread on sandwiches and wraps.
Proven way to grow guacamole in 8 weeks
Ingredients
Equipment
Method
- Carefully wash the avocado pit to remove any avocado residue, then insert three to four toothpicks evenly around the middle of the pit, pointing slightly downwards.
- Suspend the pit over a glass of water, ensuring the broader end of the pit is submerged in about an inch of water.
- Place the glass in a warm spot out of direct sunlight and change the water every few days to prevent mold growth.
- Observe the pit over the next 2-8 weeks as it develops a taproot from the bottom and a sprout from the top; replenish water as needed.
- Once the stem is about 6-7 inches tall, prune it back to about 3 inches to encourage bushier growth.
- Fill a 8-10 inch diameter pot with drainage holes with rich potting soil, leaving about an inch from the rim.
- Carefully place the avocado pit in the center of the pot, ensuring the top half of the pit remains exposed above the soil line.
- Water the newly planted avocado thoroughly until water drains from the bottom of the pot, then place it in a sunny location.
- Water your avocado plant regularly, keeping the soil consistently moist but never waterlogged.
- Fertilize sparingly every three months with a balanced houseplant fertilizer, following the product instructions.
- Monitor for pests and diseases, addressing any issues promptly with appropriate organic solutions.