Master the Art of Homemade Enchiladas: A Flavorful Journey Awaits!
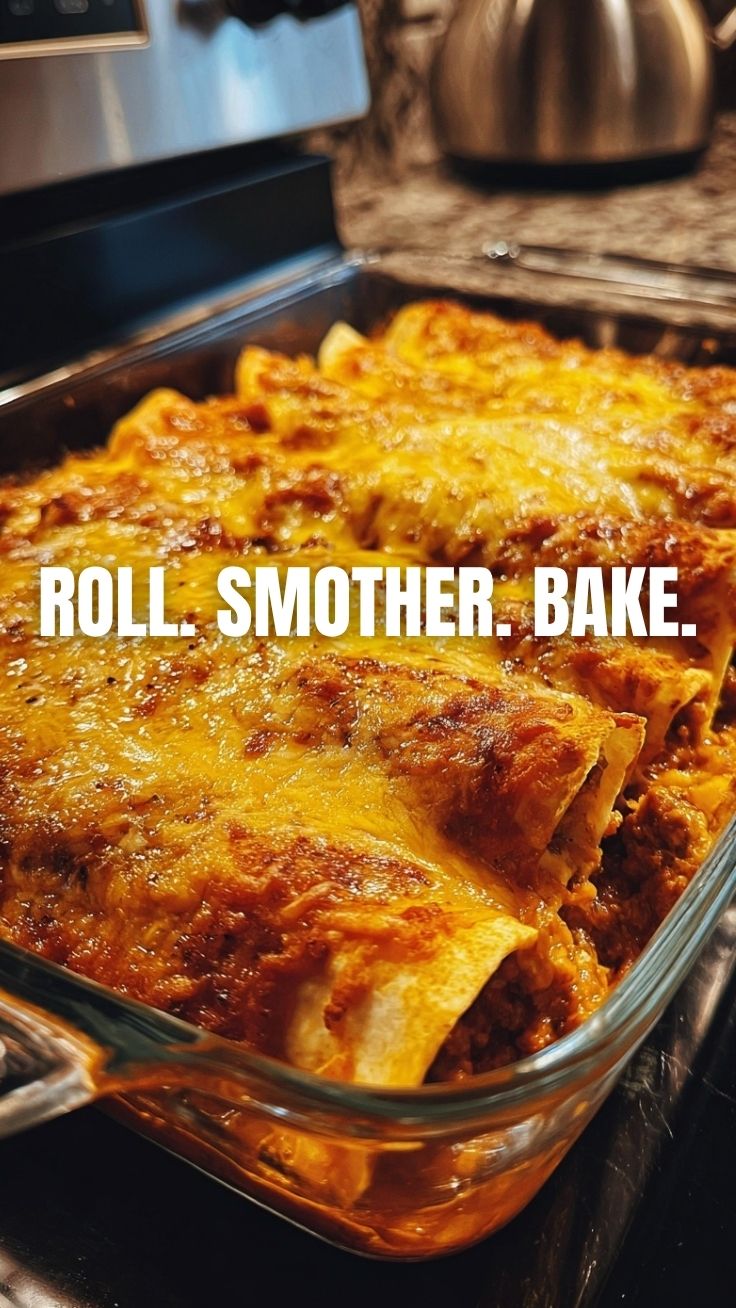
Tired of lackluster, store-bought meals that lack that authentic touch? Imagine sinking your teeth into a dish that’s rich in flavor, incredibly satisfying, and made with love right in your own kitchen. Today, we’re diving deep into the world of homemade Enchiladas (Chicken or Beef). This classic Mexican-inspired dish is not just a meal; it’s an experience, transforming simple ingredients into a culinary masterpiece. Preparing this comfort food at home allows for complete control over the quality of your ingredients, the spice level, and the overall profile, ensuring a personalized dish that tantalizes your taste buds. Mastering delicious enchilada recipes is a fulfilling endeavor, and we’re here to guide you every step of the way.
Ingredients & Kitchen Tools
- 1 ½ lbs Chicken Breast or Ground Beef: The star protein. Use breasts for shredded chicken or ground beef for a heartier filling.
- 1 tbsp Olive Oil: For sautéing aromatics and browning meat.
- 1 medium Onion, finely chopped: Adds a foundational savory note.
- 2 cloves Garlic, minced: Essential aromatic for depth of flavor.
- 1 (10 oz) can Enchilada Sauce: Mild, medium, or hot – choose your preferred spice level. Red or green!
- ½ cup Chicken or Beef Broth: To thin the sauce slightly and add moisture to the filling.
- 12-14 Corn or Flour Tortillas (6-inch): Corn for traditionalists, flour for a softer bite.
- 2 cups Shredded Cheese (Cheddar, Monterey Jack, or Mexican Blend): For melty, gooey goodness.
- Optional Toppings: Sour cream, fresh cilantro, diced avocado, jalapeños, lime wedges.
- 9×13 inch Baking Dish: The perfect size for baking a batch of enchiladas.
- Large Skillet: For cooking the filling.
- Measuring Cups & Spoons: For accurate ingredient portions.
- Mixing Bowls: For combining ingredients.
Prep Time & Cooking Schedule
- Prep Time: 25 minutes (includes chopping, cooking protein, and assembling)
- Cook Time: 20-25 minutes
- Resting Time: 5-10 minutes (after baking, allows cheese to set and flavors to meld)
This recipe is designed for efficiency. You can prepare your protein (chicken or beef) ahead of time to significantly reduce your active cooking time on the day you plan to serve. This makes it an excellent option for meal prepping or a busy weeknight.
Step-by-Step Instructions
1. Prepare the Protein: If using chicken breast, poach or boil until cooked through, then shred finely. For ground beef, brown in a large skillet over medium-high heat, breaking it up with a spoon, until no longer pink. Drain any excess fat.
2. Sauté Aromatics: In the same skillet (if using beef) or a clean one with olive oil, sauté chopped onion until softened, about 5 minutes. Add minced garlic and cook for another minute until fragrant.
3. Combine Filling: Add the cooked chicken or beef back to the skillet with the onions and garlic. Stir in ½ cup of the enchilada sauce and ¼ cup of chicken/beef broth. Season with salt, pepper, and any desired spices like cumin or chili powder. Simmer for 5 minutes to let flavors meld. Remove from heat and stir in ½ cup of shredded cheese.
4. Preheat & Prepare Dish: Preheat your oven to 375°F (190°C). Pour a thin layer of enchilada sauce (about ¼ cup) into the bottom of your 9×13 inch baking dish.
5. Assemble Enchiladas (Chicken or Beef): Lightly warm your tortillas (microwave for 15-20 seconds or dip quickly in warm enchilada sauce) to make them pliable. This prevents tearing. Spoon a generous amount of the filling onto the center of each tortilla, roll it up tightly, and place seam-side down in the prepared baking dish. Repeat with remaining tortillas and filling.
6. Sauce & Cheese: Pour the remaining enchilada sauce evenly over the rolled tortillas. Sprinkle the remaining shredded cheese over the top, ensuring full coverage.
7. Bake: Bake for 20-25 minutes, or until the cheese is melted and bubbly and the sauce is simmering. For an extra golden-brown top, you can broil for the last 1-2 minutes, watching carefully to prevent burning.
8. Rest & Serve: Let the pan rest for 5-10 minutes before serving. This allows the delicious enchilada recipes to firm up slightly, making them easier to serve. Garnish with your favorite toppings.
Nutritional Benefits & Advantages
Homemade enchiladas offer a versatile way to incorporate lean protein and fiber into your diet. By choosing chicken breast, you get a low-fat protein source. Incorporating plenty of vegetables into your filling, such as bell peppers or corn, can boost vitamin and mineral intake. Furthermore, whole wheat tortillas can be used for added fiber. Making your own sauce allows you to control sodium content, a common concern with pre-made sauces.
Tips Variations & Cooking Advice
- Vegetarian Option: Swap meat for black beans, roasted sweet potatoes, and corn for a hearty vegetarian version.
- Spice It Up: Add diced jalapeños or a pinch of cayenne pepper to the filling or sauce for extra heat.
- Green Enchiladas: Use a green chile enchilada sauce and poblano peppers in your filling for a different flavor profile.
- Creamy Enchiladas: Stir a spoonful of cream cheese or sour cream into your filling for added richness.
- Crispy Edges: For slightly crispy tortilla edges, lightly pan-fry tortillas in a small amount of oil before filling and rolling.
Common Mistakes to Avoid
- Overfilling Tortillas: This can lead to bursting during rolling or baking. A moderate amount is key.
- Dry Tortillas: Not warming the tortillas makes them prone to cracking and breaking.
- Too Much Sauce: While delicious, excessive sauce can make the enchiladas watery. Aim for just enough to cover and keep them moist.
- Underseasoning: Don’t be afraid to taste and adjust the seasoning of your filling before rolling.
Storage & Meal Prep Tips
Leftover enchiladas can be stored in an airtight container in the refrigerator for up to 3-4 days. For longer storage, freeze individual portions for up to 2-3 months. Reheat in the microwave or oven until warmed through. If reheating from frozen, it’s best to thaw overnight in the refrigerator first for even heating.
Conclusion
Crafting homemade Enchiladas (Chicken or Beef) is a satisfying culinary journey that rewards you with a dish far superior to any takeout. The ability to customize every element, from the protein and spice level to the cheese blend, makes these enchilada recipes truly your own. We encourage you to try this recipe, experiment with the variations, and delight in the rich, authentic flavors. Share your kitchen creations with us in the comments below!
FAQs
Q1: Can I make enchiladas ahead of time?
A1: Yes, you can assemble the enchiladas and store them covered in the refrigerator for up to 24 hours before baking. Add a little extra sauce right before baking if they look dry.
Q2: What’s the best way to prevent corn tortillas from breaking?
A2: Lightly warm them! A quick pass in a hot skillet, a few seconds in the microwave, or a brief dip in warm enchilada sauce makes them pliable and easy to roll.
Q3: Can I use store-bought rotisserie chicken?
A3: Absolutely! Shredded rotisserie chicken is a fantastic time-saver and works perfectly as a filling.
Q4: How do I make these gluten-free?
A4: Ensure your enchilada sauce is gluten-free (most are, but check labels) and use certified gluten-free corn tortillas.
Q5: What are some good side dishes for enchiladas?
A5: Mexican rice, refried beans, a simple green salad, extra salsa, or guacamole are all excellent accompaniments.
Best way to grow your perfect 7 Enchiladas (Chicken or Beef)
Ingredients
Equipment
Method
- Preheat your oven to 375°F (190°C) and lightly grease a 9x13 inch baking dish.
- In a large bowl, combine the shredded chicken or beef, 1.5 cups of shredded cheddar cheese, and chopped onion; mix thoroughly.
- Warm the corn tortillas according to package directions to make them pliable.
- Dip each warmed tortilla briefly into the enchilada sauce to coat.
- Place about 1/4 cup of the filling mixture down the center of each tortilla, then roll it up tightly.
- Arrange the rolled enchiladas seam-side down in the prepared baking dish.
- Pour the remaining enchilada sauce evenly over the rolled enchiladas.
- Sprinkle the remaining 1 cup of Monterey Jack cheese over the top.
- Bake for 20-25 minutes, or until the cheese is melted and bubbly and the enchiladas are heated through.
- Let the enchiladas rest for 5 minutes before serving.
- Serve hot with your preferred toppings such as sour cream, salsa, sliced avocado, and fresh cilantro.