Why This Crispy Coconut Shrimp Will Become Your New Favorite Appetizer
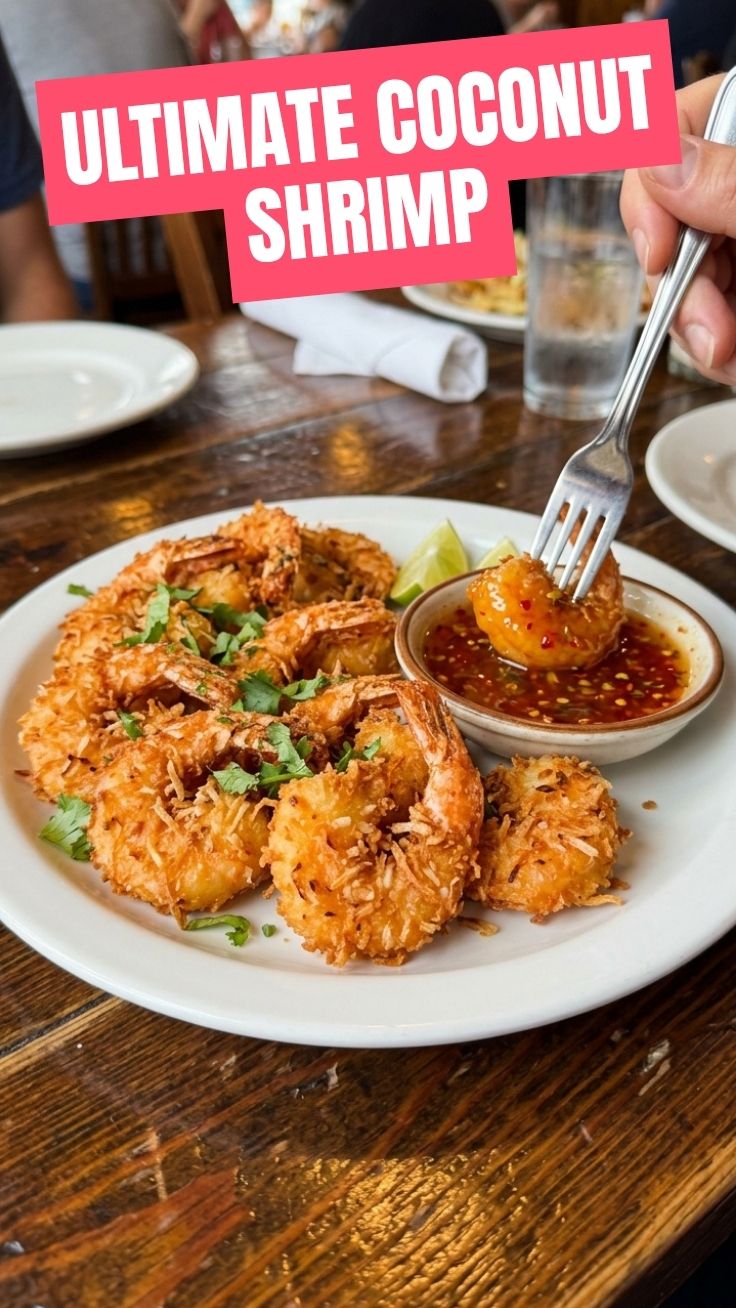
Have you ever craved that perfect balance of sweet, savory, and crunchy in a single bite? Imagine golden-brown shrimp coated in toasted coconut, served with a tangy dipping sauce that makes your taste buds dance. If you’ve only ordered this dish at restaurants, you’re missing out on something extraordinary—the ability to customize, control quality, and save money. Preparing Coconut Shrimp at home unlocks restaurant-quality results with simple techniques. The best part? You can achieve that signature crunch without deep-frying. Whether you’re hosting a party or craving a quick weeknight treat, mastering this coconut shrimp recipe transforms simple ingredients into something magical. Today, I’ll walk you through every detail—from selecting the right shrimp to achieving that perfect golden crust.
—
Ingredients & Kitchen Tools
For the Shrimp
– 1 lb large shrimp (21-25 count) – Peeled and deveined, tails on for presentation
– 1 cup unsweetened shredded coconut – Avoid sweetened varieties; they burn faster
– ½ cup panko breadcrumbs – Creates extra-crispy texture; substitute with almond flour for keto
– 2 large eggs – Acts as binding agent; use flax eggs for vegan version
– ½ cup all-purpose flour – Helps coating adhere; swap with rice flour for gluten-free
– 1 tsp garlic powder – Adds savory depth
– ½ tsp paprika – For color and mild heat
– ½ tsp salt – Enhances all flavors
– ¼ tsp black pepper – Balances sweetness
For Dipping Sauce
– ½ cup sweet chili sauce – Classic pairing
– 2 tbsp honey – Optional for extra sweetness
– 1 tbsp lime juice – Adds brightness
Essential Tools
– 3 shallow bowls – For breading station (flour, egg, coconut mixture)
– Wire rack over baking sheet – Promotes even air circulation for crispiness
– Tongs – Gentle handling prevents coating loss
– Deep-fry thermometer – Critical if pan-frying (oil at 350°F)
– Paper towels – Draining excess oil
—
Prep Time & Cooking Schedule
– Prep Time: 20 minutes (includes peeling, sauce making, breading station setup)
– Cook Time: 8-12 minutes (depending on method)
– Resting Time: 5 minutes on wire rack after cooking
– Total Active Time: Approximately 35 minutes
Plan ahead: Shrimp can be breaded up to 2 hours in advance and refrigerated. This allows flavors to meld and coating to set—crucial for non-fry methods.
When to cook: Ideal for appetizers 15 minutes before guests arrive, or as a main course with rice and vegetables.
—
Step-by-Step Instructions
1. Prepare shrimp: Pat shrimp completely dry with paper towels. Season lightly with salt and pepper. Moisture is the enemy of crispiness.
2. Set up breading station: In bowl 1, mix flour, garlic powder, paprika, salt, and pepper. Bowl 2: beat eggs with 1 tbsp water. Bowl 3: combine shredded coconut and panko.
3. Coat shrimp: Working one at a time, dredge shrimp in flour (shake off excess), dip in egg, then press firmly into coconut mixture. Ensure even coverage.
4. Chill coated shrimp: Place on a parchment-lined tray and refrigerate for 15 minutes. This step is non-negotiable for pan-frying—prevents coating from falling off.
5. Cook the shrimp:
– Air Fryer Method (recommended): Preheat to 375°F. Spray shrimp with oil. Cook 6-8 minutes, flipping halfway until golden and internal temperature reaches 145°F.
– Pan-Fry Method: Heat ½ inch oil to 350°F. Cook 2-3 minutes per side until golden. Drain on wire rack—not paper towels.
– Oven-Baked: 425°F for 10-12 minutes, flipping once.
6. Make dipping sauce: Whisk sweet chili sauce, honey, and lime juice. Adjust sweetness or acidity to taste.
Remember, achieving perfect Coconut Shrimp requires patience. Overcooking turns shrimp rubbery. When you follow this coconut shrimp recipe, the internal temperature tells the truth—145°F means done. The coating should be deep golden, not pale.
—
Nutritional Benefits & Advantages
Coconut shrimp offers surprising nutritional perks beyond indulgence. Protein-rich: A 4-ounce serving provides ~20g of protein, supporting muscle repair. Healthy fats: Coconut contains medium-chain triglycerides (MCTs), which may boost metabolism. Selenium boost: Shrimp is an excellent source of selenium, an antioxidant that supports thyroid function.
When air-fried instead of deep-fried, this dish reduces calories by approximately 40% while maintaining 85% of the crunch. Shrimp is also low in mercury compared to larger fish, making it safe for frequent consumption. Pairing with a vinegar-based dipping sauce adds probiotics without excess sugar.
If managing sodium, use unsalted seasonings and limit sauce. Shrimp naturally contains some sodium, but most commercial marinades add significantly more.
—
Tips Variations & Cooking Advice
– Spicy version: Add ½ tsp cayenne to coconut mixture
– Gluten-free: Substitute flour with almond flour, panko with crushed pork rinds
– Dairy-free: Already dairy-free; ensure sauce ingredients are certified
– Coconut variation: Toast coconut flakes first for deeper nuttiness
– Sauce alternatives: Mango habanero, sriracha mayo, or Thai peanut sauce
– Serving size: For appetizers, plan 3-4 shrimp per person; for main course, 6-8
– Substitution: Use chicken tenders instead of shrimp for a surf-and-turf twist
Pro tip: For extra-crispy results, double-coat: flour→egg→flour→egg→coconut. This creates a thicker barrier, ideal for those who prefer extra crunch.
—
Common Mistakes to Avoid
| Mistake | Why It Matters | Solution |
|———|—————-|———-|
| Using wet shrimp | Coating slides off during cooking | Pat shrimp bone-dry with paper towels |
| Skipping the chill step | Panko-coconut mixture falls off in oil | Refrigerate 15 minutes after breading |
| Overcrowding the pan | Temperature drops, shrimp steam instead of fry | Cook in batches, leaving 1-inch space |
| Using sweetened coconut | Burns at high heat; adds unwanted sweetness | Always use unsweetened shredded coconut |
| Cooking to rubbery texture | Shrimp overcooks in seconds | Use thermometer; remove at 145°F |
—
Storage & Meal Prep Tips
Refrigeration: Store cooked shrimp in an airtight container for up to 3 days. Separate layers with paper towels to absorb moisture.
Freezing: Breaded uncooked shrimp freeze beautifully. Place on a tray in a single layer until solid (1 hour), then transfer to freezer bags. Cook directly from frozen, adding 2-3 minutes to cooking time. This method preserves coating integrity better than freezing cooked shrimp.
Reheating: Never microwave—it turns coating soggy. Instead:
– Air fryer: 350°F for 3-4 minutes
– Oven: 375°F for 5-6 minutes on wire rack
– Toaster oven: Similar to air fryer method
Meal prep hack: Double the breading mixture and portion into bags. On busy nights, simply thaw shrimp, coat, and cook.
—
Conclusion
Mastering this recipe transforms a restaurant favorite into a reliable home-cooked triumph. The key takeaways: dry ingredients thoroughly, chill before cooking, and monitor internal temperature. Whether you choose air frying, pan-frying, or baking, the principles remain the same—crispy exterior, tender interior, and balanced sweetness. This Coconut Shrimp delivers consistent results that impress guests without stress. I encourage you to try this coconut shrimp recipe this week—experiment with different sauces, adjust the spice level, and share your results in the comments. For more seafood inspiration, explore our guide to grilled lemon herb salmon or quick garlic butter scallops.
—
FAQs
1. Can I use frozen shrimp?
Yes, but thaw completely in the refrigerator (not microwave). Pat extremely dry. Frozen shrimp often contain more water, so adjust cooking time slightly longer.
2. Why did my coconut burn before the shrimp cooked?
Two causes: oil too hot (keep at 350°F) or using sweetened coconut. Unsweetened coconut toasts at higher temperatures without charring.
3. Can I make this dairy-free?
Absolutely. The recipe is naturally dairy-free. Use almond flour for breading if needed. Confirm your sweet chili sauce is vegan (some contain honey).
4. How do I adjust for a keto diet?
Replace flour with almond flour, omit panko, and use coconut flour (½ cup). Increase coconut flakes to compensate. Net carbs drop to ~3g per serving.
5. My coating fell off—what went wrong?
Likely skipped the chilling step. Also ensure you’re not moving shrimp during the first 60 seconds of cooking. Let the coating set before flipping.
Proven way to grow 5 Coconut Shrimp
Ingredients
Equipment
Method
- Prepare your "growth" medium by setting up three shallow dishes: one with flour, salt, and pepper, one with beaten eggs, and one with a mixture of shredded coconut and panko breadcrumbs.
- For each shrimp, first dredge it in the seasoned flour, ensuring it's fully coated.
- Next, dip the floured shrimp into the beaten egg, allowing any excess to drip off.
- Finally, roll the egg-dipped shrimp in the coconut-panko mixture, pressing gently to make sure the coating adheres well.
- Heat the vegetable oil in a large deep skillet or Dutch oven over medium-high heat until it reaches 350°F (175°C), ensuring it's hot enough for proper frying.
- Carefully place the coated shrimp into the hot oil, making sure not to overcrowd the pan and frying them in batches if necessary.
- Fry each side for about 2-3 minutes, or until the shrimp turn golden brown and are cooked through.
- Remove the perfectly "grown" coconut shrimp from the oil using a slotted spoon or tongs.
- Transfer them to a wire rack lined with paper towels to drain any excess oil, ensuring they remain crispy.
- Serve immediately with your favorite dipping sauce and enjoy your freshly "grown" coconut shrimp.