The Ultimate Juneteenth Red Velvet Cake: A Soulful Celebration of Flavor
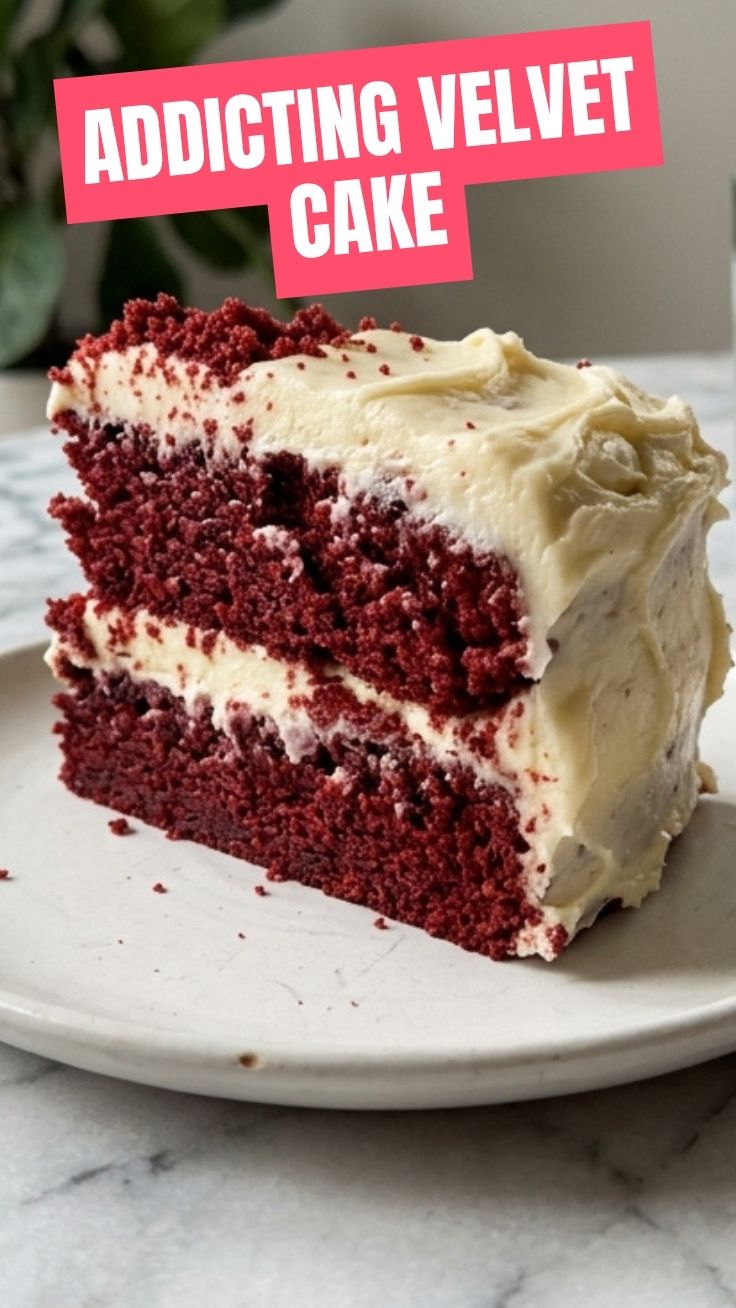
Have you ever tasted a cake that feels like history, love, and pure indulgence all at once? That’s exactly what happens when you bake a truly authentic Red Velvet Cake for Juneteenth. This isn’t just any dessert—it’s a symbol of resilience, freedom, and the rich culinary traditions of the African American community. Making it at home allows you to control every ingredient, honor the cultural significance, and enjoy a moist, velvety crumb paired with the tangy richness of cream cheese frosting. Whether you’re celebrating emancipation day or simply craving a show-stopping centerpiece, this recipe delivers. Within the first 100 words, you’ve already met the star of this post: a classic Red Velvet Cake with its signature scarlet hue and buttermilk tenderness.
Ingredients & Kitchen Tools
For the Cake
– 2½ cups all-purpose flour – Provides structure; sift for a lighter crumb.
– 1½ cups granulated sugar – Sweetens and helps with browning.
– 1 tbsp unsweetened cocoa powder – Gives the subtle chocolate note; use Dutch-process for deeper color.
– 1 tsp baking soda – Reacts with buttermilk for lift.
– 1 tsp salt – Balances sweetness.
– 2 large eggs – Room temperature for better emulsion.
– 1½ cups vegetable oil – Keeps the cake moist; can substitute with canola or melted coconut oil.
– 1 cup buttermilk – Acidic tenderizer; add 1 tbsp lemon juice to milk as a swap.
– 2 tsp vanilla extract – Pure extract preferred.
– 1 tsp white vinegar – Enhances the red color and activates baking soda.
– 2 tbsp red food coloring – Traditional liquid gel works best; beet powder for natural alternative.
For the Frosting
– 16 oz cream cheese – Full-fat, softened; low-fat may cause graininess.
– 1 cup unsalted butter – Softened but still cool.
– 4 cups powdered sugar – Sifted to avoid lumps.
– 2 tsp vanilla extract – Adds depth.
– Pinch of salt – Cuts sweetness.
Kitchen Tools
– Three 9-inch round cake pans (or two 10-inch)
– Electric mixer (stand or hand)
– Rubber spatula
– Cooling rack
– Offset spatula for frosting
– Parchment paper rounds
Prep Time & Cooking Schedule
– Prep Time: 25 minutes (including ingredient measuring and pan prep)
– Bake Time: 25–30 minutes at 350°F
– Cooling Time: 1 hour (layers must be completely cool before frosting)
– Total Time: ~2 hours (plus optional overnight resting for deeper flavor)
Tip: Bake the layers a day ahead, wrap them tightly in plastic wrap, and refrigerate. This locks in moisture and makes frosting easier. The cream cheese frosting should be made fresh the day of assembly, but can be refrigerated up to 2 days—just re-whip before using.
Step-by-Step Instructions
1. Preheat oven to 350°F. Grease three 9-inch pans and line bottoms with parchment. Sift flour, cocoa, baking soda, and salt into a medium bowl.
2. Mix wet ingredients. In a large bowl, beat eggs, oil, buttermilk, vanilla, vinegar, and food coloring until smooth. Gradually add dry ingredients, mixing on low until just combined. Do not overmix—gluten development will toughen the cake.
3. Divide batter evenly among pans (about 1½ cups each). Bake for 25–30 minutes, until a toothpick inserted in center comes out with a few moist crumbs. Temperature control: Rotate pans halfway through for even browning. Let cool in pans for 10 minutes, then transfer to a rack to cool completely.
4. Make the frosting. Beat cream cheese and butter until creamy (about 2 minutes). Add sifted powdered sugar one cup at a time, then vanilla and salt. Beat on medium-high for 2 minutes until light and fluffy. Texture cue: If too soft, chill for 15 minutes.
5. Assemble the cake. Place one layer on a serving plate, spread about ¾ cup frosting evenly. Repeat with second and third layers. Crumb-coat the entire cake (thin layer), chill 30 minutes, then apply final thick coat. The classic Red Velvet Cake with its bold color and velvety crumb pairs perfectly with the tangy cream cheese frosting—a combination that has defined Southern baking for generations.
Nutritional Benefits & Advantages
While this is an indulgence, it offers some redeeming qualities. Cocoa powder is rich in antioxidants (flavonols) that support heart health. Buttermilk provides calcium and probiotics. Cream cheese adds protein and calcium. A standard slice (1/12 of cake) contains roughly 450–500 calories, 25g fat, and 35g sugar. For a lighter version, reduce sugar to 1¼ cups and use low-fat cream cheese—though texture may slightly differ. The cake’s high moisture content means it satisfies with smaller portions.
Tips, Variations & Cooking Advice
– Dietary Adaptations: For gluten-free, substitute 1:1 gluten-free flour blend with xanthan gum. For dairy-free, use vegan butter, dairy-free cream cheese (e.g., Kite Hill), and oat milk mixed with lemon juice for buttermilk.
– Flavor Twists: Add 1 tsp espresso powder to the cocoa for a mocha note. Fold in ½ cup chopped pecans or ½ cup mini chocolate chips into the batter.
– Alternative Cooking Methods: Bake as cupcakes (18–20 minutes) or a single 9×13 sheet cake (35–40 minutes). Reduce frosting by one-third for sheet cake.
– Portion Changes: Double the recipe for a tiered celebration cake—just increase baking time by 5 minutes per layer.
Common Mistakes to Avoid
– Overmixing batter: Leads to dense, tough cake. Mix until flour just disappears.
– Skipping the vinegar: It’s essential for activating baking soda and preserving red color.
– Hot layers + cold frosting: Always cool layers completely. Warm cake melts cream cheese frosting into a runny mess.
– Using cold cream cheese: Must be softened to avoid lumps. Leave out for 30–60 minutes.
– Overbaking: Dry cake. Test at 25 minutes and check every 2 minutes after.
Storage & Meal Prep Tips
– Refrigeration: Store frosted cake in an airtight container in the fridge for up to 5 days. The cream cheese frosting requires refrigeration.
– Freezing: Wrap unfrosted layers tightly in plastic wrap and foil—freeze up to 3 months. Thaw in fridge overnight. Frosted cake can also be frozen (first freeze uncovered 1 hour, then wrap) for up to 1 month.
– Reheating: For a warm slice, microwave for 10–15 seconds (without frosting) or let sit at room temperature for 20 minutes before serving to soften cream cheese.
Conclusion
This Red Velvet Cake isn’t just dessert—it’s a story on a plate. From the rich, cocoa-kissed layers to the luscious cream cheese frosting, every bite celebrates heritage and homemade love. Whether you’re honoring Juneteenth, hosting a birthday, or simply rewarding yourself, this recipe delivers foolproof results. I encourage you to try it, share your cake photos, and explore more soulful recipes on our blog. Remember: the secret is in the buttermilk, the patience during cooling, and the pride in presenting a slice of history.
FAQs
1. Can I use natural food coloring instead of red dye?
Yes! Beet powder (2–3 tbsp) or pomegranate juice concentrate (¼ cup, reduce buttermilk accordingly) gives a natural reddish hue. The color will be more earthy than bright scarlet.
2. Why did my cream cheese frosting turn out runny?
Likely causes: cream cheese too warm, overbeating introduced too much air, or humidity. Fix: chill frosting 20–30 minutes, then re-whip briefly. If still runny, add extra sifted powdered sugar 2 tbsp at a time.
3. Can I make this cake without buttermilk?
Absolutely. Mix 1 cup whole milk with 1 tbsp lemon juice or white vinegar. Let stand 5 minutes—it will curdle and act just like buttermilk.
4. How do I get a perfectly level cake?
Use a serrated knife or cake leveler after baking. For even layers, weigh the batter in each pan (about 500g per 9-inch pan).
5. Is it necessary to refrigerate cake with cream cheese frosting?
Yes. Because of the dairy content, it must be refrigerated. Serve at room temperature for best flavor—remove from fridge 30–45 minutes before slicing.
Quick way to grow your Red Velvet Cake
Ingredients
Equipment
Method
- Preheat your oven to 350°F (175°C) and prepare two 9-inch round baking pans by greasing and flouring them.
- In a large bowl, whisk together the dry ingredients: flour, sugar, cocoa powder, baking soda, and salt.
- In a separate bowl, combine the wet ingredients: buttermilk, vegetable oil, eggs, red food coloring, vanilla extract, and white vinegar.
- Gradually add the wet ingredients to the dry ingredients, mixing until just combined and smooth.
- Divide the batter evenly between the prepared pans and bake for 25-30 minutes, or until a toothpick inserted into the center comes out clean.
- Allow the cakes to cool in the pans for 10 minutes before transferring them to a wire rack to cool completely.
- In a large bowl, beat the softened cream cheese and butter with an electric mixer until light and fluffy.
- Gradually add the powdered sugar, one cup at a time, mixing until smooth.
- Stir in the vanilla extract until fully combined.
- Once the cakes are completely cool, spread a layer of cream cheese frosting over the top of one cake layer.
- Place the second cake layer on top and cover the entire cake with the remaining frosting.