The Ultimate Garden Salad Recipe: Fresh, Crunchy, and Bursting with Flavor
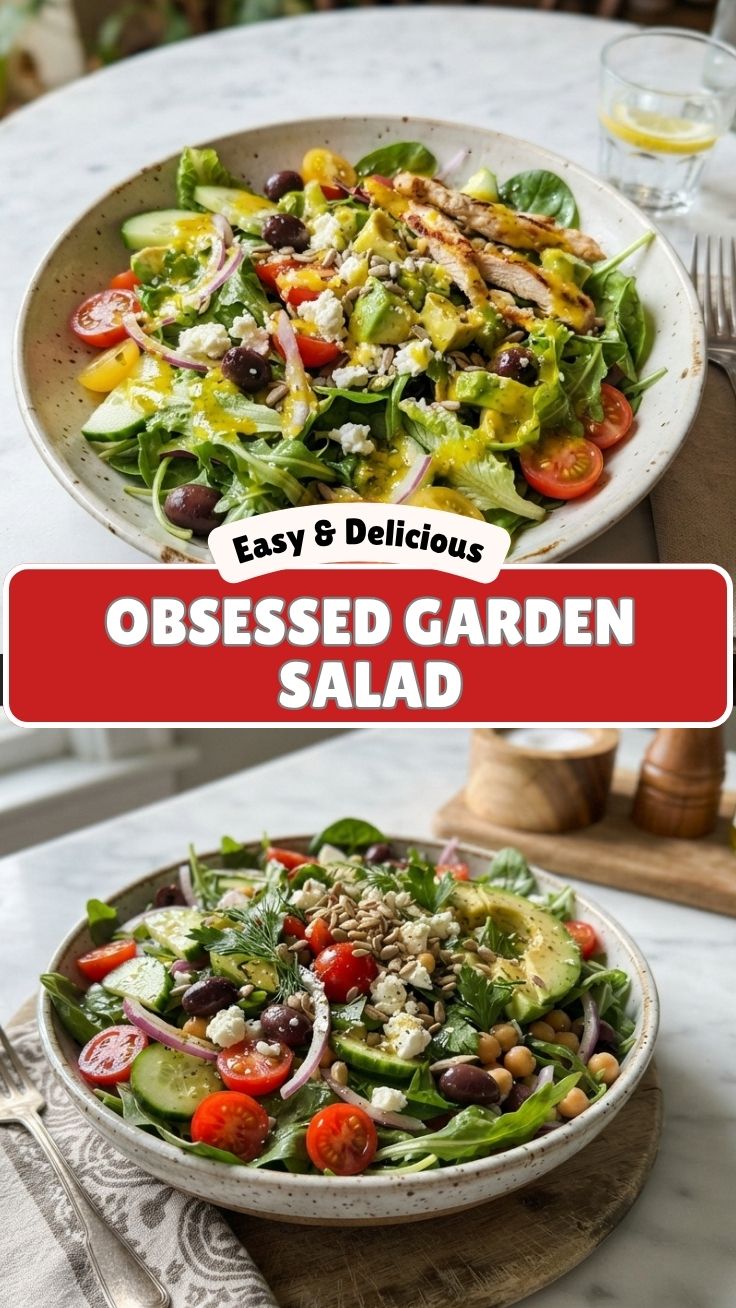
Are you tired of bland, sad salads that leave you unsatisfied? What if I told you that a perfectly crafted Garden Salad could become the most exciting dish on your table—packed with vibrant colors, crisp textures, and a homemade dressing that ties it all together? In this comprehensive guide, I’ll show you how to transform simple, fresh ingredients into a show-stopping salad that’s not only delicious but also incredibly nutritious. Making this salad at home puts you in control of every ingredient, ensuring maximum freshness, no hidden preservatives, and the freedom to customize it to your taste. Plus, I’ll also introduce you to a fantastic variation: the Heirloom Tomato Salad, which takes summer’s best produce to the next level. Let’s dive in!
Ingredients & Kitchen Tools
For the Salad Base:
– 4 cups mixed greens (romaine, spinach, arugula – or your favorite blend)
– 1 cup cherry tomatoes, halved
– 1 cucumber, diced
– 1 bell pepper (any color), thinly sliced
– 1/2 red onion, thinly sliced
– 1/2 cup shredded carrots
– 1/4 cup fresh parsley, chopped
For the Homemade Vinaigrette:
– 3 tablespoons extra virgin olive oil
– 1 tablespoon red wine vinegar (or apple cider vinegar)
– 1 teaspoon Dijon mustard
– 1/2 teaspoon honey or maple syrup
– Salt and black pepper to taste
Optional Add-Ins (to boost flavor and texture):
– 1/4 cup crumbled feta cheese (adds creaminess)
– 1/4 cup toasted sunflower seeds (adds crunch)
– 1/2 avocado, sliced (adds healthy fats)
Substitution Notes:
– Gluten-free? This salad is naturally gluten-free!
– Vegan? Use maple syrup instead of honey and skip the cheese or use a vegan alternative.
– Nut-free? Pumpkin seeds or hemp hearts are perfect replacements for sunflower seeds.
Kitchen Tools:
– Large mixing bowl
– Sharp knife
– Cutting board
– Small jar or bowl for dressing
– Whisk or fork
– Salad spinner (or clean kitchen towel) – for drying greens
Prep Time & Cooking Schedule
| Task | Time |
|——|——|
| Washing and drying greens | 5 minutes |
| Chopping vegetables | 10 minutes |
| Making the vinaigrette | 3 minutes |
| Assembling the salad | 2 minutes |
| Total Active Time | 20 minutes |
This is a no-cook recipe, making it perfect for busy weeknights, meal prep, or a quick lunch. All the time is spent on prep, and there’s no cooking required. To save even more time, you can chop your veggies up to two days in advance and store them separately in airtight containers in the fridge. The dressing can be made up to a week ahead and kept in a sealed jar.
Step-by-Step Instructions
Step 1: Wash and Dry the Greens
Place your mixed greens in a salad spinner and rinse them thoroughly with cold water. Spin until dry, or pat them gently with a clean kitchen towel. Why this matters: Excess water will make your Garden Salad soggy and dilute the dressing. Crisp, dry greens are the foundation of any great salad.
Step 2: Prepare the Vegetables
Using a sharp knife, halve the cherry tomatoes, dice the cucumber, slice the bell pepper into thin rings, thinly slice the red onion, and shred the carrots. For the Heirloom Tomato Salad variation, simply use heirloom tomatoes cut into wedges instead of cherry tomatoes. Keep all chopped ingredients in separate bowls or pile them on a large cutting board.
Step 3: Make the Homemade Vinaigrette
Add olive oil, red wine vinegar, Dijon mustard, honey, salt, and pepper to a small jar. Secure the lid and shake vigorously for 20 seconds until emulsified. Alternatively, whisk in a small bowl. Taste and adjust seasoning – a good vinaigrette should be tangy and balanced.
Step 4: Assemble the Salad
Place the dried greens in a large bowl. Scatter the chopped tomatoes, cucumber, bell pepper, red onion, and carrots evenly over the greens. Drizzle with just enough vinaigrette to lightly coat the leaves (about 2/3 of the dressing). Toss gently using salad spoons or clean hands.
Step 5: Add Final Touches
Sprinkle the parsley, feta cheese (if using), and sunflower seeds (if using) over the top. For extra indulgence, add sliced avocado. Serve immediately and enjoy the crunch!
Nutritional Benefits & Advantages
This Garden Salad is a nutritional powerhouse. Here’s why you should eat it every day:
– High in Fiber (from greens, carrots, and cucumbers) – supports digestion and keeps you full.
– Rich in Vitamins A and C (from bell peppers, carrots, and tomatoes) – boosts immunity and skin health.
– Low in Calories – a large bowl contains only about 150-200 calories (with dressing).
– Heart-Healthy Fats (from olive oil and avocado) – reduces inflammation.
– Hydrating Ingredients – cucumbers and tomatoes have high water content, keeping you refreshed.
The Heirloom Tomato Salad variation amplifies these benefits: heirloom tomatoes are particularly rich in lycopene, an antioxidant linked to reduced risk of chronic diseases.
Tips, Variations & Cooking Advice
Flavor Variations:
– Herb Garden Salad: Add fresh basil, mint, or dill alongside the parsley.
– Protein-Packed: Toss in grilled chicken, chickpeas, or hard-boiled eggs.
– Cheesy Lover’s: Swap feta for goat cheese or fresh mozzarella pearls.
Seasonal Swaps:
– Spring: Use fresh peas, radishes, and baby spinach.
– Summer: Add corn kernels, zucchini ribbons, and the Heirloom Tomato Salad twist.
– Fall: Incorporate roasted butternut squash cubes and dried cranberries.
– Winter: Use kale, shaved Brussels sprouts, and pomegranate seeds.
Dietary Adaptations:
– Gluten-Free: Already GF – just ensure any added proteins are GF.
– Vegan: Use agave or maple syrup in the dressing and skip cheese.
– Low-Carb/Keto: Reduce carrots and use more avocado and seeds.
Pro Tip:
For maximum flavor, let the chopped tomatoes sit with a pinch of salt for 5–10 minutes before assembling. This draws out their sweetness and makes them burst with flavor.
Common Mistakes to Avoid
Mistake #1: Over-Dressing the Salad
Too much dressing weighs down the greens and makes them limp. Always start with less, toss, and add more if needed. You can always add, but you can’t take away.
Mistake #2: Chopping Ingredients Too Large
Bite-sized pieces are key. A giant chunk of cucumber or onion can overwhelm each forkful. Aim for uniform, ½-inch pieces.
Mistake #3: Forgetting to Dry the Greens
As mentioned, water is the enemy of a crisp salad. Use a spinner or pat dry thoroughly.
Mistake #4: Adding Dressing Too Early
If you’re meal prepping, keep dressing separate and add only right before serving. Pre-dressed salads turn into sad, wilted messes within hours.
Mistake #5: Skipping the Acidity
A salad without acid (vinegar or citrus) tastes flat. Always balance your oil with an acidic component. This step is non-negotiable!
Storage & Meal Prep Tips
Room Temperature:
This salad is best eaten immediately after assembly. However, if you have leftovers (without dressing), you can store them.
Refrigeration:
– Undressed Salad: Store in an airtight container lined with a paper towel. The paper towel absorbs excess moisture. Keeps for 1-2 days.
– Dressed Salad: Not recommended – greens will wilt within hours. If you must, consume within 4 hours of dressing.
– Dressing: Store separately in a jar in the fridge for up to 1 week. Shake before using.
Freezing:
Do not freeze this fresh salad – greens will become mushy upon thawing. Freezing is only suitable for the dressing (leave out the fresh herbs) in an ice cube tray for up to 3 months.
Meal Prep Idea:
Chop all veggies and store them in individual containers. Make the dressing in a jar. Each morning, grab a container, add greens, and dress at lunchtime. This saves you 15 minutes daily.
Conclusion
There you have it – the ultimate Garden Salad recipe that proves healthy eating can be fast, delicious, and endlessly customizable. From the crisp crunch of fresh cucumbers to the tangy zip of homemade vinaigrette, every bite is a celebration of simple, whole ingredients. And if you’re in the mood for something a little different, the Heirloom Tomato Salad variation will blow your mind with its juicy, sweet-tart tomatoes. Now it’s your turn – head to your kitchen, grab your favorite veggies, and create a salad that’s uniquely yours. I’d love to hear how it turns out! Share your creation in the comments below or tag me in your photos. Don’t forget to explore more fresh, seasonal recipes on our site for endless inspiration. Happy crunching!
Frequently Asked Questions (FAQs)
1. Can I make this salad ahead of time?
Yes, but keep the dressing separate. Prepare the veggies and greens, store them in an airtight container with a paper towel, and add dressing only when ready to eat. It stays fresh for up to 48 hours.
2. What’s the best way to keep the salad crunchy?
Always dry your greens thoroughly. Also, chop hard vegetables like cucumbers and bell peppers into larger pieces – they’ll stay crunchier longer.
3. Can I use bottled dressing instead?
Absolutely, but homemade vinaigrette takes just 3 minutes and tastes fresher, with no preservatives or added sugars. I recommend trying the homemade version at least once!
4. What’s the difference between a regular tomato and an heirloom tomato?
Heirloom tomatoes are open-pollinated varieties that come in unique shapes, colors, and flavors. They’re often sweeter and more complex than standard tomatoes, making the Heirloom Tomato Salad a gourmet treat.
5. Can I use frozen vegetables?
Not for this fresh salad. Frozen veggies release water when thawed, making the salad soggy. Stick with fresh produce for the best texture and flavor.
Best way to grow a fresh Garden Salad in 7 days. Garden Salad
Ingredients
Equipment
Method
- Fill your pots or seed trays with potting soil, leaving about an inch of space from the top.
- Moisten the soil thoroughly with water, ensuring it is damp but not waterlogged.
- Sprinkle the lettuce, radish, and spinach seeds evenly over the soil surface in separate pots or sections.
- Cover the seeds lightly with a thin layer of soil, about 1/4 inch deep.
- Place the pots in a location that receives at least 6 hours of direct sunlight daily or under a grow light.
- Keep the soil consistently moist by watering daily, especially during germination.
- Once seedlings emerge, thin them to ensure adequate spacing for growth, removing weaker plants.
- (Optional) Apply a diluted organic liquid fertilizer after 3-4 days to promote healthy growth.
- After 7 days, your salad greens should be ready for harvest; carefully snip the outer leaves with scissors.
- Enjoy your fresh, homegrown garden salad immediately!