Unlock the Secret to Perfect Homemade Focaccia Bread: A Culinary Journey
Have you ever dreamt of baking a bread that’s crisp on the outside, unbelievably soft and airy on the inside, and bursting with incredible flavor? Today, we’re diving deep into the art of creating your very own perfect Focaccia Bread right in your kitchen. Forget store-bought imitations; preparing this exquisite bread at home isn’t just about saving money – it’s about experiencing the pure joy of baking, the intoxicating aroma filling your home, and the unparalleled taste of freshly baked goodness. This comprehensive guide will equip you with everything you need to master this beloved Italian classic, transforming simple ingredients into a masterpiece. We’ll explore the nuances of dough development, the magic of olive oil, and how to achieve that signature dimpled texture that makes Artisan Focaccia so irresistible.
Ingredients & Kitchen Tools
To embark on your focaccia journey, gather these essential items:
- All-Purpose Flour (500g): The foundation of our bread. Use a good quality unbleached variety for best results.
- Warm Water (350ml): (105-115°F / 40-46°C) Crucial for activating the yeast.
- Active Dry Yeast (7g / 2 ¼ teaspoons): The leavening agent that gives focaccia its airy texture.
- Extra Virgin Olive Oil (60ml + 30ml for drizzling): Essential for flavor, moisture, and that signature golden crust. “Liquid gold” for focaccia!
- Fine Sea Salt (10g / 1.5 teaspoons + flaky sea salt for topping): Enhances flavor and controls yeast activity. Flaky salt adds a pleasant crunch.
- Sugar (5g / 1 teaspoon): A little food for the yeast to get started. Can be omitted if preferred.
- Optional Toppings: Fresh rosemary, cherry tomatoes, olives, thinly sliced onions, garlic, or a sprinkle of Italian herbs. These elevate the flavor profile.
Kitchen Tools:
- Large Mixing Bowl: For combining and proofing the dough.
- Whisk: To combine dry ingredients.
- Spatula or Wooden Spoon: For initial mixing.
- Kitchen Scale: For precise ingredient measurements. Highly recommended for baking!
- Measuring Cups & Spoons: For accurate small-scale measurements.
- Plastic Wrap or a Clean Kitchen Towel: For covering the dough during proofing.
- 9×13 inch Baking Pan (or similar size): A sturdy pan is key for even baking.
- Parchment Paper: Prevents sticking and makes cleanup a breeze.
- Timer: For keeping track of proofing and baking times.
Prep Time & Cooking Schedule
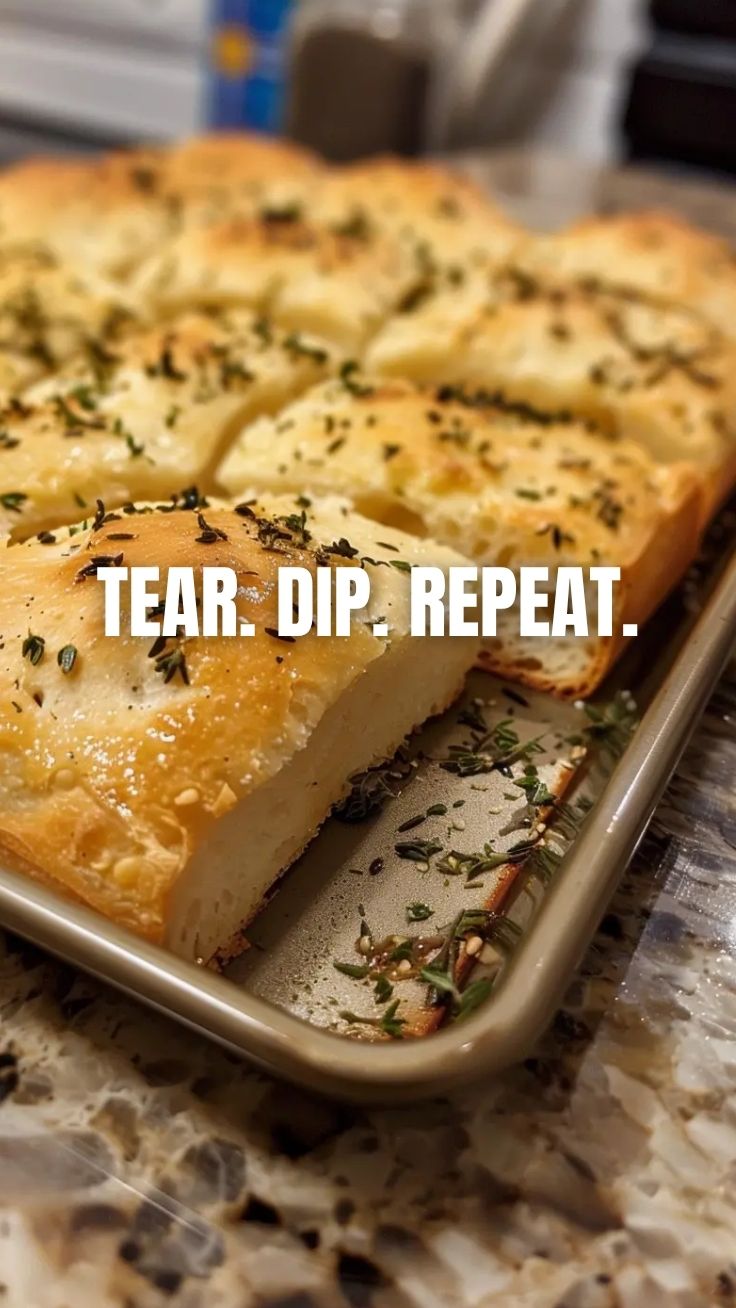
- Active Prep Time: 20-25 minutes
- First Proofing Time: 1-1.5 hours
- Second Proofing Time: 30-45 minutes
- Baking Time: 20-30 minutes
- Total Time: Approximately 2.5 – 3.5 hours
This schedule allows for sufficient dough development and proofing, which are critical for the airy texture of perfect focaccia. Plan to start your dough early in the day if you want it fresh for dinner!
Step-by-Step Instructions
1. Activate the Yeast: In your large mixing bowl, combine the warm water, sugar, and active dry yeast. Stir gently and let it sit for 5-10 minutes until foamy. This confirms your yeast is alive and ready to work its magic.
2. Combine Ingredients: Add the flour, a generous drizzle of olive oil (60ml), and fine sea salt to the yeast mixture. Mix with a spatula or wooden spoon until a shaggy dough forms.
3. Knead (or No-Knead Method): For classic Focaccia Bread, you don’t need extensive kneading. Turn the dough onto a lightly floured surface and knead for about 5 minutes until it forms a somewhat smooth ball. Alternatively, for a no-knead method, simply cover the bowl and let it rest for 15 minutes, then perform a set of “stretch and folds” (gently pull a portion of the dough up and fold it over itself) about 4 times around the bowl. Repeat this every 15-20 minutes for an hour.
4. First Proofing: Lightly oil your mixing bowl. Place the dough in the bowl, turn it once to coat, and cover tightly with plastic wrap or a damp kitchen towel. Let it rise in a warm place for 1 to 1.5 hours, or until doubled in size.
5. Prepare Baking Pan: Generously drizzle 2-3 tablespoons of olive oil into your 9×13 inch baking pan. This is crucial for the crispy bottom crust. You can also line it with parchment paper for easier cleanup.
6. Transfer and Dimple: Gently transfer the risen dough into the prepared baking pan. Using your fingertips, gently stretch the dough to fill the pan, being careful not to deflate it entirely. Create deep, even dimples across the entire surface of the dough with your oiled fingers. For a truly professional look, ensure every inch of this Artisan Focaccia is perfectly dimpled to hold those delicious olive oil pools.
7. Second Proofing & Topping: Drizzle the remaining 30ml of olive oil generously over the dimpled dough. Add your desired toppings (rosemary, olives, etc.) and sprinkle with flaky sea salt. Cover loosely and let it proof a second time for 30-45 minutes. Preheat your oven to 400°F (200°C) during this time.
8. Bake: Bake for 20-30 minutes, or until the focaccia is golden brown and sounds hollow when tapped on the bottom.
9. Cool: Once baked, immediately transfer the focaccia to a wire rack to cool slightly. Serve warm!
Nutritional Benefits & Advantages
Focaccia, particularly when made with good quality olive oil, offers more than just deliciousness. Olive oil is rich in monounsaturated fats, known for their heart-healthy benefits and anti-inflammatory properties. The yeast in the bread aids in digestion, and whole wheat flour can be substituted for added fiber. While it’s an indulgence, homemade focaccia allows you to control the ingredients, avoiding unwanted preservatives or excessive sodium, making it a healthier option than many store-bought breads.
Tips, Variations & Cooking Advice
- Flavor Boost: Experiment with different herbs like thyme, oregano, or a mix of Italian herbs. Roasted garlic cloves pressed into the dough before baking is divine.
- Sweet Focaccia: Lightly sweeten the dough, top with sliced fruit (peaches, grapes), a sprinkle of sugar, and a dusting of cinnamon for a unique dessert focaccia.
- Gluten-Free Option: Use a high-quality gluten-free all-purpose flour blend (one specifically designed for bread baking) and follow the same steps. You might need slightly more liquid.
- Overnight Cold Proof: For a deeper flavor, after the first proof, place the oiled dough in the pan, dimple, and cover. Refrigerate overnight (8-12 hours). Take it out 1-2 hours before baking to let it come to room temperature and proof slightly before adding toppings and baking.
- Hydration is Key: Don’t be afraid if your dough feels sticky; focaccia is a high-hydration dough, which contributes to its characteristic airy texture. Oiled hands help with handling.
Common Mistakes to Avoid
- Under-proofing: Don’t rush the proofing stages. Insufficient proofing leads to a dense, chewy texture instead of light and airy.
- Not Enough Olive Oil: The generous use of olive oil is non-negotiable for authentic focaccia – both in the dough, in the pan, and as a topping. It’s what creates that perfect crispy crust and rich flavor.
- Over-baking: Keep an eye on your focaccia. Over-baking can dry it out. It should be golden brown, not dark brown or burnt.
- Ignoring the Pan Temperature: Ensure your oven is fully preheated to the correct temperature. A cold oven will affect the rise and crust development.
Storage & Meal Prep Tips
Store leftover Focaccia Bread in an airtight container at room temperature for up to 2-3 days. For longer storage, wrap individual slices tightly in plastic wrap and then foil, and freeze for up to 1 month. To reheat, thaw if frozen, then warm in a preheated oven at 350°F (175°C) for 5-10 minutes, or until warmed through and crispy. It’s excellent for sandwiches, alongside soups, or simply dipped in more olive oil and balsamic vinegar.
Conclusion
Mastering homemade Focaccia Bread is a truly rewarding culinary experience. From the delightful aroma that fills your kitchen to the first bite of its airy, olive oil-infused goodness, it’s an undeniable crowd-pleaser. With this detailed guide, you’re now equipped to bake an exquisite Artisan Focaccia that will impress everyone. Don’t be shy – dive in, trust the process, and soon you’ll be enjoying the irresistible taste of freshly baked Italian bread. Share your focaccia creations with us in the comments below – we’d love to see your delicious results!
FAQs
Q1: Can I use instant yeast instead of active dry yeast?
A1: Yes, you can. If using instant yeast, you can mix it directly with the flour and other dry ingredients without activating it first in warm water.
Q2: My focaccia didn’t rise properly. What went wrong?
A2: Common causes include inactive yeast (water wasn’t warm enough or too hot), old yeast, insufficient proofing time, or the dough wasn’t kept in a warm enough environment during proofing.
Q3: How can I prevent the focaccia from sticking to the pan?
A3: A generous amount of olive oil in the bottom of the pan is key! You can also line the pan with parchment paper for extra assurance.
Q4: Can I knead the dough in a stand mixer?
A4: Absolutely! Use the dough hook attachment on low speed for 5-7 minutes until the dough is smooth and elastic. You’ll still want to do the stretch and folds.
Q5: What are some good alternatives if I don’t have fresh rosemary?
A5: Dried rosemary can be used, although less potent. Other fantastic toppings include thinly sliced red onion, sun-dried tomatoes, black olives, or even just a generous sprinkle of coarse salt and black pepper.
Proven Way to Grow Perfect Focaccia Bread
Ingredients
Equipment
Method
- In a large bowl, dissolve yeast in warm water with a pinch of sugar; let it sit for 5 minutes until foamy.
- Add flour, olive oil, and salt to the yeast mixture, mixing until a shaggy dough forms.
- Knead on a lightly floured surface for about 8-10 minutes until the dough is smooth and elastic.
- Place the dough in a greased bowl, cover with plastic wrap, and let it rise in a warm place for 1-1.5 hours, or until doubled in size.
- Gently punch down the dough to release air, then transfer it to a 9x13 inch baking pan coated with olive oil.
- Dimple the dough deeply with your fingers, drizzle with olive oil, sprinkle with sea salt and rosemary, and add optional toppings.
- Let it rise again for 30 minutes, preheat oven to 400°F (200°C), then bake for 20-25 minutes until golden brown.
- Remove from oven, let cool slightly, and serve warm.