—
title: The Secret to Crispy, Juicy Buttermilk Fried Chicken at Home
date: 2023-10-27
categories:
– Chicken Recipes
– Comfort Food
– Dinner Ideas
tags:
– fried chicken
– buttermilk
– crispy chicken
– homemade
– comfort food
– easy recipe
—
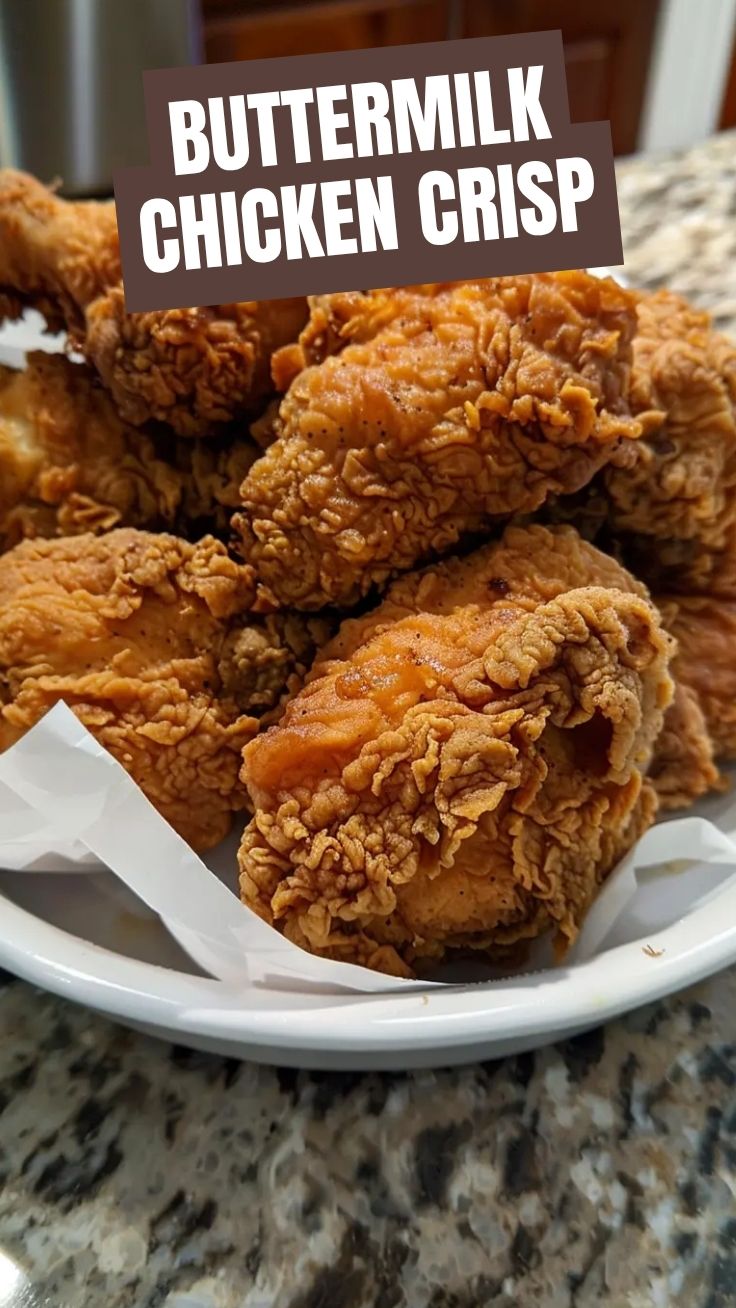
Are you ready to elevate your home cooking and create a dish that will have everyone asking for seconds? Imagine biting into perfectly golden-brown, impossibly crispy skin, yielding to incredibly juicy, tender meat. That’s the magic of homemade Buttermilk Fried Chicken. While often associated with intricate restaurant techniques, mastering this iconic dish at home is not only achievable but deeply rewarding. There’s an unparalleled satisfaction in serving up a classic like this, knowing exactly what went into it and customizing it to perfection.
Ingredients & Kitchen Tools
Crafting the perfect fried chicken starts with the right components and tools. Here’s what you’ll need:
- Chicken Pieces (8-10 pieces): A mix of drumsticks, thighs, and wings works best for variety and even cooking. Bone-in, skin-on is crucial for flavor and moisture.
- Buttermilk (2 cups): The star for tenderizing the chicken and creating a rich, tangy base.
- All-Purpose Flour (2 cups): For the crispy coating.
- Cornstarch (1/2 cup): Enhances crispiness and helps the coating adhere.
- Salt (2 tbsp): Essential seasoning for both brine and coating.
- Black Pepper (1 tbsp): Adds a subtle kick.
- Paprika (1 tbsp): For color and a sweet, smoky note.
- Garlic Powder (1 tbsp): Adds aromatic depth.
- Onion Powder (1 tbsp): Complements the garlic.
- Cayenne Pepper (1 tsp, optional): For those who like a little heat.
- Oil for Frying (4-6 cups): Vegetable, canola, or peanut oil are ideal due to their high smoke point.
- Large Bowl: For marinating the chicken.
- Shallow Dish/Tray: For dredging the chicken in flour.
- Dutch Oven or Large Deep Pot: Essential for deep frying safely and effectively.
- Wire Rack with Baking Sheet: For draining excess oil and keeping chicken crispy.
- Tongs: For handling hot chicken.
- Instant-Read Meat Thermometer: Crucial for ensuring chicken is cooked through.
- Whisk: To combine dry ingredients.
Prep Time & Cooking Schedule
- Prep Time: 20 minutes
- Marinating Time: Minimum 4 hours, ideally overnight (12-24 hours) for maximum tenderness and flavor. This is key to achieving that melt-in-your-mouth texture.
- Cook Time: 25-30 minutes per batch
- Resting Time: 10 minutes
Plan ahead for the marinating science! The longer the chicken soaks in buttermilk, the more tender and flavorful your final dish will be. This recipe is perfect for a weekend project or an impressive weeknight meal if you prep the chicken the day before.
Step-by-Step Instructions
1. Marinate the Chicken: In a large bowl, combine the chicken pieces and buttermilk. Ensure all chicken is submerged. Cover and refrigerate for at least 4 hours, preferably overnight. This initial soak is vital for tenderizing and infusing rich flavor into your Buttermilk Fried Chicken.
2. Prepare the Seasoned Flour: In a shallow dish or tray, whisk together the flour, cornstarch, salt, black pepper, paprika, garlic powder, onion powder, and cayenne pepper (if using).
3. Dredge the Chicken: Remove chicken from the buttermilk, allowing excess to drip off slightly. Don’t rinse. Individually dredge each piece in the seasoned flour mixture, pressing firmly to ensure a thick, even coating. A good coating is crucial for a crispy crust, much like a perfectly prepared Southern fried chicken. Place coated pieces on a wire rack while you heat the oil.
4. Heat the Oil: Pour 3-4 inches of oil into a Dutch oven or deep pot. Heat oil to 325-350°F (160-175°C). Use an instant-read thermometer to monitor the temperature; maintaining it is key to avoiding soggy or burnt chicken.
5. Fry the Chicken: Carefully lower 3-4 pieces of chicken into the hot oil, ensuring not to overcrowd the pot. Overcrowding lowers the oil temperature and results in greasy chicken. Fry for 6-8 minutes per side, turning occasionally, until golden brown and cooked through. The internal temperature should reach 165°F (74°C).
6. Drain and Rest: Once cooked, transfer chicken to a wire rack set over a baking sheet to drain excess oil. This step helps maintain crispiness. Repeat with remaining chicken batches, ensuring oil temperature returns to the optimal range between batches. Let chicken rest for 10 minutes before serving.
Nutritional Benefits & Advantages
Homemade fried chicken, particularly when made with quality ingredients, offers more than just comfort. Chicken is an excellent source of lean protein, essential for muscle repair and growth. Buttermilk, despite its name, is often low in fat and adds beneficial probiotics if unpasteurized. While it’s a treat, preparing it at home allows you to control the type of oil used (opting for healthier options like avocado or peanut oil) and avoid artificial additives often found in fast-food varieties.
Tips, Variations & Cooking Advice
- Spice Level: Adjust the amount of cayenne pepper to tailor the heat to your preference, or add a pinch of chili powder for an earthy kick.
- Herbaceous Notes: Infuse your buttermilk with fresh rosemary or thyme sprigs during marination for an aromatic twist.
- Gluten-Free Option: Substitute all-purpose flour with a 1:1 gluten-free flour blend for a celiac-friendly version.
- Air Fryer Method: For a lighter option, after dredging, lightly spray chicken with oil and air fry at 375°F (190°C) for 20-25 minutes, flipping halfway, until golden and cooked through. Crispy results may vary.
- Double-Dredging: For an extra thick and craggy crust, dredge the chicken, then dip it back into the leftover buttermilk (or a separate small bowl of buttermilk for this purpose) and dredge again in flour.
Common Mistakes to Avoid
- Overcrowding the Pot: This drops the oil temperature, leading to greasy, undercooked chicken. Fry in batches!
- Incorrect Oil Temperature: Too low, and chicken absorbs too much oil. Too high, and the outside burns before the inside cooks. Invest in a good thermometer.
- Skipping the Marination: The buttermilk is crucial for tenderization and flavor. Don’t rush or skip this step.
- Not Draining Properly: Leaving chicken on paper towels can make the bottom soggy. Use a wire rack to allow air circulation.
- Under-Seasoning: Don’t be shy with the salt and spices in your flour mixture. Flavor is key!
Storage & Meal Prep Tips
Leftover Buttermilk Fried Chicken can be stored in an airtight container in the refrigerator for up to 3-4 days. To maintain crispiness when reheating, avoid the microwave. Instead, preheat an oven or air fryer to 375°F (190°C) and reheat for 10-15 minutes, or until warmed through and crispy. For longer storage, cooked fried chicken can be frozen for up to 2-3 months. Thaw in the refrigerator overnight before reheating in the oven.
Conclusion
There’s truly nothing quite like the satisfaction of creating your own authentic Buttermilk Fried Chicken from scratch. From the tenderizing soak in buttermilk to the perfectly seasoned, crispy coating, every step contributes to a culinary masterpiece. This isn’t just a recipe; it’s an experience that brings the comforting flavors of Southern fried chicken right to your dinner table. Give it a try, savor every bite, and don’t forget to share your delicious results!
FAQs
1. Can I use regular milk instead of buttermilk?
* You can make a buttermilk substitute by adding 1 tablespoon of lemon juice or white vinegar to regular milk and letting it sit for 5-10 minutes until it slightly curdles. However, real buttermilk offers superior flavor and tenderization.
2. How do I know when the chicken is done?
* The best way is with an instant-read meat thermometer inserted into the thickest part of the chicken, avoiding the bone. It should read 165°F (74°C). The crust should also be deeply golden brown.
3. My chicken isn’t crispy. What went wrong?
* Common culprits include overcrowding the pot, oil temperature being too low, or not draining the chicken on a wire rack after frying. Ensure your oil stays around 325-350°F.
4. Can I prepare the battered chicken ahead of time?
* While you can dredge the chicken a couple of hours in advance and keep it refrigerated, for the crispiest result, it’s best to dredge just before frying. The flour can become soggy if left too long.
5. What’s the best oil for frying?
* Canola, vegetable, and peanut oils are excellent choices due to their neutral flavor and high smoke points, essential for deep frying.
Best way to grow crispy Buttermilk Fried Chicken in 5 steps
Ingredients
Equipment
Method
- Place chicken pieces in a large bowl and pour buttermilk over them, ensuring all pieces are coated, then cover and refrigerate for at least 4 hours or overnight.
- In a shallow dish, whisk together flour, paprika, garlic powder, salt, and black pepper, then remove chicken from buttermilk, letting excess drip off, and dredge each piece in the flour mixture, pressing to ensure a thick, even coating.
- Pour vegetable oil into a large, heavy-bottomed pot or Dutch oven, filling it about 2-3 inches deep, and heat over medium-high heat until it reaches 350°F (175°C).
- Carefully place 2-3 chicken pieces into the hot oil, ensuring not to overcrowd the pot, and fry for about 6-8 minutes per side, turning occasionally, until deep golden brown and cooked through (internal temperature of 165°F/74°C).
- Using tongs, remove fried chicken from the oil and place on a wire rack set over a baking sheet to drain excess oil, then let it rest for a few minutes before serving hot.