Master the Art of Homemade Buffalo Wings: Your Ultimate Guide
Are you ready to elevate your snack game and dive into a world of fiery flavor and crispy perfection? Forget bland takeout—there’s a unique satisfaction in crafting your own Buffalo Wings right in your kitchen. Not only is it incredibly cost-effective, but it also allows you to customize every aspect, from the crispiness of the skin to the heat level of your Buffalo Sauce. Preparing these iconic wings at home ensures you get fresh, high-quality ingredients and a final product that surpasses any restaurant version. Let’s unlock the secrets to truly legendary wings!
Ingredients & Kitchen Tools
To embark on this culinary adventure, you’ll need the following:
- 2 lbs fresh chicken wings and drumettes: Look for fresh, never-frozen wings for the best texture.
- ½ cup all-purpose flour: Helps create a crispy coating. Can substitute with cornstarch or a gluten-free flour blend for a crispier, gluten-free option.
- 1 tsp salt: Essential for seasoning the wings.
- ½ tsp black pepper: Adds a subtle kick.
- 1 tsp garlic powder: Enhances the savory depth.
- 1 tsp paprika: For color and a touch of sweetness.
- 1 cup Buffalo Sauce: Your favorite store-bought or homemade recipe. Adjust for desired heat.
- 2 tbsp unsalted butter (melted): Melds beautifully with the hot sauce for a richer, smoother coating.
- Vegetable oil (for frying): Or another high smoke point oil like canola or peanut oil. Enough to submerge the wings.
- Blue cheese dressing/ranch dressing: Classic dipping sauces.
- Celery sticks/carrot sticks: For a refreshing crunch.
Kitchen Tools:
- Large mixing bowls: For seasoning and tossing.
- Deep-fryer or large heavy-bottomed pot/Dutch oven: For safe and efficient frying.
- Tongs: Essential for handling hot wings.
- Wire rack with a baking sheet: For draining excess oil and keeping wings crispy.
- Meat thermometer: To ensure wings are cooked through (165°F/74°C internal temperature).
- Paper towels: For draining and blotting.
Prep Time & Cooking Schedule
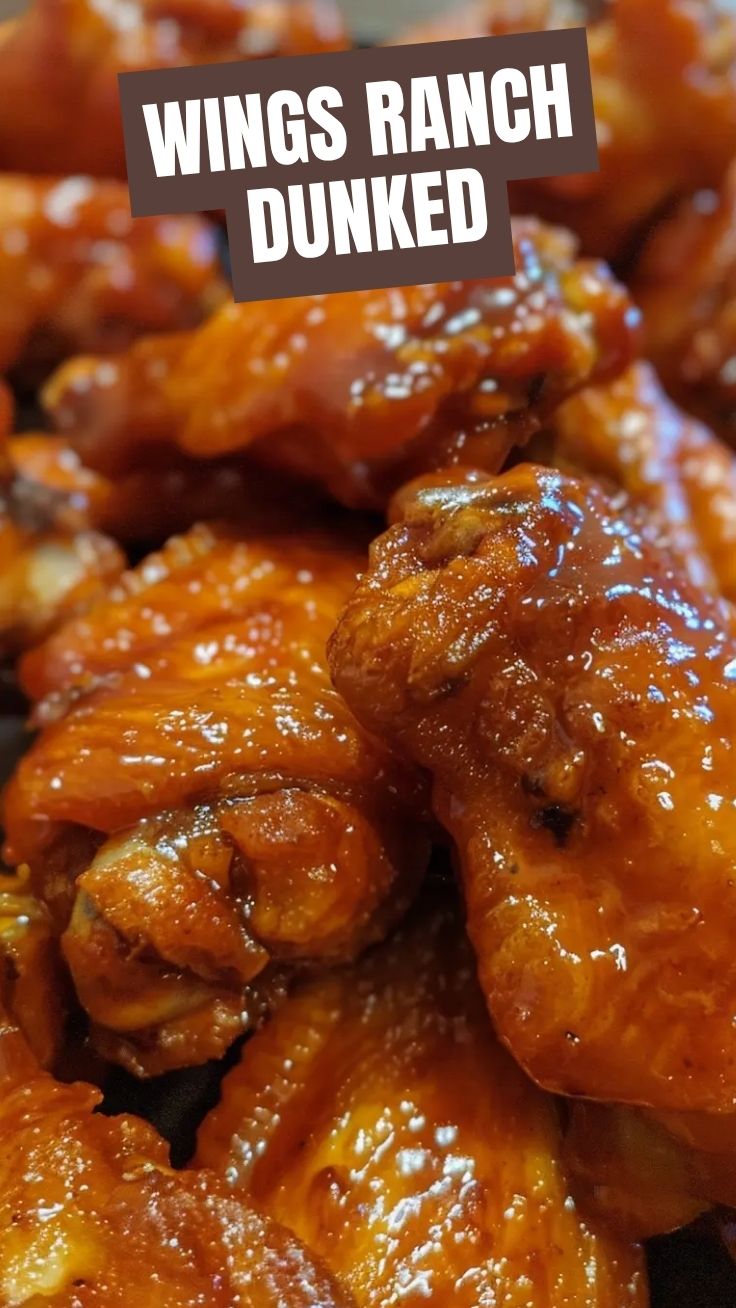
Making excellent Buffalo Wings involves more than just throwing chicken in oil. Here’s a breakdown to help you plan:
- Prep Time: 15 minutes (includes patting dry, seasoning, and flouring).
- Cook Time: 20-25 minutes (per batch, depending on frying method).
- Resting Time: 5 minutes (after frying, before tossing in sauce).
- Marinating Time (Optional): 30 minutes to overnight (for deeper flavor in the chicken).
For optimal timing, consider patting your wings thoroughly dry and seasoning them an hour before frying. This allows the seasoning to penetrate and contributes to a crispier skin. Frying in batches is crucial to maintain oil temperature and achieve consistent crispiness without overcrowding the pot.
Step-by-Step Instructions
1. Prepare the Wings: Pat the chicken wings thoroughly dry with paper towels. This step is critical for crispy skin as excess moisture leads to steaming. In a large bowl, toss the wings with salt, black pepper, garlic powder, and paprika.
2. Dredge in Flour: Add the all-purpose flour to the seasoned wings, tossing until each wing is lightly coated. Shake off any excess flour.
3. Heat the Oil: In a deep-fryer or large heavy-bottomed pot, heat about 3-4 inches of vegetable oil to 350°F (175°C). Use a thermometer to monitor the temperature; maintaining it is key to perfectly cooked wings.
4. Fry the Wings: Carefully add the wings to the hot oil in batches, making sure not to overcrowd the pot. Overcrowding will lower the oil temperature and result in soggy wings. Fry for 8-10 minutes per batch, turning occasionally, until golden brown and cooked through (internal temperature of 165°F/74°C).
5. Drain and Rest: Remove the fried wings with tongs and place them on a wire rack set over a baking sheet to drain excess oil. These crispy Buffalo Wings need a moment to rest.
6. Prepare the Sauce: In a separate large bowl, combine your favorite Buffalo Sauce with melted butter. Warm gently if desired.
7. Toss and Serve: Add the hot, drained wings to the bowl with the Buffalo Sauce and toss until thoroughly coated. Serve immediately with blue cheese or ranch dressing, celery, and carrot sticks. Enjoy your expertly crafted wings!
Nutritional Benefits & Advantages
Chicken wings, when prepared thoughtfully, can be a good source of protein, essential for muscle repair and growth. While frying adds calories, opting for air-frying or baking can significantly reduce fat content. Chicken skin, though high in fat, contains collagen, which is beneficial for skin and joint health. Furthermore, using a homemade Buffalo Sauce allows you to control sodium and sugar levels, making them a healthier choice than many store-bought alternatives. Paired with fresh celery and carrots, you add valuable vitamins and fiber to your meal.
Tips, Variations & Cooking Advice
- Baking/Air Frying: For a lighter option, bake wings at 400°F (200°C) for 45-50 minutes, flipping halfway, or air-fry at 375°F (190°C) for 20-25 minutes. Toss with sauce as usual.
- Spice Level: Adjust the heat of your Buffalo Sauce by adding a pinch of cayenne pepper or a dash of ghost pepper sauce for extreme heat, or a touch of honey for a sweeter, milder version.
- Crispy Coating: For extra crispiness, try adding a tablespoon of baking powder to your flour mixture. This helps dry out the skin and promotes browning.
- Flavor Boost: Marinate the wings in buttermilk or a spiced brine for at least 30 minutes prior to drying and flouring for incredibly tender and flavorful results.
- Gluten-Free: Substitute all-purpose flour with rice flour or a gluten-free all-purpose blend. Ensure your Buffalo Sauce is also gluten-free.
Common Mistakes to Avoid
- Not Patting Wings Dry: The most common mistake. Wet wings will steam instead of crisp up.
- Overcrowding the Pot: Drops oil temperature, leading to greasy, soggy wings. Fry in small batches.
- Inconsistent Oil Temperature: Too low, and wings absorb too much oil; too high, and they burn on the outside before cooking through. Use a thermometer.
- Under-Seasoning: Don’t be shy with the salt and pepper before frying.
- Delaying Sauce Toss: Toss wings in sauce immediately after frying for maximum adherence and flavor absorption.
Storage & Meal Prep Tips
Leftover Buffalo Wings can be stored in an airtight container in the refrigerator for up to 3-4 days. For longer storage, freeze them in a single layer on a baking sheet, then transfer to a freezer-safe bag for up to 2-3 months.
To reheat, the best method for maintaining crispiness is to bake them at 350°F (175°C) for 10-15 minutes or air-fry at 325°F (160°C) for 5-8 minutes until heated through. Avoid microwaving, as it will make them soggy. If reheating from frozen, increase baking/air-frying time significantly.
Conclusion
Crafting your own batch of Buffalo Wings is a rewarding experience that yields incredibly delicious results. By following these detailed steps, you can achieve restaurant-quality crispiness and flavor, tailored perfectly to your preferences. Whether you like them super spicy, perfectly balanced, or with a unique twist, mastering your homemade Buffalo Sauce and frying technique will set you apart. Don’t hesitate—give this recipe a whirl and share your incredible results with us! What’s your secret ingredient for the perfect wing?
FAQs
Q1: Can I use frozen wings?
A1: Yes, but ensure they are fully thawed and thoroughly patted dry before seasoning and frying. This is crucial for crispiness.
Q2: How do I make my wings extra crispy?
A2: Patting dry, using a little baking powder in your flour mixture, and frying at the correct, consistent oil temperature are key. Consider a double-fry method for ultimate crispness.
Q3: What’s the best oil for frying Buffalo Wings?
A3: Vegetable oil, canola oil, or peanut oil are excellent choices because they have high smoke points and neutral flavors that won’t interfere with the wing’s taste.
Q4: Can I make the Buffalo Sauce ahead of time?
A4: Absolutely! Homemade Buffalo Sauce can be prepared days in advance and stored in the refrigerator. Gently reheat before tossing with the freshly cooked wings.
Q5: What are some alternative dipping sauces?
A5: While blue cheese and ranch are classic, try a honey mustard, sriracha mayo, or a creamy garlic sauce for a different flavor profile.
Proven way to grow 15 Buffalo Wings plants
Ingredients
Equipment
Method
- Prepare the spicy soil mix in large pots, ensuring good drainage.
- Plant each buffalo wing seed about 1 inch deep, spacing them evenly.
- Water thoroughly with ranch dressing water until the soil is moist.
- Place the pots under grow lights for 12 hours a day, maintaining a warm environment.
- Fertilize weekly with blue cheese fertilizer to encourage rapid wing development.
- Monitor for "wing-rot" and apply a gentle dusting of celery salt if needed.
- Harvest buffalo wings when they reach desired crispiness and spice level, typically after 8-10 weeks.