The Irresistible Comfort of Homemade Chili Mac: Your Ultimate Recipe Guide
Ever wondered how to elevate a classic comfort dish into a hearty, flavor-packed meal that tantalizes every taste bud? Today, we’re diving deep into the art of creating the perfect Chili Mac. This iconic dish effortlessly combines two beloved comfort foods – chili and macaroni and cheese – into a single, satisfying casserole. Preparing Chili Mac at home isn’t just about saving money; it’s about customizing flavors, ensuring quality ingredients, and impressing your family and friends with a culinary masterpiece. Forget bland, watery versions; this guide promises a rich, savory experience that will have everyone asking for seconds.
Ingredients & Kitchen Tools
Crafting the perfect Chili Mac requires a blend of staple pantry items and fresh produce. Here’s what you’ll need:
- 1 lb Ground Beef or Turkey: Lean ground meat provides a hearty base. (Substitute with plant-based crumbles for a vegetarian option.)
- 1 tbsp Olive Oil: For sautéing.
- 1 large Onion, chopped: Adds aromatic depth.
- 2 cloves Garlic, minced: Essential for savory flavor.
- 1 (15 oz) can Diced Tomatoes, undrained: Provides a tangy, rich base for the chili.
- 1 (15 oz) can Kidney Beans, rinsed and drained: Adds protein and texture. (Black beans or pinto beans are also great.)
- 1 (15 oz) can Tomato Sauce: Deepens the tomato flavor.
- 2 tbsp Chili Powder: The foundational spice for authentic chili flavor.
- 1 tsp Cumin: Adds earthy warmth.
- ½ tsp Paprika: For color and mild spice.
- ¼ tsp Cayenne Pepper (optional): For a touch of heat.
- Salt and Black Pepper to taste: Essential for seasoning.
- ½ lb Elbow Macaroni or other small pasta: The classic choice for mac and cheese. (Other pasta shapes like shells or rotini work too.)
- 2 tbsp Unsalted Butter: For the cheese sauce.
- 2 tbsp All-Purpose Flour: To create a roux for the cheese sauce.
- 2 cups Milk (whole or 2%): The creamy base for the mac and cheese.
- 2 cups shredded Cheddar cheese: The star of any mac and cheese. (Sharp or medium cheddar works best.)
- 1 cup shredded Monterey Jack or Colby Jack cheese: For extra meltiness and flavor.
- Optional toppings: Chopped fresh cilantro, sour cream, extra shredded cheese, jalapeños.
Kitchen Tools:
- Large Skillet or Dutch Oven: For browning meat and simmering chili.
- Large Pot: For cooking pasta.
- Whisk: For making the cheese sauce.
- 9×13 inch Baking Dish: For assembling and baking.
- Measuring Cups and Spoons: For accurate ingredient quantities.
- Colander: For draining pasta and beans.
Prep Time & Cooking Schedule
- Prep Time: 20 minutes
- Cook Time: 35-40 minutes (20 minutes for chili/pasta, 15-20 minutes for baking)
- Resting Time: 5-10 minutes (allows everything to set)
This recipe is designed for efficiency. You can start the chili component while the pasta cooks, streamlining the process significantly. The total active cooking time is about 45 minutes, with an additional 15-20 minutes for the final bake, making it a perfect weeknight meal that feels special.
Step-by-Step Instructions
1. Cook the Pasta: Bring a large pot of salted water to a boil. Add the elbow macaroni and cook according to package directions until al dente. Drain and set aside.
2. Brown the Meat: In your large skillet or Dutch oven, heat olive oil over medium-high heat. Add ground beef and cook, breaking it up with a spoon, until browned. Drain any excess fat.
3. Sauté Aromatics: Add chopped onion to the skillet with the browned meat. Cook until softened, about 5 minutes. Stir in minced garlic and cook for another minute until fragrant.
4. Simmer the Chili: Stir in diced tomatoes (undrained), kidney beans, tomato sauce, chili powder, cumin, paprika, and cayenne pepper (if using). Bring to a simmer, then reduce heat to low, cover, and cook for at least 15 minutes, allowing flavors to meld. Season with salt and pepper to taste. This chili base is crucial for our Chili Mac.
5. Make the Cheese Sauce: While the chili simmers, melt butter in a medium saucepan over medium heat. Whisk in flour and cook for 1 minute, forming a roux. Gradually whisk in milk until smooth. Bring to a gentle simmer, stirring constantly, until the sauce thickens. Remove from heat and stir in 2 cups shredded Cheddar cheese and ½ cup Monterey Jack until melted and smooth. Season with salt and pepper.
6. Combine & Assemble: Preheat oven to 375°F (190°C). In a large bowl, combine the cooked macaroni with the cheese sauce, ensuring the pasta is well coated. Gently fold in the chili mixture.
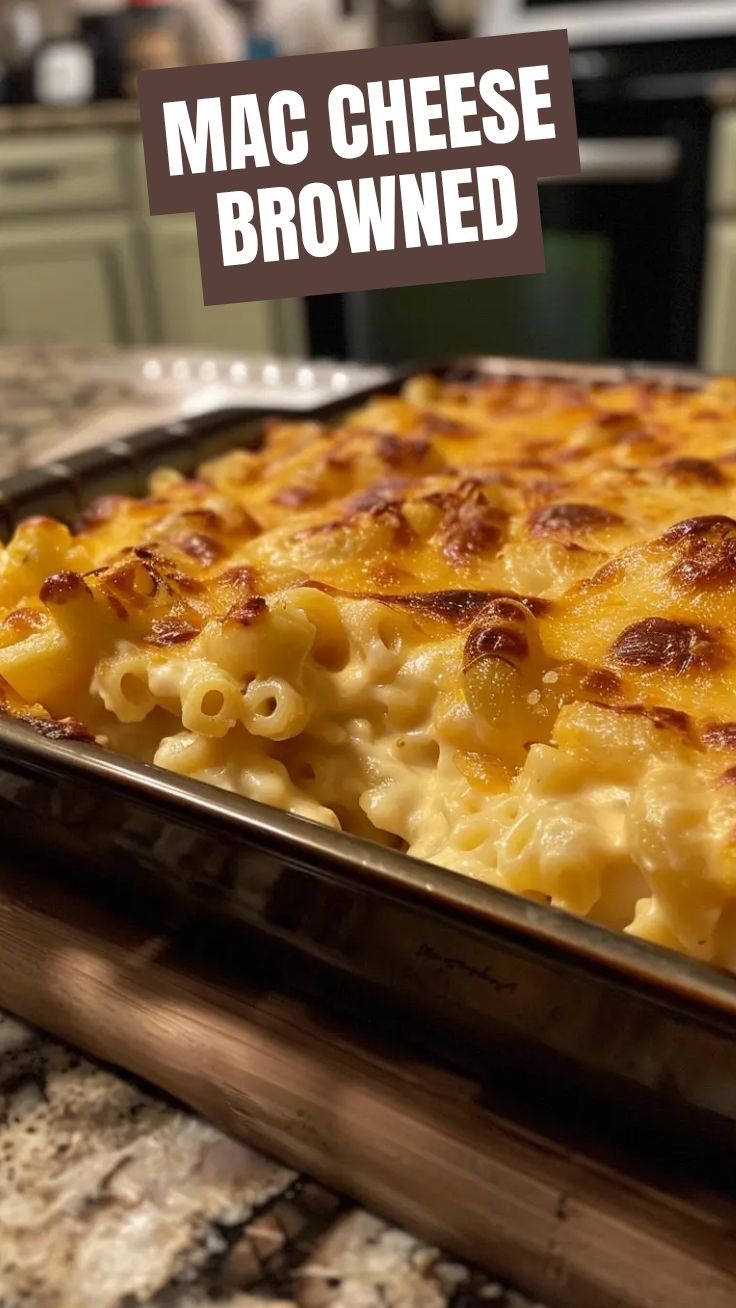
7. Bake: Transfer the Chili Mac to the prepared 9×13 inch baking dish. Sprinkle the remaining ½ cup Monterey Jack cheese over the top. Bake for 15-20 minutes, or until bubbly and the cheese is melted and lightly golden.
8. Serve: Let rest for 5-10 minutes before serving. Garnish with your favorite toppings.
Nutritional Benefits & Advantages
Chili Mac, when made with quality ingredients, offers more than just comfort. The ground meat provides a substantial source of protein and iron, essential for muscle health and energy. Kidney beans are packed with fiber, promoting digestive health and aiding in satiety, as well as additional plant-based protein. Tomatoes contribute vital antioxidants like lycopene and Vitamin C. While it contains dairy, the calcium from the cheese is beneficial for bone health. Opting for whole wheat pasta can further increase fiber content and nutrient density.
Tips Variations & Cooking Advice
- Spice Level: Adjust the amount of cayenne pepper or add a pinch of red pepper flakes for more heat. For a milder version, omit the cayenne entirely.
- Vegetarian Chili Mac: Swap ground meat for plant-based crumbles and use vegetable broth instead of any meat-based broth (though this recipe doesn’t call for broth, some chili recipes do).
- Cheese Variations: Experiment with different cheese combinations. A blend of sharp cheddar, Monterey Jack, and a touch of smoked gouda can add incredible complexity.
- Add Veggies: Fold in diced bell peppers, corn, or zucchini with the chili for added nutrients and flavor.
- Smoky Flavor: A pinch of smoked paprika or a dash of liquid smoke can add a delicious smoky note to your chili.
- Creamier Texture: For an even creamier mac and cheese, consider adding a tablespoon of cream cheese to the béchamel sauce.
Common Mistakes to Avoid
- Overcooking Pasta: Mushy pasta will ruin the texture of your Chili Mac. Cook it until al dente as it will continue to cook in the oven.
- Lumpy Cheese Sauce: Ensure your roux is smooth and add milk gradually while whisking constantly to prevent lumps. Don’t overheat the sauce, as this can make the cheese grainy.
- Underseasoning: Taste your chili mixture before combining it with the pasta and sauce. Adjust salt and pepper as needed. A well-seasoned base is key.
- Dry Chili Mac: Ensure enough sauce and chili liquid to keep the dish moist. If your chili seems too thick, add a splash of water or broth.
Storage & Meal Prep Tips
Leftover Chili Mac can be stored in an airtight container in the refrigerator for up to 3-4 days. To reheat, microwave individual portions or bake in a covered dish at 325°F (160°C) until heated through, adding a splash of milk or broth if it seems dry.
For meal prep, you can make the chili and the cheese sauce a day in advance and store them separately. When ready to bake, cook the pasta, combine everything, and proceed with baking. This significantly cuts down on active cooking time on busy weeknights. Freezing is generally not recommended for pasta dishes with creamy sauces as the sauce can separate upon thawing.
Conclusion
There you have it—your ultimate guide to creating a truly spectacular Chili Mac. This dish is the epitome of comfort food, blending the hearty richness of chili with the creamy indulgence of Cheddar cheese. By following these steps and incorporating our tips, you’re not just making a meal; you’re crafting an experience that brings warmth and satisfaction to your table. We encourage you to try this recipe, experiment with the variations, and share your delicious results with us!
FAQs
Q1: Can I make this a gluten-free dish?
A1: Yes! Simply use gluten-free elbow macaroni and ensure your flour for the roux is a gluten-free all-purpose blend.
Q2: What if my cheese sauce is too thick or too thin?
A2: If too thick, whisk in a tablespoon of milk at a time until desired consistency. If too thin, make a small slurry of cornstarch and cold water, then whisk it into the simmering sauce and cook until thickened.
Q3: Can I add beans other than kidney beans to the chili?
A3: Absolutely! Black beans, pinto beans, or even a mix of different beans will work wonderfully and add unique flavor profiles.
Q4: How important is browning the meat thoroughly?
A4: Browning the meat creates a rich depth of flavor through the Maillard reaction. Don’t rush this step; allow the meat to get a good sear for the best results.
Q5: Can I prepare this recipe ahead of time for a party?
A5: You can assemble the entire dish up to 24 hours in advance and store it covered in the refrigerator. When ready to bake, add an extra 5-10 minutes to the cooking time to ensure it’s heated through.
Best way to grow with 3 Baked Mac and Cheese tips
Ingredients
Equipment
Method
- Preheat your oven to 375°F (190°C). Cook the macaroni according to package directions until al dente, then drain and set aside.
- In a large saucepan, melt butter over medium heat. Whisk in the flour and cook for 1-2 minutes until a thick paste forms.
- Gradually whisk in the milk until smooth. Bring the mixture to a gentle simmer, stirring constantly, until it thickens.
- Remove from heat and stir in the shredded cheddar cheese until completely melted and smooth. Season with salt and pepper.
- Combine the cooked macaroni with the cheese sauce, ensuring everything is well coated. Pour into a 9x13 inch baking dish.
- Bake for 20-25 minutes, or until bubbling and golden brown. Let stand for a few minutes before serving.
- For an extra crispy top, broil for the last 2-3 minutes, watching carefully to prevent burning.