The Ultimate Summer Berry Trifle: A No-Bake Dessert That Steals the Show
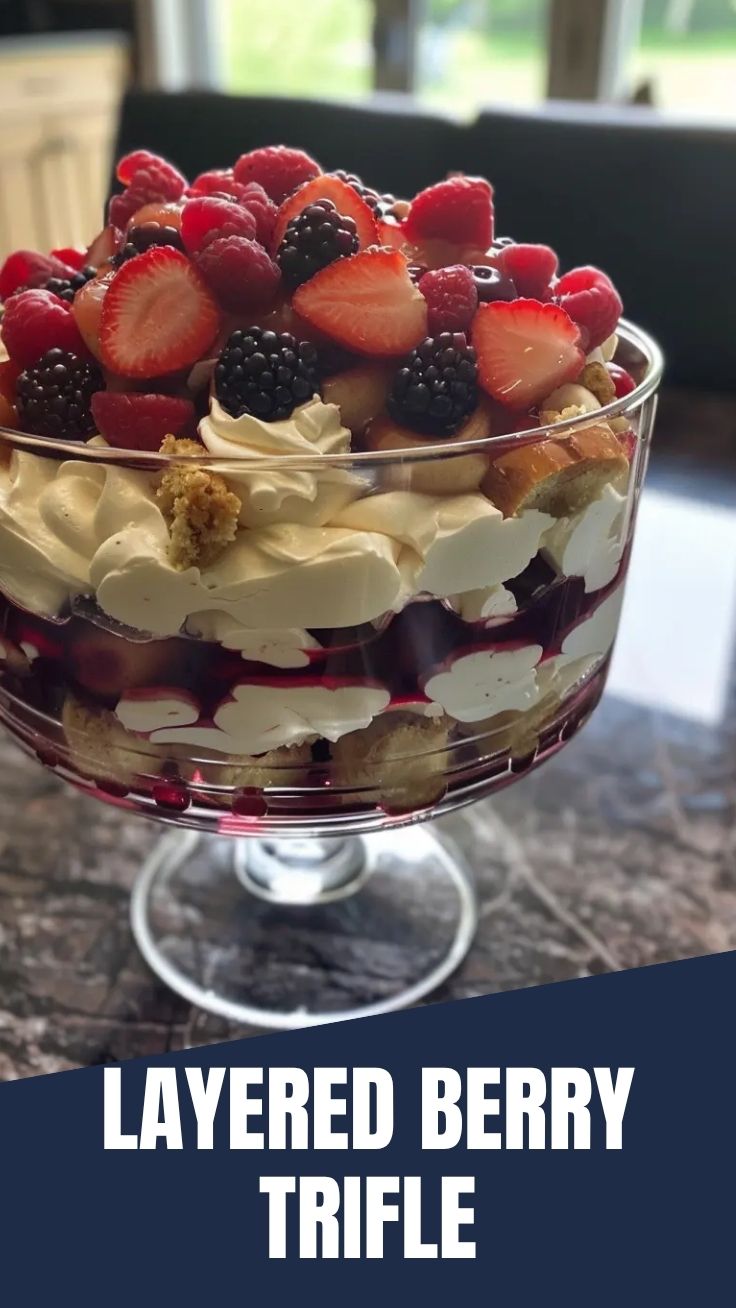
Have you ever craved a dessert that looks like a masterpiece but takes minimal effort to assemble? The Summer Berry Trifle is exactly that—a stunning layered dessert that combines fresh berries, creamy custard, and fluffy cake into one irresistible treat. Preparing this recipe at home saves you money, lets you control the sweetness, and guarantees a show-stopping centerpiece for any gathering. Whether you’re hosting a backyard barbecue or a fancy dinner party, this no-bake wonder delivers maximum flavor with minimum fuss.debug
—
Ingredients & Kitchen Tools
Ingredients
– Fresh strawberries – 2 cups, hulled and sliced (substitute frozen if out of season)
– Fresh blueberries – 1 cup (or frozen, thawed)
– Fresh raspberries – 1 cup (or blackberries for variety)
– Vanilla pudding mix – 1 box (3.4 oz), instant variety
– Whole milk – 2 cups (or almond milk for dairy-free)
– Heavy cream – 1 cup, whipped to stiff peaks (or coconut cream for vegan)
– Ladyfingers – 1 package (about 24, or use sponge cake cubes)
– Sugar – 2 tablespoons, granulated
– Lemon zest – 1 teaspoon (optional, for brightness)
Kitchen Tools
– Large mixing bowl – for whipping cream and folding
– Hand mixer or stand mixer – saves time and effort
– Glass trifle dish – 8-cup capacity; clear glass shows off layers
– Sharp knife – for slicing strawberries evenly
– Measuring cups and spoons – precision matters
– Spatula – for gentle folding without deflating cream
Optional Substitutions
– Gluten-free: Use gluten-free ladyfingers or crushed gluten-free graham crackers
– Low-sugar: Use sugar-free pudding mix and skip added sugar
– Vegan: Use coconut whipped cream and plant-based pudding
—
Prep Time & Cooking Schedule
– Prep time: 20 minutes
– Cook time: 0 minutes (no oven needed!)
– Chill time: 2–4 hours (or overnight for best results)
– Total time: 2 hours 20 minutes to 4 hours 20 minutes
> Tip: Make the custard and whip the cream the night before. Assemble the trifle in the morning, and it’s ready to serve by lunch. The resting time allows flavors to meld and ladyfingers to soften perfectly.
—
Step-by-Step Instructions
1. Prepare the pudding base: In a large bowl, whisk the vanilla pudding mix with 2 cups of cold milk until smooth. Let it set for 5 minutes to thicken. This forms the creamy backbone of your stunning Summer Berry Trifle.
2. Whip the cream: In a separate chilled bowl, beat heavy cream and sugar until stiff peaks form. Gently fold half the whipped cream into the pudding to lighten it. Reserve the rest for topping.
3. Layer the bottom: Arrange a single layer of ladyfingers in the bottom of your trifle dish. Brush lightly with milk or simple syrup if desired (this adds moisture).
4. Add berries: Scatter a layer of mixed berries—strawberries, blueberries, and raspberries—over the ladyfingers. Sprinkle a pinch of lemon zest here if using.
5. Spread custard: Spoon one-third of the pudding-cream mixture over the berries, spreading evenly with a spatula.
6. Repeat layers: Continue layering ladyfingers, berries, and custard until you reach the top, ending with a custard layer.
7. Top with cream: Spread the remaining whipped cream over the top. Garnish with a few reserved berries and a mint sprig for elegance.
8. Chill: Cover and refrigerate for at least 2 hours. Overnight is best—this allows the layers to meld into a cohesive, spoonable dessert recipes masterpiece that’s perfectly chilled.
Pro tip: For a firmer texture, let the trifle rest 4 hours. For a softer, almost pudding-like consistency, go full 6 hours.
—
Nutritional Benefits & Advantages
This Summer Berry Trifle isn’t just pretty—it packs nutritional perks. Berries are loaded with antioxidants (anthocyanins, quercetin) that combat inflammation and support heart health. One cup of strawberries provides over 100% of your daily vitamin C needs. The calcium from milk and cream strengthens bones, while ladyfingers offer quick energy from carbs. Compared to heavy buttercream desserts, this trifle is lighter—each serving contains about 250–300 calories, depending on portion size. Plus, it’s a fantastic way to incorporate seasonal fruit into your dessert recipes, making indulgence feel virtuous.
—
Tips, Variations & Cooking Advice
– Flavor swap: Replace vanilla pudding with lemon or cheesecake pudding for a tangy twist.
– Seasonal twist: Use peaches and nectarines in summer, or apples and pears in fall.
– Alcohol option: Brush ladyfingers with limoncello or elderflower liqueur for an adult version.
– Dietary adaptation: To make gluten-free, use certified GF ladyfingers or crushed gluten-free cookies. For dairy-free, use coconut cream and plant-based pudding.
– Portion change: Serve in individual glasses or mason jars for grab-and-go desserts.
– Texture trick: Toast ladyfingers lightly before assembling for extra crunch that lasts.
—
Common Mistakes to Avoid
1. Over-softening ladyfingers: If they turn mushy, you’ve soaked them too long. Lightly brush, don’t drench.
2. Skipping chill time: Warm trifle is a soupy mess. Patience is key for proper texture.
3. Using underripe berries: They’ll be tart and hard. Taste-test first; if sour, macerate with sugar for 10 minutes.
4. Overmixing cream: Whip just until stiff peaks hold. Over-whipping turns cream into butter.
5. Ignoring layer balance: Too much custard overpowers berries. Keep layers even—roughly 1 inch each.
—
Storage & Meal Prep Tips
– Refrigeration: Store leftover trifle covered in the fridge for up to 3 days. The texture changes (softer), but flavor deepens.
– Freezing: Not recommended—cream and pudding become grainy when thawed. However, you can freeze the pudding layer separately for up to 1 month.
– Meal prep: Assemble layers (except top cream) a day ahead. Add whipped cream just before serving for the prettiest presentation.
– Reheating: None needed. If too cold, let sit at room temperature for 15 minutes before serving.
—
Conclusion
This Summer Berry Trifle proves that spectacular dessert recipes don’t require hours in the kitchen. With minimal prep, zero oven time, and maximum visual impact, it’s the perfect dessert for busy hosts or last-minute cravings. The combination of juicy berries, creamy custard, and tender ladyfingers creates a symphony of textures that pleases every palate. We’d love to see your creation—tag us on social media or leave a comment below. Ready to explore more? Check out other no-bake wonders on our site!
—
FAQs
Q: Can I use frozen berries instead of fresh?
Yes! Thaw and drain them first to avoid excess liquid that could make the trifle soggy. pat dry before layering.
Q: How early can I make this trifle?
Assemble up to 24 hours in advance. The flavors meld beautifully, but add the top cream garnish within 4 hours of serving for best appearance.
Q: Can I use store-bought whipped cream?
Absolutely. Use 2 cups of stabilized whipped topping to save time, though homemade provides richer flavor.
Q: My trifle turned out runny—what went wrong?
Likely the pudding didn’t set fully, berries released too much juice, or ladyfingers were oversoaked. Next time, let pudding chill 10 minutes before layering, and macerate berries with sugar only minimally.
Q: What can I substitute for ladyfingers?
Crumbled pound cake, angel food cake cubes, or vanilla wafers all work great. Adjust soaking time accordingly.
Proven way to grow a Summer Berry Trifle in 4 steps
Ingredients
Equipment
Method
- Prepare the vanilla pudding according to package directions using 3 cups of cold milk; refrigerate until set.
- In a large bowl, whip the heavy cream with powdered sugar and vanilla extract until stiff peaks form.
- Arrange half of the pound cake cubes at the bottom of a large trifle dish, then top with half of the mixed berries, followed by half of the prepared pudding and half of the whipped cream.
- Repeat the layers with the remaining pound cake, berries, pudding, and whipped cream, then chill the trifle for at least 30 minutes before serving for best results.