The Secret to Fluffy, Flavorful Rice Every Time
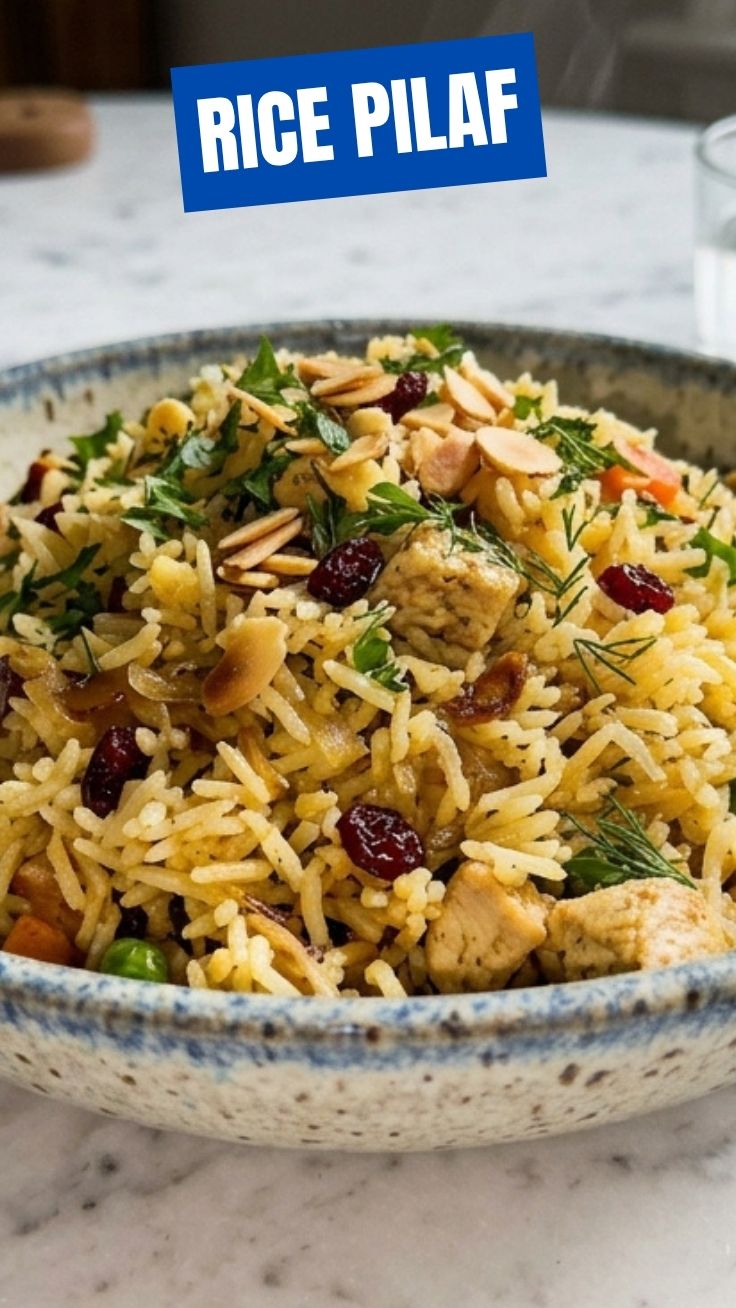
Have you ever stood over a pot of rice, hoping it turns out fluffy and separate rather than a gluey clump? That anticipation—and occasional frustration—is exactly why learning to master a proper Rice Pilaf is a game-changer in the kitchen. This isn’t just boiled rice; it’s a technique that transforms humble grains into a fragrant, buttery side dish worthy of any main course. Preparing it at home gives you complete control over ingredients, saving you money and allowing you to avoid preservatives found in boxed mixes. A great Rice Pilaf relies on a simple sauté-and-simmer method, and finding a reliable rice pilaf recipe changes everything. Whether paired with roast chicken or grilled fish, this dish delivers consistent, restaurant-quality results with minimal effort.
Ingredients & Kitchen Tools
| Ingredient | Quantity | Notes & Substitutions |
|————|———-|———————–|
| Long-grain white rice | 1 cup | Basmati or jasmine work best; avoid short-grain for separate grains |
| Butter or olive oil | 2 tbsp | Butter adds richness; olive oil for dairy-free |
| Small onion | 1, finely diced | Shallots or leeks are excellent substitutes |
| Garlic cloves | 2, minced | Use ½ tsp garlic powder if fresh is unavailable |
| Chicken or vegetable broth | 2 cups | Low-sodium preferred; water + bouillon works too |
| Salt | ½ tsp | Adjust based on broth saltiness |
| Black pepper | ¼ tsp | Freshly ground is best |
| Optional add-ins | ⅓ cup each | Toasted almonds, dried cranberries, fresh parsley |
Kitchen tools needed: Medium saucepan with tight-fitting lid, wooden spoon, measuring cups/spoons, sharp knife, cutting board.
Prep Time & Cooking Schedule
– Prep time: 10 minutes (dice onion, mince garlic, measure broth)
– Cook time: 18–20 minutes (sauté 5 min + simmer 13–15 min)
– Resting time: 5–10 minutes (critical for fluffy texture)
Planning tip: Start the pilaf right after you prep your main dish. The resting period aligns perfectly with plating time. If you’re making this for a busy weeknight dinner, measure everything beforehand—once you start sautéing, the process moves quickly.
Step-by-Step Instructions
1. Sauté the aromatics. Melt butter in your saucepan over medium heat. Add diced onion and cook 3–4 minutes until translucent. Stir in minced garlic and cook 30 seconds until fragrant—don’t let it brown.
2. Toast the rice. Add the dry rice to the pan, stirring constantly for 2 minutes. You’ll notice slightly nutty aroma and grains turning opaque. This toasting step is what distinguishes a Rice Pilaf from plain steamed rice, locking in flavor.
3. Add liquid and season. Pour in the broth, salt, and pepper. Stir once to combine, then bring to a boil. This rice pilaf recipe works with any broth—vegetable keeps it vegetarian, chicken adds depth.
4. Simmer and cover. Immediately reduce heat to low, cover tightly, and let simmer 13–15 minutes. Avoid lifting the lid during cooking—steam is doing the work.
5. Rest and fluff. Remove from heat, keep covered, and let rest 5 minutes. This allows steam to redistribute. Uncover, fluff gently with a fork, and stir in any optional add-ins like toasted almonds or fresh herbs.
Temperature cue: Liquid should show gentle bubbles, not a rolling boil, during simmering.
Nutritional Benefits & Advantages
This pilaf offers balanced nutrition in every serving (about 200 calories per cup). Brown rice version adds 3g fiber and B vitamins. The sautéed onions provide prebiotic compounds that support gut health. Using broth instead of water boosts electrolyte content. The dish is naturally low in fat (4g per serving) and cholesterol-free when made with olive oil. For a protein boost, stir in cooked lentils or chickpeas—the nutty flavor complements the toasted rice beautifully.
Tips Variations & Cooking Advice
Flavor variations:
– Mediterranean: Add 1 tsp dried oregano, ¼ cup sun-dried tomatoes
– Indian-inspired: Sauté with 1 tsp cumin seeds, ½ tsp turmeric, and cinnamon stick
– Herby: Stir in 2 tbsp each fresh dill and mint after cooking
Dietary adaptations:
– Gluten-free: This recipe is naturally gluten-free; ensure broth is certified GF
– Dairy-free: Use olive oil or vegan butter
– Low-sodium: Use unsalted broth and reduce added salt
Alternative cooking methods:
– Instant Pot: Sauté on high, then pressure cook on high 5 minutes with natural release
– Oven-baked: Combine ingredients in covered dish, bake at 375°F for 25 minutes
Portion change: Double the recipe using 2 cups rice and 4 cups liquid—cook time stays same.
Common Mistakes to Avoid
Mistake #1: Lifting the lid while cooking. Every peek releases precious steam, resulting in unevenly cooked, sticky rice. Solution: Trust the timer and keep covered.
Mistake #2: Skipping the toasting step. This creates flavor foundation and prevents mushy texture. Solution: Toast grains until they just begin to smell nutty—about 2 minutes.
Mistake #3: Using cold broth. Cold liquid shocks the rice, extending cooking time and causing unevenness. Solution: Use room temperature or slightly warm broth.
Mistake #4: Over-stirring after cooking. Aggressive stirring breaks grains and releases starch. Solution: Fluff gently with a fork—just 3–4 lifts.
Storage & Meal Prep Tips
Refrigeration: Store in airtight container for up to 5 days. Cool completely before sealing to prevent condensation.
Freezing: Portion into freezer-safe bags, flatten, and freeze flat up to 3 months. Thaw overnight in fridge.
Reheating: Sprinkle with 1 tbsp water per cup, cover, and microwave 1–2 minutes. For stovetop, add splash of broth and heat over medium-low, stirring gently.
Meal prep: Make a double batch on Sunday. Use for lunches with roasted vegetables, as side for grilled meat, or stuffed into bell peppers.
Conclusion
Mastering this simple Rice Pilaf technique unlocks a versatile side dish that elevates any meal. By toasting the grains and controlling liquid ratios, you achieve consistent, fluffy results every time. This reliable rice pilaf recipe works for beginners and experienced cooks alike, adapting to any cuisine or dietary need. Try it tonight—your family will wonder why you didn’t make it sooner. Share your results or experiment with the variations listed above. For more side dish inspiration, explore our collection of vegetable and grain recipes.
FAQs
1. Can I use brown rice instead of white?
Yes, but increase cooking time to 40–45 minutes and liquid to 2½ cups. Toast brown rice 3 minutes before adding liquid.
2. Why did my rice turn out mushy?
Usually caused by too much liquid, insufficient toasting, or cooking at too high heat. Next time reduce broth by 2 tbsp and ensure gentle simmer.
3. Can I make this vegan?
Absolutely—use olive oil instead of butter and vegetable broth. Add nutritional yeast for buttery flavor without dairy.
4. How do I add more flavor without salt?
Sauté ginger, lemongrass, or a bay leaf with the aromatics. Stir in lemon zest or fresh herbs after cooking for bright flavor.
5. Can I cook this in a rice cooker?
Yes, sauté aromatics on stovetop first, then transfer everything to rice cooker. Use same liquid ratio and cook on white rice setting.
Proven way to grow tasty Rice Pilaf in 4 steps Rice Pilaf
Ingredients
Equipment
Method
- Rinse the rice under cold water until it runs clear, then set it aside to drain.
- Heat butter or olive oil in a medium saucepan over medium heat; sauté chopped onion until softened, about 3-5 minutes, then add minced garlic and cook for another minute until fragrant.
- Stir in the rinsed rice, coating it with the butter and aromatics, and toast for 2-3 minutes until slightly translucent.
- Pour in the broth, salt, and pepper; bring to a boil, then reduce heat to low, cover tightly, and simmer for 15-20 minutes until all liquid is absorbed and rice is tender.
- Remove the saucepan from heat and let it rest, covered, for 5-10 minutes to allow the rice to finish steaming.
- Fluff the pilaf with a fork and serve hot as a delicious side dish.