The Ultimate Guide to Perfecting Chicken Parmesan at Home
Have you ever craved that golden, crispy, cheese-covered Italian classic but thought it was too complicated to make from scratch? The truth is, nothing compares to the satisfaction of pulling a bubbling, homemade casserole out of your own oven. When you take the time to prepare it yourself, you control every layer of flavor—from the crunch of the breading to the melt of the mozzarella. That’s exactly why preparing a stellar Chicken Parmesan in your own kitchen is a game-changer. It’s not just about saving money; it’s about creating a dish that’s fresher, healthier, and tailored to your taste. And if you’re looking for more ways to enjoy this comfort food, exploring trusted Chicken Parmesan Recipes can open up a world of creative variations.
Ingredients & Kitchen Tools
For the Chicken:
– 2 large boneless, skinless chicken breasts (butterflied or pounded to ½-inch even thickness for uniform cooking)
– 1 cup all-purpose flour (helps the egg wash adhere; swap for gluten-free flour if needed)
– 2 large eggs (lightly beaten with 1 tablespoon water for a lighter coating)
– 1½ cups seasoned breadcrumbs (panko yields extra crunch; Italian-style adds herbs)
– ½ cup grated Parmesan cheese (adds a salty, nutty base to the breading)
– 1 teaspoon garlic powder, 1 teaspoon onion powder, ½ teaspoon black pepper (for seasoning layers)
For the Topping & Sauce:
– 1½ cups marinara sauce (use a high-quality jarred sauce or homemade for a richer taste)
– 8 oz fresh mozzarella cheese, sliced or shredded (fresh gives the best melt; low-moisture works too)
– ½ cup grated Parmigiano-Reggiano (for a final golden crust on top)
– Fresh basil leaves (for garnish and a fresh pop of flavor)
Kitchen Tools:
– Meat mallet or rolling pin (for pounding chicken to even thickness)
– 3 shallow bowls (for the flour, egg, and breading station)
– Large skillet (oven-safe cast iron or stainless steel works best for frying)
– 9×13 baking dish or casserole pan
– Tongs, wire rack, and a sharp knife
Prep Time & Cooking Schedule
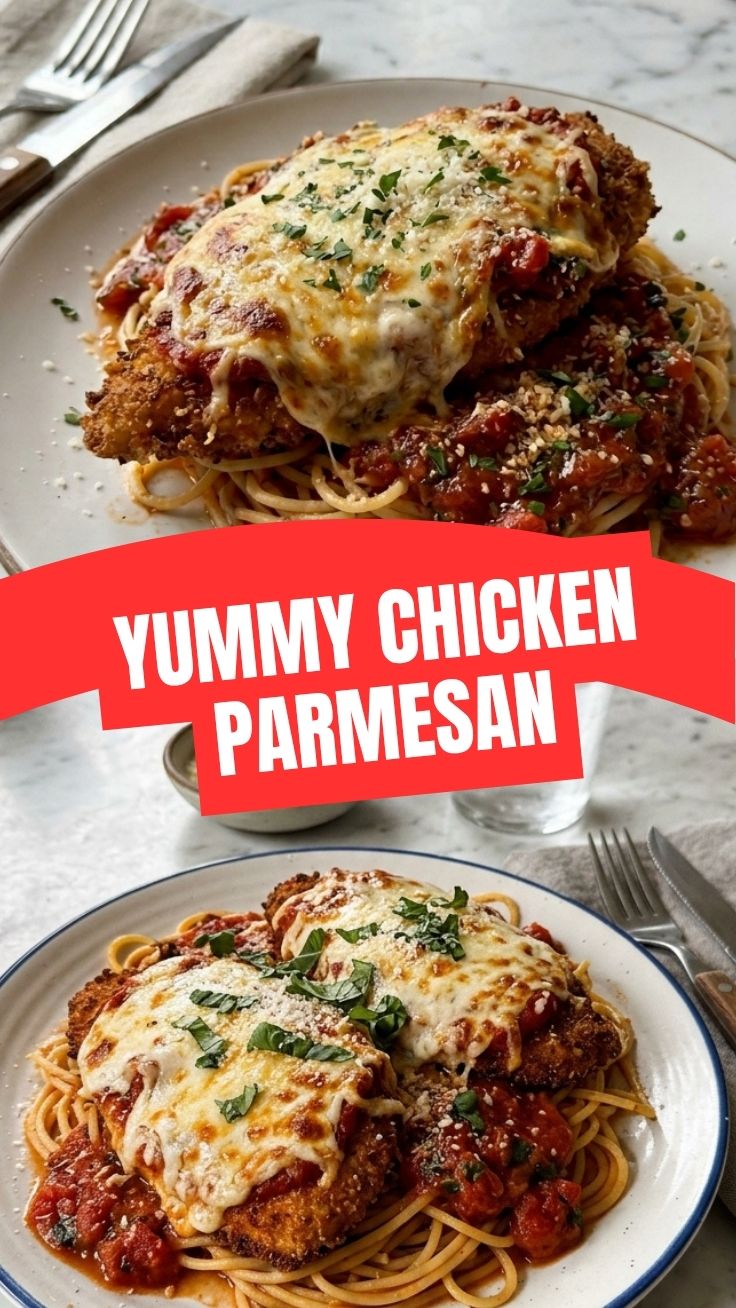
Total time from start to table is approximately 1 hour 10 minutes, broken down as follows:
| Stage | Time | Notes |
|——-|——|——-|
| Prep & Pound Chicken | 15 minutes | Pat dry, pound, and season. Let rest for 5 minutes. |
| Breading & Frying | 20 minutes | Set up your dredging station; fry in batches for even browning. |
| Assembly & Baking | 25 minutes at 400°F | Bake until cheese is bubbly and golden. |
| Resting | 5 minutes | Crucial for the cheese to set without sliding off. |
Plan ahead by preheating your oven to 400°F and prepping all ingredients before you start frying. This ensures the chicken stays hot and crispy when it goes into the oven.
Step-by-Step Instructions
Step 1: Prepare the Chicken
Slice each chicken breast in half horizontally (butterfly) or pound them to an even ½-inch thickness between two sheets of plastic wrap. Season both sides generously with salt, pepper, and garlic powder.
Step 2: Set Up the Breading Station
In three separate bowls, place: (1) flour, (2) beaten eggs with a splash of water, and (3) breadcrumbs mixed with grated Parmesan, onion powder, and a pinch of salt. Dredge each piece in flour (shake off excess), dip into egg, then press firmly into the breadcrumb mixture.
Step 3: Pan-Fry for Golden Crust
Heat ⅓ cup olive oil in a large skillet over medium-high heat. When the oil shimmers, add the breaded cutlets in a single layer (don’t crowd the pan). Cook for 3–4 minutes per side until deep golden brown and cooked through. Transfer to a wire rack set over a baking sheet—this keeps the crust from getting soggy.
Step 4: Assemble and Bake
Spread a thin layer of marinara in a 9×13 baking dish. Arrange the fried cutlets in a single layer. Top each with a generous spoonful of marinara, then lay slices of mozzarella and a sprinkle of Parmigiano-Reggiano. Bake at 400°F for 15–20 minutes until the cheese is bubbling and the edges are lightly browned.
🌿 Pro Tip: For the best texture, switch the oven to broil for the last 2 minutes. Watch closely so the cheese doesn’t burn. This final blast gives you that perfect golden crust while keeping the chicken juicy.
When you follow this method, you’ll understand why a homemade Chicken Parmesan outperforms takeout every time. And if you’re curious about different techniques, you’ll find plenty of reliable Chicken Parmesan Recipes that offer shortcuts without sacrificing taste.
Step 5: Rest and Serve
Let the dish rest for 5 minutes after baking. Garnish with fresh basil and serve hot over spaghetti, with a side salad, or in a crusty sandwich roll.
Nutritional Benefits & Advantages
Chicken Parmesan isn’t just indulgent—it can be part of a balanced meal when prepared thoughtfully. A single serving (one cutlet with sauce and cheese) provides approximately 35–40 grams of high-quality protein, which supports muscle repair and satiety. The tomato-based marinara is rich in lycopene, an antioxidant linked to heart health, while olive oil used in frying supplies monounsaturated fats that are good for cholesterol levels. By making it at home, you also cut down on sodium and preservatives often found in restaurant or frozen versions. Serve with a side of roasted vegetables or a simple green salad to add fiber and vitamins.
Tips, Variations & Cooking Advice
– Lighter Version: Bake the breaded cutlets on a greased wire rack at 425°F for 15 minutes instead of frying. Spray lightly with oil for crunch.
– Gluten-Free: Use almond flour or a gluten-free all-purpose blend for dredging, and certified gluten-free breadcrumbs or crushed pork rinds.
– Dairy-Free: Replace mozzarella with your favorite plant-based shreds and use nutritional yeast in the breading instead of Parmesan.
– Flavor Twists: Add a pinch of red pepper flakes to the breading for heat, or mix dried oregano and basil into the marinara for an herby boost.
– Portion Control: Make mini chicken Parmesan sliders using chicken tenders instead of full breasts—perfect for parties.
Common Mistakes to Avoid
| Mistake | Why It Happens | The Fix |
|———|—————|———|
| Soggy breading | Frying at too low a temperature or overcrowding the pan | Keep oil at 350–375°F; fry in batches and let the oil reheat between rounds. |
| Dry chicken | Overcooking or uneven thickness | Pound to even thickness and use a meat thermometer—internal temp should reach 165°F. |
| Cheese slides off | Cutting mozzarella too thick or not using enough sauce as glue | Use thin slices or shredded cheese, and spoon sauce directly over each cutlet before adding cheese. |
| Burnt cheese before chicken is hot | Oven temperature too high or baking time too long | Bake at 400°F and use the broiler only for the final 2 minutes. |
Storage & Meal Prep Tips
– Refrigeration: Store leftovers in an airtight container for up to 4 days. To prevent sogginess, place a paper towel in the container to absorb moisture.
– Freezing: Assemble the dish completely but do not bake. Wrap the dish tightly in plastic wrap, then foil. Freeze for up to 3 months. When ready, thaw overnight in the fridge and bake as directed, adding 10 minutes to the cooking time.
– Reheating: For crispy results, reheat in a 375°F oven for 10–12 minutes instead of the microwave. If using a microwave, cover loosely and heat in 30-second bursts at 50% power to avoid rubbery chicken.
Conclusion
Making this Italian-American classic at home gives you full control over quality, flavor, and nutrition—without sacrificing the crispy, cheesy indulgence you love. From the golden pan-fried crust to the bubbly mozzarella topping, this dish is built to impress. Whether you stick with the traditional method or try a faster variation, you now have a foolproof blueprint for success. I encourage you to give this recipe a try and share your results—tag a friend who loves a great homemade Chicken Parmesan and explore more trusted Chicken Parmesan Recipes for even more inspiration.
FAQs
1. Can I use chicken thighs instead of breasts?
Absolutely. Boneless, skinless thighs work well—they’re more forgiving and stay juicy. Just pound them to even thickness and adjust cooking time slightly (they may take a minute or two longer to cook through).
2. Why did my breading fall off during frying?
This usually happens when the chicken isn’t patted dry before breading or when the oil isn’t hot enough. Make sure to shake off excess flour, press breadcrumbs firmly, and let the breaded cutlets rest for 5 minutes before frying.
3. Can I skip the frying step entirely?
Yes. For a lighter version, spray breaded cutlets with olive oil spray and bake at 425°F on a wire rack for 15–18 minutes, flipping halfway. You won’t get the same deep-golden crust, but it’s still delicious.
4. What’s the best cheese for Chicken Parmesan?
Fresh mozzarella (the kind packed in water) gives the best melt and creaminess. For extra flavor, add a sprinkle of Parmigiano-Reggiano on top before baking. Low-moisture mozzarella works too but won’t be as creamy.
5. How do I keep the bottom from getting soggy when baking?
Place the fried cutlets on a wire rack over a baking sheet while you assemble the dish. This allows steam to escape. Also, resist the urge to oversauce—just a thin layer under the chicken is enough.
Best way to grow Chicken Parmesan on a 30 Minute Timetable
Ingredients
Equipment
Method
- Preheat your oven to 400°F (200°C) and prepare a baking dish by lightly greasing it.
- Pat the chicken breasts dry and season them with salt and pepper.
- Set up a breading station with three shallow dishes: one with flour, one with beaten egg, and one with Italian breadcrumbs.
- Dredge each chicken breast in flour, then dip in egg, and finally coat thoroughly in breadcrumbs.
- Heat olive oil in a large skillet over medium-high heat and pan-fry the breaded chicken for 2-3 minutes per side until golden brown.
- Transfer the chicken to the prepared baking dish, spread marinara sauce over each piece, and sprinkle with mozzarella and Parmesan cheeses.
- Bake for 15-20 minutes, or until the chicken is cooked through and the cheese is bubbly and golden.
- Remove from oven and let stand for a few minutes before serving with your favorite pasta or a side salad.