Celebrate Juneteenth with a Luscious Red Velvet Cake: A Symbol of Heritage and Sweetness
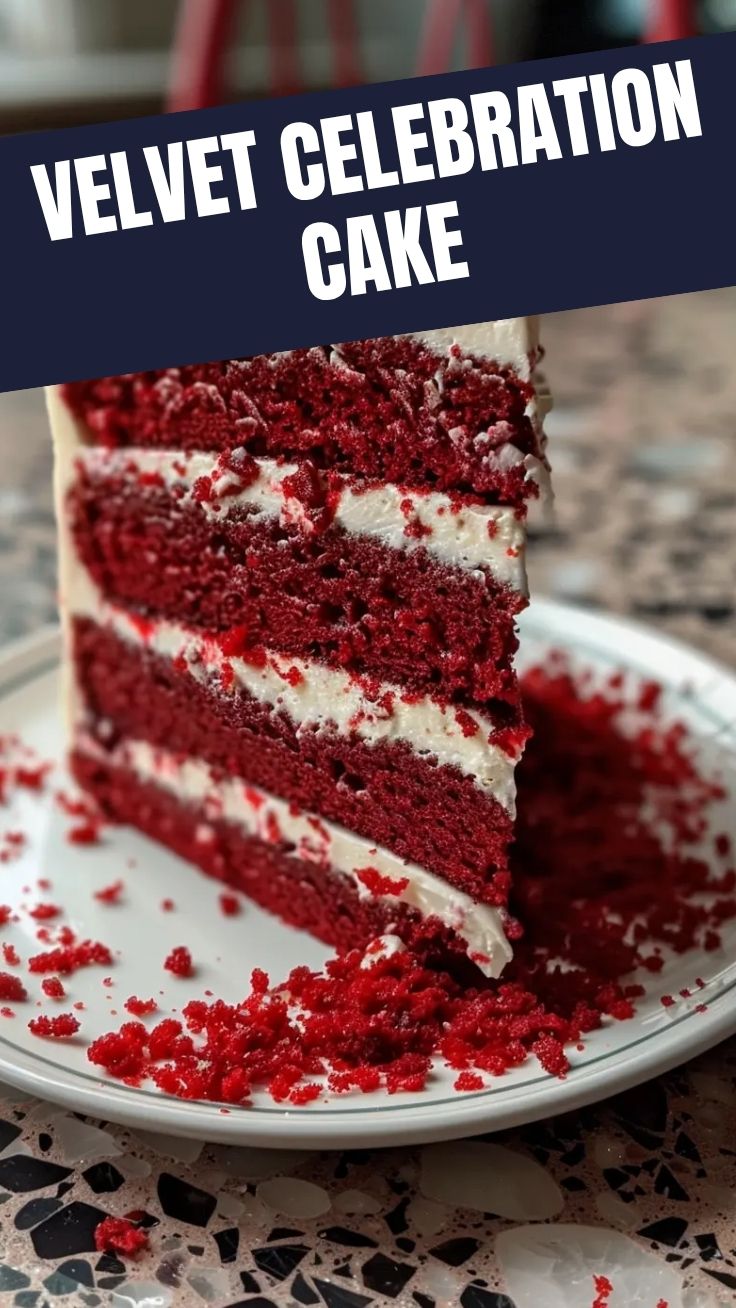
There are certain recipes that transcend mere sustenance, becoming ingrained in our cultural fabric. For Juneteenth, what better way to honor history and celebrate freedom than with a dessert that embodies both vibrancy and comfort? Today, we’re diving into the delightful world of the Juneteenth Red Velvet Cake. This iconic treat, with its striking hue and tender crumb, is more than just a cake; it’s a testament to resilience, joy, and the rich culinary traditions of a community. Preparing this magnificent cake at home isn’t just about baking; it’s an act of remembrance, a delicious way to connect with history, and a chance to create new, cherished memories. And when it comes to Juneteenth celebration desserts, this red velvet masterpiece truly stands out, offering a perfect blend of sweetness and significance.
Ingredients & Kitchen Tools
Crafting the perfect Juneteenth Red Velvet Cake requires a thoughtful selection of ingredients and the right tools.
For the Cake:
2 ½ cups All-Purpose Flour: Provides structure. Sifted for a lighter texture.*
- 1 ½ cups Granulated Sugar: Sweetness and moisture.
- 1 tsp Baking Soda: Leavening agent for lift.
- 1 tsp Salt: Enhances other flavors.
- 1 tbsp Unsweetened Cocoa Powder: The signature subtle chocolate flavor and color base.
1 cup Buttermilk: Acidity activates baking soda and adds tanginess. Can make your own with milk + lemon juice/vinegar.*
- 1 cup Vegetable Oil: Keeps the cake moist and tender.
- 2 large Eggs: Binds ingredients and adds richness.
- 1 tsp White Vinegar: Reacts with baking soda for extra lift.
- 2 tsp Vanilla Extract: Essential for classic red velvet flavor.
1-2 oz Red Food Coloring (liquid or gel): For the distinctive deep red hue. Use gel for more vibrant color with less liquid.*
For the Cream Cheese Frosting:
- 1 (8 oz) package Cream Cheese, softened: The star of the frosting, tang and creaminess.
- ½ cup Unsalted Butter, softened: Richness and smooth texture.
4-5 cups Powdered Sugar, sifted: Sweetness and structure. Sifting prevents lumps.*
- 1 tsp Vanilla Extract: Enhances flavor.
- Pinch of Salt: Balances sweetness.
Kitchen Tools:
- Two 9-inch Round Cake Pans: For even baking.
- Electric Mixer (stand or hand-held): For efficient mixing of batter and frosting.
- Large Mixing Bowls: For wet and dry ingredients.
- Whisk: For combining dry ingredients.
- Rubber Spatula: For scraping bowls and folding.
- Measuring Cups & Spoons: For accurate ingredient portions.
- Parchment Paper: Prevents sticking.
- Wire Rack: For cooling cakes.
- Offset Spatula or Butter Knife: For spreading frosting.
Prep Time & Cooking Schedule

- Prep Time: 30 minutes
- Cook Time: 28-32 minutes
- Cooling Time: 1-2 hours (crucial for frosting!)
This recipe fits well into a half-day baking project. You can prepare the batter in the morning, bake the cakes, allow them to cool completely in the afternoon, and then frost them. This allows for a relaxed approach and ensures perfectly chilled layers for frosting.
Step-by-Step Instructions
1. Prepare Your Pans: Preheat your oven to 350°F (175°C). Grease and flour two 9-inch round cake pans, then line the bottoms with parchment paper. This ensures easy release.
2. Combine Dry Ingredients: In a large bowl, whisk together the sifted all-purpose flour, granulated sugar, baking soda, salt, and cocoa powder. Make sure there are no lumps.
3. Mix Wet Ingredients: In a separate medium bowl, whisk together the buttermilk, vegetable oil, eggs, white vinegar, vanilla extract, and red food coloring until well combined and the color is evenly distributed.
4. Combine Wet and Dry: Gradually add the wet ingredients to the dry ingredients, mixing on low speed with an electric mixer until just combined. Be careful not to overmix, as this can lead to a tough cake. Scrape down the sides of the bowl to ensure everything is incorporated.
5. Bake the Cakes: Divide the batter evenly between the prepared cake pans. Bake for 28-32 minutes, or until a wooden skewer inserted into the center comes out clean.
6. Cool Completely: Allow the cakes to cool in their pans on a wire rack for 10-15 minutes before inverting them onto the rack to cool completely. This full cooling is essential before frosting to prevent the frosting from melting.
7. Make the Frosting: While the cakes cool, prepare the cream cheese frosting. In a large bowl, beat the softened cream cheese and butter with an electric mixer until light and fluffy. Gradually add the sifted powdered sugar, vanilla extract, and a pinch of salt, beating until smooth and creamy.
8. Assemble and Frost: Once the cakes are completely cool, level them if necessary using a serrated knife. Place one cake layer on a serving platter. Spread a generous layer of cream cheese frosting over the top. Carefully place the second cake layer on top and cover the entire cake with the remaining frosting. This Juneteenth Red Velvet Cake is a true showstopper, perfect for gathering friends and family. Don’t forget to consider other Juneteenth celebration desserts to complement this stunning cake!
Nutritional Benefits & Advantages
While a treat, Red Velvet Cake does offer a few subtle benefits. The cocoa powder contributes antioxidants, and buttermilk provides probiotics (though baking diminishes some of these). The true advantage here lies in the joy it brings and the cultural significance it holds, making it nourishing for the soul. Preparing it at home also allows you to control ingredient quality and reduce artificial additives often found in store-bought versions.
Tips, Variations & Cooking Advice
- For a deeper red: Use gel food coloring. Start with 1 oz and add more if desired.
- Buttermilk Substitute: If you don’t have buttermilk, add 1 tablespoon of white vinegar or lemon juice to a measuring cup, then fill to the 1-cup line with regular milk. Let sit for 5 minutes before using.
- Flavor Boost: A tiny pinch of espresso powder (1/4 tsp) can deepen the chocolate flavor without making it taste like coffee.
- Gluten-Free: Substitute the all-purpose flour with a 1:1 gluten-free baking blend.
- Dairy-Free: Use a dairy-free buttermilk substitute (e.g., almond milk with vinegar) and dairy-free cream cheese and butter alternatives for the frosting.
Common Mistakes to Avoid
- Overmixing the Batter: This develops gluten excessively, resulting in a tough, dense cake. Mix until just combined.
- Not Sifting Dry Ingredients: Leads to lumps in the batter and an uneven texture.
- Not Cooling Cakes Completely: Frosting a warm cake will cause the frosting to melt and slide off, making a mess. Patience is key!
- Too Much Food Coloring: While you want a vibrant red, excessive amounts can impact the cake’s flavor. Stick to the suggested amount or slightly more if using gel.
Storage & Meal Prep Tips
Leftover Juneteenth Red Velvet Cake should be stored in an airtight container in the refrigerator for up to 3-4 days due to the cream cheese frosting. To serve, let it sit at room temperature for 15-20 minutes to allow the frosting to soften slightly. The unfrosted cake layers can be wrapped tightly in plastic wrap and then foil, and frozen for up to 2-3 months. Thaw in the refrigerator overnight before frosting.
Conclusion
Baking this Juneteenth Red Velvet Cake is more than just following a recipe; it’s participating in a rich tradition, bringing a piece of history and celebration to your table. Its vivid color and luxurious taste make it an undeniable centerpiece for any gathering, especially as one of the most cherished Juneteenth celebration desserts. We encourage you to try this recipe, savor every bite, and share this delightful creation with your loved ones. What are your favorite Juneteenth traditions? Share your experiences in the comments below!
FAQs
1. Can I make the cake layers ahead of time?
Yes, cake layers can be baked one day in advance, wrapped tightly, and stored at room temperature. For longer storage, freeze them as described in the “Storage” section.
2. Why is my red velvet cake not very red?
This often happens if you used liquid food coloring or didn’t use enough. Gel food coloring provides a much more vibrant and concentrated color. The amount of cocoa powder can also slightly counteract the red.
3. Can I use oil instead of butter in the frosting?
No, cream cheese frosting relies on the solid fat of butter and cream cheese for structure and texture. Oil would make it too thin and greasy.
4. My cream cheese frosting is too runny. What did I do wrong?
This usually means your butter and cream cheese were too soft, or you added too little powdered sugar. Try chilling the frosting for 15-30 minutes, then re-whipping it and adding more sifted powdered sugar, a quarter cup at a time, until it reaches the desired consistency. Ensure your cream cheese is cold when you start and butter just softened.
5. What’s the best way to level cake layers?
Once completely cool, use a long, serrated knife. Place the cake on a flat surface and, using a gentle sawing motion, slowly turn the cake while cutting across to remove the domed top. A cake leveling tool can also make this easier.
Proven Way to Grow Juneteenth Red Velvet Cake in 5
Ingredients
Equipment
Method
- Begin by preparing your "soil" by preheating the oven to 350°F (175°C) and greasing and flouring two 9-inch round cake pans.
- Combine the dry "nutrients" (flour, sugar, cocoa powder, baking soda, and salt) in a large bowl, ensuring they're well mixed.
- In a separate bowl, whisk together the wet "elements" (eggs, buttermilk, oil, red food coloring, vanilla, and vinegar) until thoroughly combined.
- Gradually introduce the wet ingredients to the dry ingredients, mixing until just combined and avoiding overmixing to keep the "plant" tender.
- Divide the "seedling" batter evenly between the prepared pans and bake for 30-35 minutes, or until a toothpick inserted into the center comes out clean.
- Allow the "plants" to cool in the pans for 10 minutes before transferring them to a wire rack to cool completely, which is crucial for successful frosting.
- For the "harvest," beat the softened cream cheese and butter together until smooth and creamy for the frosting.
- Gradually add the powdered sugar to the frosting mixture, beating until light and fluffy, then stir in the vanilla extract.
- Once the cake layers are completely cool, assemble and frost your "grown" Juneteenth Red Velvet Cake, decorating as desired with any remaining "elements."