Master the Art of Homemade Ice Cream Sandwiches: A Step-by-Step Guide to Pure Delight
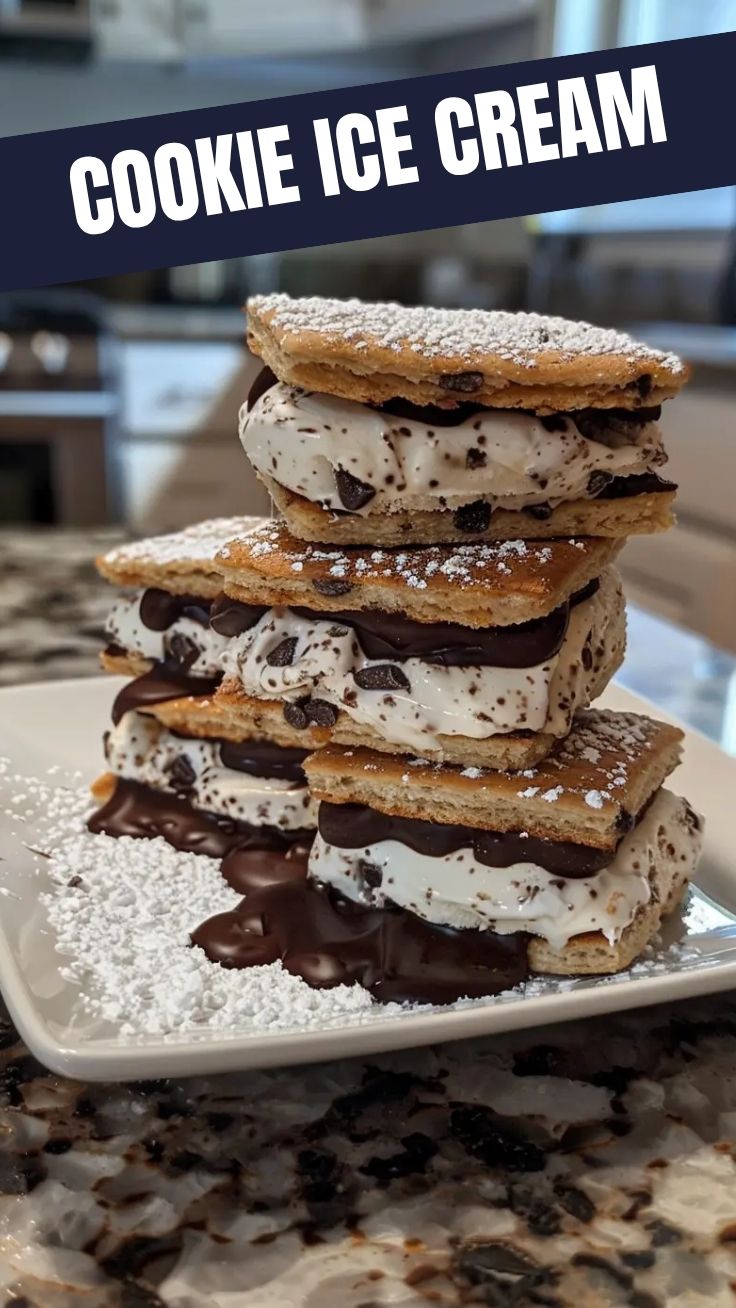
Ever wondered if you could recreate that iconic, joyous taste of an ice cream sandwich right in your own kitchen? The answer is a resounding YES! Preparing Ice Cream Sandwiches (Homemade) isn’t just about dessert; it’s about crafting moments of pure, unadulterated bliss. Forget the store-bought versions; when you elevate classic desserts with fresh ingredients and a personal touch, you unlock an entirely new level of culinary satisfaction. In this guide, we’ll walk you through transforming simple ingredients into an extraordinary treat. And for those who love to experiment, we’ll even delve into incorporating a delectable Cookie Dough Recipe to create truly unforgettable frozen delights.
Ingredients & Kitchen Tools
Crafting the perfect Ice Cream Sandwiches (Homemade) requires a few essential items.
For the Cookies:
- 1 ½ cups All-Purpose Flour: The structural backbone of our cookie.
- ½ cup Unsweetened Cocoa Powder: For that deep, rich chocolate flavor.
- 1 tsp Baking Soda: Helps the cookies rise and achieve a soft texture.
- ¼ tsp Salt: Balances the sweetness and enhances flavor.
- ¾ cup Unsalted Butter (softened): Provides richness and tenderness.
- ¾ cup Granulated Sugar: Sweetness and contributes to crisp edges.
- ¾ cup Packed Light Brown Sugar: Adds moisture and a chewy texture.
- 1 Large Egg: Binds ingredients and adds richness.
- 1 tsp Vanilla Extract: Enhances all the other flavors.
For the Filling:
- 1.5 Quarts Your Favorite Ice Cream (slightly softened): The star of the show. Vanilla, chocolate, or even a delightful Cookie Dough Recipe ice cream works wonders.
Kitchen Tools:
- Large Mixing Bowls: Essential for combining ingredients.
- Electric Mixer (stand or hand-held): For creaming butter and sugar effectively.
- Measuring Cups and Spoons: For precise ingredient measurements.
- Rubber Spatula: For scraping bowls and folding.
- Baking Sheets: For baking the cookie wafers.
- Parchment Paper: Prevents sticking and makes cleanup easy.
- 2-inch Square or Round Cookie Cutter: For shaping uniform cookies.
- Offset Spatula or Butter Knife: For spreading ice cream smoothly.
- Plastic Wrap or Wax Paper: For wrapping individual ice cream sandwiches.
Prep Time & Cooking Schedule
- Prep Time: 30 minutes (for cookie dough) + 15 minutes (for assembly)
- Chill Time (Cookie Dough): 30 minutes
- Bake Time: 8-10 minutes per batch
- Freezing Time (Assembled Sandwiches): At least 2-4 hours
Plan to start this recipe several hours, or even a day, before you want to serve the Ice Cream Sandwiches (Homemade), allowing ample time for chilling and freezing to ensure a perfectly solid, mess-free treat.
Step-by-Step Instructions
1. Prepare the Cookie Dough: In a medium bowl, whisk together the flour, cocoa powder, baking soda, and salt. In a large bowl, cream together the softened butter, granulated sugar, and brown sugar with an electric mixer until light and fluffy. Beat in the egg and vanilla extract until well combined and smooth. Gradually add the dry ingredients to the wet ingredients, mixing on low speed until just combined. Do not overmix.
2. Chill the Dough: Form the dough into a disc, wrap it in plastic wrap, and refrigerate for at least 30 minutes. This helps prevent spreading during baking and makes the dough easier to handle, crucial for creating sturdy cookies for your Ice Cream Sandwiches (Homemade).
3. Bake the Cookies: Preheat your oven to 350°F (175°C). Line two baking sheets with parchment paper. Roll out the chilled dough to about ¼-inch thickness. Using a 2-inch cookie cutter, cut out your cookie shapes and carefully place them on the prepared baking sheets, leaving about 1 inch between each. Bake for 8-10 minutes, or until the edges are set and the centers are still slightly soft. Transfer to a wire rack to cool completely. For an advanced flavor profile, consider baking cookies from a dedicated Cookie Dough Recipe for an intensely satisfying crunch.
4. Assemble the Sandwiches: Once the cookies are completely cool, slightly soften your favorite ice cream (20-30 minutes at room temperature). Scoop a generous dollop of ice cream onto the flat side of one cookie. Gently top with another cookie, pressing down slightly to spread the ice cream to the edges.
5. Freeze: Wrap each assembled ice cream sandwich tightly in plastic wrap or wax paper. Place them back in the freezer for at least 2-4 hours, or until thoroughly firm. This step is essential for preventing melty messes and ensuring a joyful eating experience.
Nutritional Benefits & Advantages
While Ice Cream Sandwiches (Homemade) are undoubtedly a treat, making them yourself offers distinct advantages. You control the quality of ingredients, opting for organic butter, less refined sugars, or even dairy-free ice cream alternatives. Cocoa powder, a key ingredient in our cookies, is rich in antioxidants. Making your own also allows for portion control, enabling you to enjoy a delicious dessert without overindulging. Choosing high-quality ice cream, possibly even one incorporating whole grains or nuts from a specialized Cookie Dough Recipe, can also add minor nutritional benefits like healthy fats or fiber.
Tips, Variations & Cooking Advice
- Flavor Extravaganza: Experiment with different ice cream flavors! Mint chip, strawberry, coffee, or even a rich caramel swirl can transform your sandwiches.
- Textural Delights: Roll the edges of your finished sandwiches in sprinkles, mini chocolate chips, toasted nuts, or shredded coconut for added texture and visual appeal.
- Gluten-Free Option: Substitute all-purpose flour with a 1:1 gluten-free baking blend for allergen-friendly cookies.
- Dairy-Free Option: Use dairy-free butter and your favorite dairy-free ice cream for a vegan version.
- Perfectly Square Cookies: For a cleaner look, after baking, use a ruler and a sharp knife to trim the edges of your cooled cookies.
Common Mistakes to Avoid
- Overmixing the Dough: This can lead to tough cookies. Mix until just combined.
- Working with Warm Dough: Warm cookie dough spreads too much, resulting in flat, greasy cookies. Always chill your dough.
- Not Cooling Cookies Completely: Assembling sandwiches with warm cookies will immediately melt the ice cream. Patience is key!
- Not Freezing Long Enough: Insufficient freezing time will result in a messy, soft sandwich that’s hard to eat.
- Overcrowding Baking Sheets: Gives cookies less room to bake evenly.
Storage & Meal Prep Tips
Store your wrapped Ice Cream Sandwiches (Homemade) in an airtight container in the freezer for up to 2-3 weeks. This prevents freezer burn and keeps them fresh. They are perfect for meal prepping desserts; simply grab one from the freezer whenever a craving strikes. No reheating needed – just unwrap and enjoy!
Conclusion
Crafting Ice Cream Sandwiches (Homemade) is a delightful culinary adventure, offering a perfect blend of creativity and delicious indulgence. With this detailed guide, you have everything you need to produce perfect frozen treats that will impress friends and family alike. Whether you stick to the classic chocolate cookie and vanilla ice cream or venture into more exotic territories with a custom Cookie Dough Recipe, the joy of a homemade dessert is truly unparalleled. Don’t hesitate to share your creations and experiences in the comments below – happy baking (and freezing)!
FAQs
Q1: Can I make the cookies ahead of time?
A1: Yes, you can bake the cookies up to 3 days in advance. Store them in an airtight container at room temperature until ready to assemble.
Q2: What if my ice cream is too hard to spread?
A2: Let your ice cream sit at room temperature for about 20-30 minutes, or until it’s pliable enough to easily spread with an offset spatula.
Q3: Can I use store-bought cookie dough?
A3: Absolutely! Store-bought cookie dough can be a great shortcut, especially if you’re short on time. Just ensure it’s a sturdy dough that bakes into a firm cookie.
Q4: How do I prevent the ice cream from squirting out when I bite into it?
A4: Ensure the ice cream is firmly frozen before serving. Also, don’t overfill the sandwiches; a controlled amount of ice cream will help maintain integrity.
Q5: What’s the best way to cut the cookies evenly?
A5: Using a 2-inch cookie cutter is ideal for uniformity. If you don’t have one, you can use a knife and a ruler to cut square shapes once the rolled-out dough has been chilled.
Homemade Ice Cream Sandwiches
Ingredients
Equipment
Method
- Preheat your oven to 350°F (175°C) and line two baking sheets with parchment paper.
- In a medium bowl, whisk together the flour, cocoa powder, baking soda, and salt; set aside.
- In a large bowl, cream together the softened butter and granulated sugar until light and fluffy.
- Beat in the egg until well combined.
- Gradually add the dry ingredients to the wet ingredients, mixing until just combined.
- Drop spoonfuls of dough onto the prepared baking sheets, leaving space between each.
- Bake for 10-12 minutes, or until the edges are firm; let them cool completely on a wire rack.
- Once the cookies are completely cool, scoop a generous amount of softened ice cream onto the flat side of one cookie.
- Gently top with another cookie, pressing down slightly to spread the ice cream to the edges.
- If desired, roll the edges of the assembled sandwiches in sprinkles or chocolate chips.
- Place the assembled ice cream sandwiches on a baking sheet lined with parchment paper and freeze for at least 1 hour, or until firm.
- Serve your homemade ice cream sandwiches immediately or store them in an airtight, freezer-safe container for up to 2 weeks.