The Ultimate Guide to Making Authentic Hatch Green Chile at Home
Have you ever wondered why restaurant-quality green chile tastes so much better than anything you can buy in a can? The secret lies in using fresh, roasted Hatch Green Chile—a culinary treasure from New Mexico that transforms ordinary dishes into extraordinary experiences. Preparing this iconic ingredient at home not only saves money but also allows you to control the heat level, freshness, and flavor profile. Whether you’re a seasoned cook or a beginner, mastering Green Chile Recipes will elevate your cooking game and impress your family and friends. In this comprehensive guide, we’ll walk you through everything you need to know about selecting, roasting, and cooking with Hatch green chiles, ensuring you achieve restaurant-quality results every time.
Ingredients & Kitchen Tools
Essential Ingredients
– Fresh Hatch green chiles (2 lbs): Look for firm, glossy chiles with no soft spots. The heat level varies from mild to extra hot, so choose according to your tolerance.
– Garlic cloves (4-5): Adds depth and aromatic complexity to the chile.
– White onion (1 medium): Provides sweetness and balances the heat.
– Tomatoes (2 large): Roma or vine-ripened work best for acidity and body.
– Chicken or vegetable broth (2 cups): Use low-sodium to control salt levels.
– All-purpose flour (2 tbsp): For thickening; substitute with cornstarch for gluten-free.
– Vegetable oil (2 tbsp): Neutral oil like canola or avocado oil.
– Salt and black pepper: To taste.
– Cumin (1 tsp): Optional but adds earthy warmth.
Kitchen Tools
– Baking sheet with rim: For roasting chiles.
– Tongs: For handling hot chiles.
– Plastic or paper bags: For steaming chiles after roasting.
– Cutting board and sharp knife: For dicing.
– Large pot or Dutch oven: For simmering the chile.
– Immersion blender or regular blender: For achieving smooth consistency.
– Measuring cups and spoons: For accuracy.
Optional Substitutions
– For milder flavor: Remove all seeds and membranes before cooking.
– For vegan version: Use vegetable broth and omit any meat additions.
– For smoky flavor: Add 1 tsp smoked paprika or chipotle powder.
Prep Time & Cooking Schedule
Total Time: 1 hour 15 minutes
– Prep Time: 20 minutes (washing, roasting, peeling, dicing)
– Cooking Time: 45 minutes (simmering and thickening)
– Resting Time: 10 minutes (allows flavors to meld)
Planning Tip: Roast the chiles a day ahead and refrigerate them overnight. This makes peeling easier and intensifies the flavor. The chile sauce also tastes better the next day, so consider making it in advance for meal prep.
Step-by-Step Instructions
Step 1: Roast the Chiles
Preheat your oven to 425°F (220°C). Place the fresh Hatch Green Chile on a baking sheet in a single layer. Roast for 20-25 minutes, turning every 5 minutes with tongs, until the skin is blistered and charred. The chiles should look blackened but not burnt through.
Step 2: Steam and Peel
Transfer the roasted chiles to a plastic bag or bowl covered with plastic wrap. Let them steam for 10 minutes—this loosens the skin. Once cool enough to handle, peel off the charred skin using your fingers or a paper towel. Remove stems, seeds, and membranes if desired. Dice the chiles into small pieces.
Step 3: Sauté Aromatics
In a large pot, heat 2 tbsp vegetable oil over medium heat. Add diced onion and cook until translucent (about 5 minutes). Add minced garlic and cook for 1 minute until fragrant. This base is crucial for building flavor in any Green Chile Recipes.
Step 4: Build the Sauce
Add the diced tomatoes and cook for 3 minutes, stirring occasionally. Sprinkle flour over the mixture and stir constantly for 2 minutes to cook out the raw flour taste. Slowly pour in the broth while whisking to prevent lumps.
Step 5: Simmer and Season
Add the diced roasted chiles, cumin, salt, and pepper. Bring to a gentle boil, then reduce heat to low. Simmer uncovered for 30 minutes, stirring occasionally. The sauce should thicken and darken slightly. For a smoother texture, use an immersion blender to puree partially or fully.
Step 6: Adjust and Serve
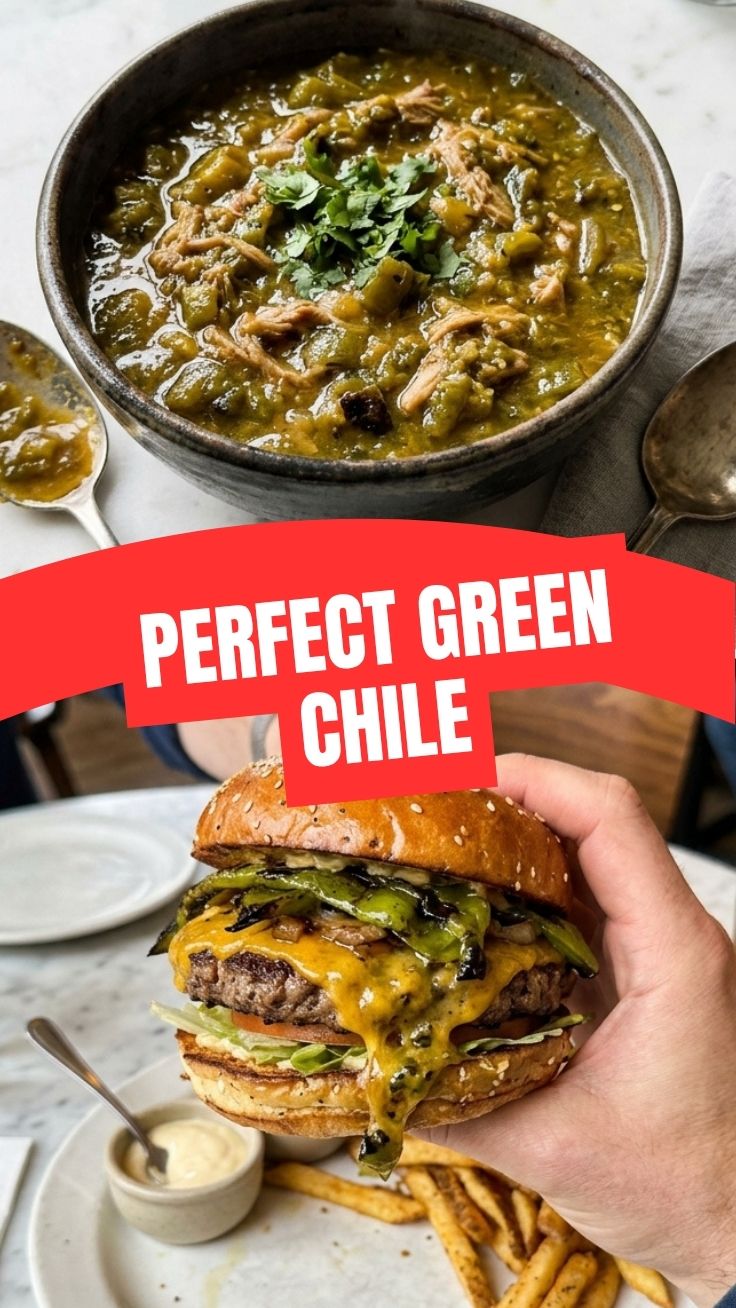
Taste and adjust seasoning. If too thick, add more broth. If too thin, simmer longer. Let rest for 10 minutes before serving. This chile is perfect for enchiladas, burritos, eggs, or as a standalone soup.
Nutritional Benefits & Advantages
Hatch green chiles are nutritional powerhouses packed with health benefits:
– Vitamin C: One chile provides more than 100% of your daily needs, boosting immunity.
– Capsaicin: The compound responsible for heat boosts metabolism and reduces inflammation.
– Fiber: Supports digestive health and promotes satiety.
– Low Calories: Only about 30 calories per cup, making it ideal for weight management.
– Antioxidants: Protects cells from damage and supports heart health.
This recipe is naturally gluten-free (if using cornstarch), low in fat, and can be made vegan. The slow simmering process preserves nutrients while developing deep, complex flavors.
Tips Variations & Cooking Advice
Flavor Variations
– Smoky Chipotle: Add 1-2 chipotle peppers in adobo sauce for a smoky kick.
– Creamy Version: Stir in ½ cup heavy cream or coconut milk at the end.
– Herb-Infused: Add fresh cilantro or oregano during the last 5 minutes.
Cooking Methods
– Slow Cooker: After roasting and peeling, combine all ingredients in a slow cooker and cook on low for 6-8 hours.
– Instant Pot: Sauté aromatics using the sauté function, then pressure cook on high for 10 minutes with natural release.
– Grill Method: Roast chiles directly on a gas grill for authentic smoky flavor.
Dietary Adaptations
– Gluten-Free: Replace flour with 1 tbsp cornstarch mixed with 2 tbsp cold water.
– Dairy-Free: Omit any dairy additions; the recipe is naturally dairy-free.
– Low-Sodium: Use no-salt-added broth and adjust salt at the end.
Common Mistakes to Avoid
1. Skipping the Roasting Step: Roasting is non-negotiable—it develops the signature smoky flavor and makes peeling easy.
2. Overcooking the Chiles: Burnt chiles taste bitter. Roast until blistered but not charred through.
3. Not Steaming Properly: Insufficient steaming makes peeling difficult and wastes flesh.
4. Adding Too Much Liquid: Start with less broth and add more as needed. Thin chile lacks body.
5. Underseasoning: Green chile needs adequate salt to balance acidity and heat. Taste and adjust gradually.
Storage & Meal Prep Tips
Refrigeration
Store in an airtight container for up to 5 days. The flavor improves after 24 hours as the spices meld.
Freezing
Freeze in portion-sized containers or freezer bags for up to 3 months. Leave ½ inch headspace for expansion. Thaw overnight in the refrigerator.
Reheating
Reheat gently on the stovetop over medium-low heat, stirring occasionally. Add a splash of broth or water if too thick. Avoid microwaving on high, which can cause uneven heating and texture changes.
Meal Prep Ideas
– Make a double batch and freeze half for busy weeknights.
– Use as a base for quick enchiladas, burrito bowls, or breakfast migas.
– Portion into ice cube trays for small servings to add to eggs or soups.
Conclusion
Mastering homemade Hatch Green Chile is a game-changer for anyone who loves bold, authentic Southwestern flavors. By following this guide, you’ve learned how to select, roast, and transform fresh chiles into a versatile sauce that elevates everything from enchiladas to breakfast dishes. The key takeaways are simple: roast thoroughly, steam properly, and season generously. Whether you’re exploring Green Chile Recipes for the first time or refining your technique, this recipe delivers consistent, restaurant-quality results. We encourage you to try this recipe, share your creations on social media, and experiment with variations to make it your own. Your taste buds—and your dinner guests—will thank you.
FAQs
1. Can I use canned Hatch green chiles instead of fresh?
Yes, but the flavor will be less smoky and vibrant. Use 2 cans (4 oz each) of diced green chiles and skip the roasting step. Add ½ tsp liquid smoke for a closer approximation.
2. How do I reduce the heat level?
Remove all seeds and membranes before dicing. You can also mix in a diced bell pepper or add a tablespoon of sugar to balance the heat.
3. Why is my chile sauce bitter?
Bitterness usually comes from over-roasted chiles or burnt garlic. Roast chiles until blistered but not blackened, and add garlic after onions are translucent to prevent burning.
4. Can I make this recipe without tomatoes?
Absolutely. Omit tomatoes and increase broth by 1 cup. Add 1 tbsp tomato paste for color and umami if desired.
5. How do I thicken the chile without flour?
Use cornstarch slurry (1 tbsp cornstarch + 2 tbsp cold water) or simmer longer to reduce naturally. You can also blend in a handful of raw cashews for creamy thickness.
Best way to grow Hatch Green Chile in 7 days
Ingredients
Equipment
Method
- Sanitize peat pots/seed trays and fill them with moist starting mix, then plant 2-3 seeds 1/4 inch deep in each pot and lightly cover with mix.
- Place trays on a heating mat set to 80-85°F (27-29°C) and cover with a plastic dome or cling wrap to maintain high humidity.
- Position grow lights 2-4 inches above the covered trays, ensuring they are on for 16 hours daily.
- Check moisture daily, misting to keep the soil consistently damp but not waterlogged, and ensuring proper ventilation to prevent mold.
- Once seedlings emerge (around day 3-5), remove the plastic cover and lower grow lights to within 1-2 inches of the plants, maintaining the heating mat temperature.
- After a couple of sets of true leaves appear, thin seedlings to one strong plant per pot by snipping weaker ones at the soil line.
- Begin fertilizing with a diluted liquid fertilizer (1/4 strength) every other day by day 5-6, continuing to monitor light, temperature, and moisture.
- By day 7, if seedlings have developed 2-3 sets of true leaves and strong root systems, transplant them into larger pots using well-draining potting mix, being careful not to disturb the roots.