Why You’ll Never Buy Cinnamon Rolls Again After Making These at Home
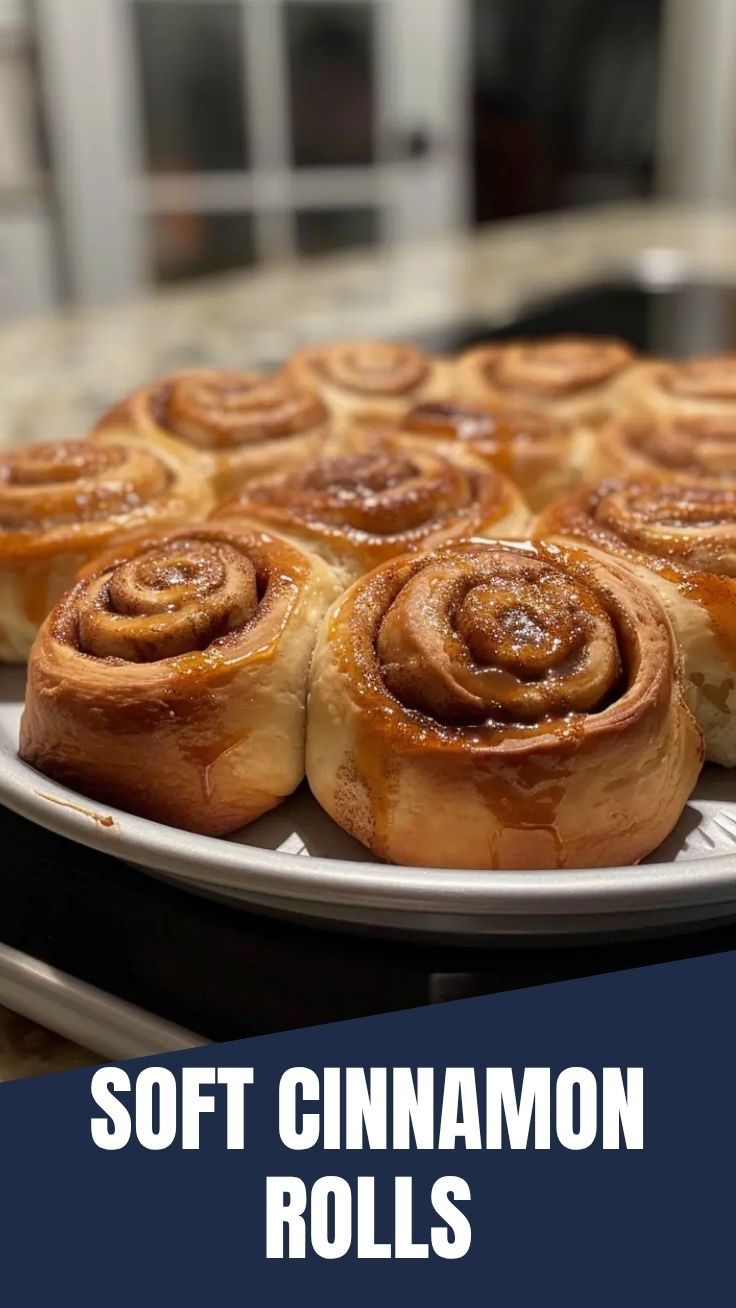
Have you ever pulled a tray of golden, swirled pastry from your own oven and wondered why you ever settled for canned dough? There’s something transformative about baking Cinnamon Rolls (Homemade) from scratch—the kitchen fills with warm, spiced air, and each bite delivers a tender, buttery melt-in-your-mouth experience that no store-bought version can replicate. Preparing them at home not only saves money but also gives you full control over ingredient quality, sweetness level, and texture. Whether you’re a seasoned baker or a complete beginner, mastering the art of homemade cinnamon rolls elevates your breakfast game and impresses everyone at the table. In this guide, you’ll discover everything you need to create bakery-worthy results every single time.
Ingredients & Kitchen Tools
Dough Ingredients
– All-purpose flour (3½–4 cups) – Provides structure; bread flour yields chewier rolls.
– Warm milk (1 cup, 110°F) – Activates yeast and adds tenderness.
– Granulated sugar (¼ cup) – Feeds yeast and balances flavor.
– Active dry yeast (2¼ teaspoons / 1 packet) – Creates rise; can substitute instant yeast.
– Unsalted butter (⅓ cup, melted) – Enriches dough; salted butter works if you reduce added salt.
– Egg (1 large, room temperature) – Adds richness and helps binding.
– Salt (½ teaspoon) – Enhances flavor and controls yeast activity.
Filling Ingredients
– Unsalted butter (¼ cup, softened) – Spreads smoothly for even cinnamon distribution.
– Brown sugar (½ cup, packed) – Provides deep molasses notes; coconut sugar works for a lower-glycemic option.
– Ground cinnamon (1½ tablespoons) – The star flavor; Ceylon cinnamon is milder, cassia is bolder.
Cream Cheese Frosting (Optional but Recommended)
– Cream cheese (4 oz, softened) – Tangy base; use dairy-free cream cheese for vegan version.
– Butter (2 tablespoons, softened) – Adds creaminess.
– Powdered sugar (1 cup) – Sweetens without graininess.
– Vanilla extract (½ teaspoon) – Elevates flavor complexity.
– Milk (1–2 tablespoons) – Adjusts consistency.
Essential Kitchen Tools
– Large mixing bowl
– Whisk or stand mixer with dough hook
– Rolling pin (preferably tapered)
– 9×13-inch baking dish (glass or metal)
– Kitchen scale (for precise flour measurement)
– Plastic wrap or clean kitchen towel
– Pastry brush (optional, for butter application)
Prep Time & Cooking Schedule
Understanding the timeline helps you plan your baking session without stress:
– Prep Time: 30 minutes (mixing, kneading, and shaping)
– First Rise (Proofing): 1–1½ hours at room temperature (75°F–80°F) until doubled in size
– Shaping Time: 15 minutes (rolling, filling, slicing)
– Second Rise: 45–60 minutes until puffy and touching each other
– Bake Time: 22–28 minutes at 350°F (175°C)
– Cooling Time: 10 minutes before frosting
Total Active Work: ~45 minutes
Total Time Including Rises: ~3 hours (can be extended overnight in the refrigerator)
Planning Tip: You can prepare the dough the night before. After shaping the rolls, cover tightly and refrigerate for up to 12 hours. The next morning, let them sit at room temperature for 30 minutes while the oven preheats, then bake as directed. This makes fresh cinnamon rolls achievable even on busy mornings.
Step-by-Step Instructions
Step 1: Activate the Yeast
In a small bowl, combine warm milk (110°F) and 1 tablespoon of sugar. Sprinkle the yeast on top and let it sit for 5–7 minutes until foamy. If the mixture doesn’t foam, your yeast may be dead—start over with fresh yeast.
Step 2: Mix the Dough
In a large bowl, whisk together 3½ cups flour, remaining sugar, and salt. Create a well and add the yeast mixture, melted butter, and egg. Stir until a shaggy dough forms. Transfer to a floured surface and knead for 8–10 minutes until smooth and elastic. The dough should be tacky but not sticky—add the remaining ½ cup flour only if necessary.
Step 3: First Rise
Place the dough in a lightly greased bowl, turning once to coat. Cover with plastic wrap and let rise in a warm, draft-free spot until doubled—about 1 hour.
Step 4: Prepare the Filling
In a small bowl, mix softened butter, brown sugar, and cinnamon until well combined and spreadable. Set aside.
Step 5: Roll and Fill
Punch down the risen dough and roll it on a lightly floured surface into a 12×18-inch rectangle (about ¼-inch thick). Spread the cinnamon filling evenly over the dough, leaving a ½-inch border on the long edges. Starting from the long side, tightly roll the dough into a log, pinching the seam to seal.
Step 6: Slice and Arrange
Using a sharp serrated knife or unflavored dental floss, cut the log into 12 equal rolls (about 1½ inches each). Place them in a greased 9×13-inch baking dish, cut-side up, leaving slight space between each. This is the crucial moment in any Cinnamon Rolls (Homemade) journey—proper spacing ensures they bake evenly without becoming doughy in the center. Follow a reliable Cinnamon Roll Recipe for consistent results.
Step 7: Second Rise
Cover the dish with plastic wrap and let the rolls rise for 45–60 minutes until puffy and touching each other.
Step 8: Bake
Preheat oven to 350°F. Bake for 22–28 minutes, rotating the dish halfway through. The rolls are done when golden brown on top and the center reaches 190°F. Internal temperature is more reliable than visual cues alone.
Step 9: Frost and Serve
While the rolls bake, beat cream cheese, butter, powdered sugar, and vanilla until smooth. Add milk to reach desired consistency. Let rolls cool for 10 minutes, then spread frosting generously while still warm.
Pro Tip: If your rolls brown too quickly, tent with foil during the last 10 minutes of baking. For extra gooey centers, reduce oven temperature to 325°F and extend baking time by 5 minutes.
Nutritional Benefits & Advantages
While cinnamon rolls are undeniably a treat, they offer surprising nutritional advantages when made from scratch:
– Cinnamon is rich in antioxidants and has anti-inflammatory properties. Studies suggest it may help regulate blood sugar levels and improve heart health.
– Whole ingredients mean no artificial preservatives, high-fructose corn syrup, or hydrogenated oils commonly found in store-bought versions.
– Controlled portions allow you to adjust sugar content—reduce brown sugar by ¼ cup or use a sugar substitute without sacrificing texture.
– Homemade creamed cheese frosting uses real cream cheese and butter, providing calcium and vitamin A, whereas store-bought frostings often rely on palm oil and stabilizers.
– Customizable nutrition – you can substitute whole wheat flour for up to half of the all-purpose flour to add fiber, or use Greek yogurt in the frosting for extra protein.
Tips Variations & Cooking Advice
Flavor Variations
– Maple Pecan – Replace brown sugar with maple sugar and add ½ cup chopped pecans to the filling.
– Chai Spice – Add 1 teaspoon ground cardamom, ½ teaspoon ginger, and ¼ teaspoon cloves to the filling.
– Chocolate Hazelnut – Spread ½ cup chocolate hazelnut spread over the dough before adding cinnamon filling.
– Savory Twist – Omit cinnamon and sugar; fill with shredded cheese, garlic butter, and herbs for pull-apart dinner rolls.
Dietary Adaptations
– Gluten-Free – Use a 1:1 gluten-free flour blend containing xanthan gum. Increase liquid by 2 tablespoons and let the dough rest 10 minutes before kneading.
– Dairy-Free – Substitute milk with almond or oat milk, butter with vegan butter, and cream cheese with a plant-based alternative.
– Low-Sugar – Use a monk fruit or allulose blend in place of sugar; the yeast may need slightly longer to activate.
Alternative Cooking Methods
– Air Fryer – Cook at 325°F for 10–12 minutes. Use a smaller dish or bake in batches.
– Slow Cooker – Line the insert with parchment, place rolls inside, and cook on low for 2–2½ hours. Check after 1½ hours.
– Make-Ahead Freezer – Freeze unbaked rolls after slicing. When ready, thaw in the refrigerator overnight, then let rise and bake.
Portion Changes
– For mini rolls, cut the log into 18 pieces and bake in a 9×9-inch dish for 18–22 minutes.
– For jumbo rolls, cut into 8 pieces and use a 10-inch round cake pan; bake 28–32 minutes.
Common Mistakes to Avoid
| Mistake | Solution |
|———|———-|
| Dense, heavy rolls | Over-kneading or too much flour. Knead until smooth and springy; weigh flour rather than scooping. |
| Dry, crumbly texture | Too much flour or overbaking. Use a kitchen scale and check internal temperature. |
| Yeast not rising | Milk too hot (kills yeast) or too cold (inactive). Use a thermometer for 110°F. |
| Filling leaks out | Rolls too tight or filling too wet. Spread filling evenly (not too thick) and seal seam firmly. |
| Uneven baking | Rolls cut inconsistently or dish too crowded. Use floss to cut even pieces; leave ½-inch space between rolls. |
| Soggy centers | Underbaking. Use a thermometer; center must reach 190°F. |
| Frosting too runny | Too much milk or too warm. Chill frosting for 10 minutes before spreading. |
Storage & Meal Prep Tips
Refrigeration
Store frosted cinnamon rolls in an airtight container at room temperature for 1 day or in the refrigerator for up to 5 days. Bring to room temperature before serving, or microwave for 10–15 seconds for a fresh-from-the-oven feel.
Freezing (Unbaked)
Prepare rolls through slicing, then place on a parchment-lined baking sheet and freeze until solid (about 2 hours). Transfer to a zip-top bag. To bake, thaw in the refrigerator overnight, let rise at room temperature for 45 minutes, then bake as directed.
Freezing (Baked)
Cool completely without frosting. Wrap individually in plastic wrap, then place in a freezer bag. They stay fresh for up to 3 months. When ready, thaw at room temperature, reheat in a 300°F oven for 10 minutes, then frost.
Reheating Instructions
– Oven: 300°F for 5–7 minutes (best for maintaining texture)
– Microwave: 15–20 seconds (speedy but can make the dough chewy)
– Air Fryer: 300°F for 3–4 minutes (crisps the edges nicely)
Conclusion
Mastering Cinnamon Rolls (Homemade) transforms a simple breakfast into an occasion worth waking up for. By following proper yeast activation, shaping techniques, and baking temperatures, you’ll achieve pillowy, spiral-swirled perfection every time. The beauty of this Cinnamon Roll Recipe lies in its flexibility—whether you customize the filling, adapt for dietary needs, or prep ahead for a holiday morning, the core techniques remain the same. Now it’s your turn to fill your kitchen with that irresistible aroma. Try this recipe this weekend, share your results with friends, and explore other breakfast bake recipes on the site for more from-scratch inspiration.
FAQs
1. Can I use instant yeast instead of active dry yeast?
Yes. Use the same amount (2¼ teaspoons). You can skip the proofing step and mix instant yeast directly with the flour. The first rise may be slightly shorter—check after 45 minutes.
2. Why are my cinnamon rolls dry and hard?
Likely over-baked or too much flour. Always measure flour by weight (500g for this recipe) or use the spoon-and-level method. Bake until internal temp hits 190°F, not a minute longer.
3. Can I substitute all-purpose flour with whole wheat?
You can replace up to 50% of the all-purpose flour with whole wheat. The rolls will be denser but more nutrient-dense. Add 2 tablespoons extra liquid to compensate for whole wheat’s absorbency.
4. My rolls didn’t rise properly. What went wrong?
The most common cause is expired yeast or liquid that was too hot (over 120°F kills yeast). Always check expiration dates and use a thermometer. Drafty kitchens also slow rising—place dough in a turned-off oven with the light on.
5. How do I make cinnamon rolls ahead for Christmas morning?
Follow the recipe through slicing, cover tightly, and refrigerate for up to 12 hours. In the morning, let them sit at room temperature for 30 minutes while the oven preheats, then bake as directed. Fresh-baked rolls with no early-morning work!
Best way to grow your Homemade Cinnamon Rolls dough
Ingredients
Equipment
Method
- Proof the yeast by combining warm milk, a pinch of sugar, and active dry yeast in a large bowl; let it sit for about 5-10 minutes until foamy.
- In a separate large bowl, whisk together the flour, remaining sugar, and salt, then create a well in the center of the dry ingredients.
- Pour the proofed yeast mixture into the well of the dry ingredients, add the eggs and melted butter, and mix until a shaggy dough forms.
- Turn the dough out onto a lightly floured surface and knead it for 8-10 minutes, or until it becomes smooth and elastic.
- Place the kneaded dough in a lightly oiled large bowl, turning it once to coat, then cover it with plastic wrap or a clean kitchen towel.
- Let the dough rise in a warm, draft-free place for 1-1.5 hours, or until it has doubled in size.
- Gently punch down the risen dough to release the air, then turn it out onto a lightly floured surface for shaping.
- Shape the dough as desired for your cinnamon rolls and place them on a baking sheet, then cover and let them rise again for another 30-45 minutes.
- Bake the cinnamon rolls in a preheated oven at 375°F (190°C) for 20-25 minutes, or until golden brown and cooked through.