The Ultimate Guide to Homemade Chocolate Brownies
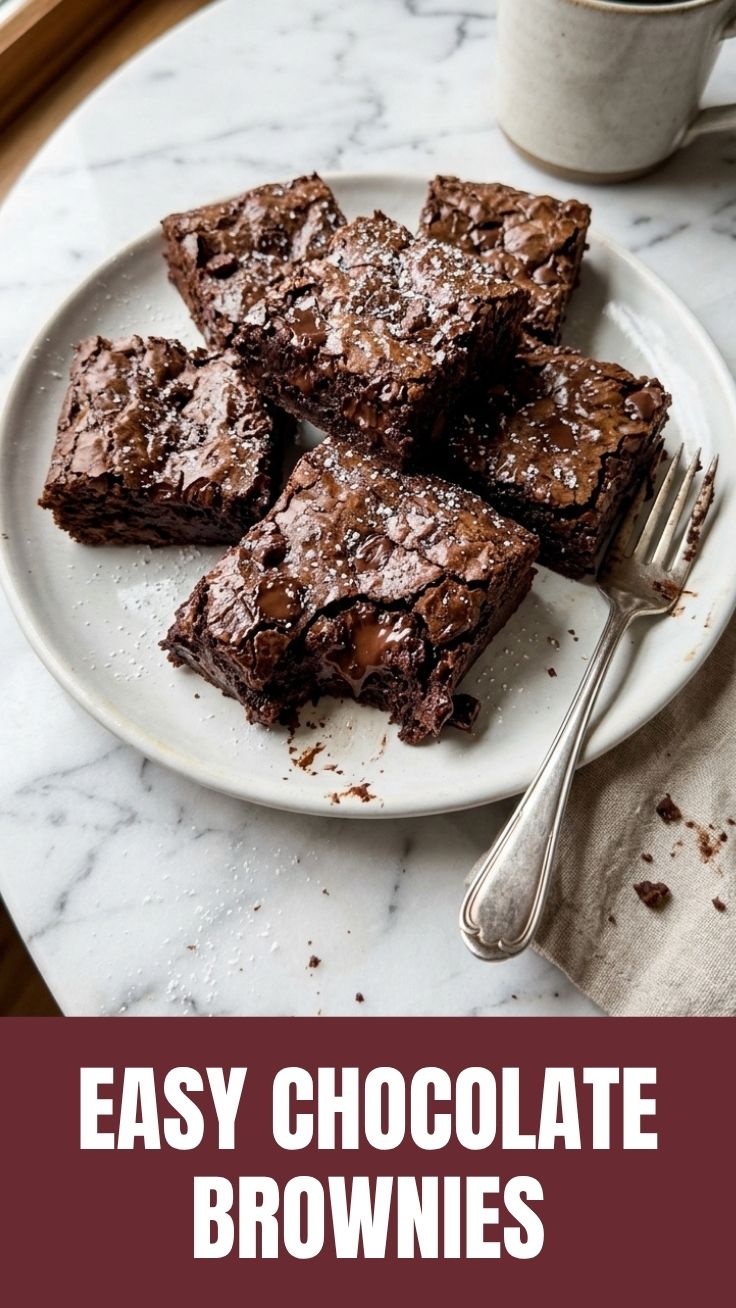
Is there anything more comforting than a tray of freshly baked homemade chocolate brownies filling your kitchen? This beloved dessert is a staple in home baking, but achieving that perfect balance of a crackly top and a gooey center requires more than just a box mix. By preparing from scratch, you gain complete control over the richness and sweetness, ensuring a truly indulgent treat. The secret to the best batch lies in understanding the science behind the bake to unlock the perfect Chocolate Brownies every time. Many home bakers struggle with dry edges or undercooked centers, but with the right technique, you can master the art of these decadent treats. The journey to achieving fudgy chocolate brownies starts with quality ingredients and a few pro-level tricks. Whether you are a novice or a seasoned baker, this guide will help you create a dessert that rivals any bakery.
—
Ingredients & Kitchen Tools
Every great recipe begins with the right components. Here is a detailed list of what you will need, along with helpful clarifications.
Ingredients:
– Unsalted butter (½ cup / 113 g): Provides richness and structure. Using unsalted allows you to control the sodium level. For a dairy-free version, swap with coconut oil or vegan butter.
– Bittersweet chocolate (6 oz / 170 g, chopped): The foundation of deep cocoa flavor. Use at least 60% cacao for balance. Semisweet or dark chocolate chips work as substitutes.
– Granulated sugar (1 cup / 200 g): Sweetens and contributes to the shiny, crackly crust. You can reduce to ¾ cup for less sweetness.
– Large eggs (2, at room temperature): Essential for structure and emulsification. Room-temperature eggs mix more evenly, creating a smoother batter.
– Vanilla extract (1 tsp): Enhances the chocolate aroma. A splash of almond or espresso extract offers a unique twist.
– All-purpose flour (½ cup / 60 g): Provides just enough structure without making the brownies cakey. For gluten-free, use a 1:1 gluten-free flour blend.
– Cocoa powder (2 tbsp): Intensifies the chocolate profile. Dutch-processed gives a smoother taste; natural cocoa adds a slightly tangy note.
– Salt (½ tsp): Balances sweetness and enhances overall flavor. Flaky sea salt on top after baking is a game-changer for contrast.
Kitchen Tools:
– 8×8-inch baking pan: The standard size for thick brownies. An aluminum pan distributes heat evenly. Line with parchment paper for easy removal.
– Mixing bowls: One heatproof for melting chocolate and butter, one medium for dry ingredients, and one large for the batter.
– Whisk and silicone spatula: A whisk aerates the egg-sugar mixture; a spatula folds in dry ingredients without overmixing.
– Double boiler or microwave: For gentle melting. A microwave works in 30-second bursts; a double boiler prevents scorching.
– Cooling rack: Allows air circulation to prevent soggy bottoms.
—
Prep Time & Cooking Schedule
Planning your time ensures stress-free baking. Here is the estimated timeline:
– Prep Time: 15 minutes (melting chocolate, measuring ingredients, lining the pan)
– Bake Time: 20–25 minutes at 350°F (175°C)
– Cooling Time: 2 hours at room temperature (essential for clean slices and fudgy texture)
– Total Active Time: 40 minutes
Context for scheduling: Start 3 hours before you plan to serve. The brownies need to cool completely to set their rich, dense structure. If you rush this step, they may fall apart or seem underbaked. For best results, bake them the evening before and let them rest overnight—they taste even better the next day as the flavors meld.
—
Step-by-Step Instructions
Follow these clear directions for flawless results. Pay attention to temperature and texture cues.
Step 1: Prepare the Pan and Preheat
Preheat your oven to 350°F (175°C). Line an 8×8-inch baking pan with parchment paper, leaving overhang on two sides for easy lifting. Lightly grease the paper to ensure no sticking.
Step 2: Melt Butter and Chocolate
In a heatproof bowl over simmering water (or microwave in 30-second bursts), melt together the butter and chopped chocolate. Stir until smooth and glossy. Remove from heat and let cool for 2 minutes.
Step 3: Combine Sugar and Eggs
In a large bowl, whisk together the sugar and room-temperature eggs until pale and slightly thickened—about 2 minutes by hand or 1 minute with an electric mixer. This aerates the mixture, contributing to that coveted crackly top.
Step 4: Mix in Chocolate and Vanilla
Pour the melted chocolate mixture into the egg-sugar mixture. Add the vanilla extract. Stir gently with a spatula until fully incorporated. The batter should look shiny and smooth.
Step 5: Fold in Dry Ingredients
In a small bowl, whisk together the flour, cocoa powder, and salt. Sift this over the chocolate batter. Fold gently using a spatula—only until no streaks of flour remain. Overmixing activates gluten, resulting in cakey rather than fudgy brownies. To achieve classic chocolate brownies, stop when the batter just comes together.
Step 6: Bake
Pour the batter into the prepared pan and smooth the top. Bake for 20–25 minutes. The brownies are done when the edges are set and pull away from the pan, and a toothpick inserted into the center comes out with a few moist crumbs attached—not wet batter. This cue ensures a dense, moist center, giving you that signature fudgy chocolate brownies texture.
Step 7: Cool and Slice
Place the pan on a cooling rack for 15 minutes, then lift the brownies out using the parchment overhang. Cool completely on the rack for at least 2 hours before slicing. Use a sharp knife, wiping it clean between cuts for neat edges.
—
Nutritional Benefits & Advantages
Beyond its irresistible taste, this dessert offers surprising nutritional value when consumed in moderation. Dark chocolate, a star ingredient, is rich in antioxidants—specifically flavonoids—which support heart health by improving blood flow and reducing blood pressure. Cocoa powder contains magnesium and iron, minerals essential for muscle function and oxygen transport.
Eggs provide high-quality protein and essential vitamins like B12 and riboflavin. By using unsalted butter and controlling salt, you can manage sodium intake more effectively than many store-bought mixes. Compared to pre-packaged alternatives, homemade brownies contain no preservatives, artificial flavors, or trans fats. For an even healthier twist, you can replace half the butter with unsweetened applesauce to reduce fat while keeping moisture. Each serving (a 2-inch square) provides about 150–180 calories, depending on substitutions, making it a treat you can enjoy without guilt.
—
Tips Variations & Cooking Advice
Customize this base recipe to suit your preferences or dietary needs. Here are creative twists:
– Flavor Variations: Stir in ½ cup of chopped nuts (walnuts or pecans) for crunch, 1 tsp of espresso powder for a mocha kick, or ½ cup of white chocolate chips for contrast.
– Dietary Adaptations: For a gluten-free version, follow the flour substitution mentioned earlier. To make dairy-free brownies, use coconut oil and dairy-free chocolate chips.
– Cooking Method Alternatives: If you prefer a cheesecake swirl, drop dollops of cream cheese mixture on top before baking and swirl with a knife. For extra indulgence, insert a layer of caramel in the middle.
– Texture Tweaks: For slightly fluffier brownies, add an extra egg yolk. For ultra-gooey centers, reduce bake time by 2 minutes. If you like a higher top, use a 7×7-inch pan for thicker bars.
Portion advice: Cut into 16 squares for standard servings, or 9 large squares for hearty handfuls. Always use a serrated knife for cleaner cuts.
—
Common Mistakes to Avoid
Avoid these pitfalls to ensure consistent, perfect results every time.
1. Overbaking: This is the number one culprit for dry, crumbly brownies. Always remove the pan when a toothpick shows moist crumbs, not clean. The residual heat will continue cooking the center.
2. Overmixing the Batter: Vigorous mixing develops gluten, turning fudgy brownies into cake-like ones. Fold gently and stop as soon as the flour disappears.
3. Using Cold Eggs: Cold eggs can seize the melted chocolate mixture, resulting in a grainy texture. Let eggs sit at room temperature for 30 minutes before starting.
4. Skipping the Parchment Paper: Without parchment, lifting brownies out of the pan is tricky, and they often break. Always line with overhang for easy removal.
5. Cutting Too Soon: Slicing warm brownies yields messy, gooey edges. Patience is essential—cool completely for clean slices and set structure.
—
Storage & Meal Prep Tips
Proper storage maintains freshness and texture. Follow these guidelines:
– Room Temperature Storage: Place brownies in an airtight container with a piece of bread. The bread absorbs excess moisture and keeps brownies soft for up to 3 days. Replace the bread daily.
– Refrigeration: For longer storage, wrap each brownie tightly in plastic wrap and place in a sealed container. They stay fresh for up to 1 week. Note: Refrigeration may harden the texture slightly, so let them sit at room temperature for 15 minutes before serving.
– Freezing: Brownies freeze beautifully. Wrap individually in plastic wrap, then place in a freezer-safe bag. They remain delicious for up to 3 months. To thaw, leave at room temperature for 1–2 hours.
– Reheating: For a warm, gooey experience, microwave a brownie for 10–15 seconds. Alternatively, warm in a 300°F oven for 5 minutes. Avoid overheating, which dries them out.
Meal prep tip: Bake a double batch and freeze half. You will always have a quick dessert ready for unexpected guests or cravings.
—
Conclusion
Mastering homemade chocolate brownies is a rewarding skill that elevates any baking repertoire. By understanding the science behind each step—from gentle mixing to precise bake times—you can consistently achieve a dense, fudgy interior with a delicate, crackly crust. This recipe empowers you to control ingredients, adapt to dietary needs, and create a treat that rivals any store-bought option. As you experiment with variations, remember that the beauty of homemade chocolate brownies lies in their versatility. Whether you prefer them plain or loaded with mix-ins, the journey is as satisfying as the destination. I encourage you to try this recipe, share your results with friends and family, or explore other decadent desserts on the blog. The perfect fudgy chocolate brownies await your oven, ready to become a beloved staple in your kitchen.
—
FAQs
1. Can I substitute cocoa powder for melted chocolate?
Yes, but adjust the recipe. For every 1 oz of chocolate, use 3 tbsp of cocoa powder plus 1 tbsp of butter or oil. This changes the fat content slightly, so expect a slightly less rich texture.
2. Why are my brownies too cakey?
Overmixing the batter after adding flour develops gluten, leading to a cake-like texture. Also, check your egg count—adding an extra egg white can reduce fudginess. Stick to the recipe’s mixing instructions.
3. How do I make them extra fudgy?
Increase the chocolate-to-flour ratio by adding 2 oz extra of melted chocolate. You can also reduce the flour to ⅓ cup and add one extra egg yolk for richness.
4. Can I use a different pan size?
Absolutely. For a 9×13-inch pan, double the recipe and bake for 25–30 minutes. For a 7×7-inch pan, use the same recipe for thicker brownies and increase bake time by 2–3 minutes. Adjust times based on pan material.
5. How do I fix brownies that are too dry?
If already baked, serve with a scoop of ice cream or drizzle of warm caramel sauce to add moisture. Next time, ensure you do not overbake and consider adding 2 tbsp of sour cream to the batter for extra tenderness.