The Ultimate Guide to Homemade Breadsticks: Crispy, Buttery, and Irresistible
Have you ever wondered why restaurant Breadsticks taste so much better than store-bought versions? The secret lies in fresh ingredients, proper technique, and a touch of love. Making homemade breadsticks not only fills your kitchen with an irresistible aroma but also gives you complete control over texture and flavor. Whether you’re pairing them with pasta, soup, or enjoying them as a snack, mastering this recipe will elevate your home cooking. These Breadsticks are surprisingly easy to prepare, and with a few pro tips, you’ll achieve that perfect golden crust and soft, airy interior every time.
Ingredients & Kitchen Tools
Ingredients
– 3 cups all-purpose flour – Provides structure; substitute with bread flour for chewier texture
– 1 packet active dry yeast (2 ¼ tsp) – Essential for leavening; instant yeast works too
– 1 cup warm water (110°F/43°C) – Activates yeast; too hot kills it, too cold slows it
– 2 tbsp olive oil – Adds moisture and tenderness; butter works for richer flavor
– 1 tsp salt – Enhances flavor and controls yeast activity
– 1 tbsp sugar – Feeds yeast and promotes browning
– 2 tbsp melted butter – For brushing tops; use vegan butter for dairy-free version
– Optional seasonings: garlic powder, dried oregano, parmesan cheese, sesame seeds
Kitchen Tools
– Large mixing bowl (glass or stainless steel preferred)
– Wooden spoon or spatula
– Measuring cups and spoons
– Kitchen towel or plastic wrap for covering
– Baking sheet (lined with parchment paper)
– Bench scraper or sharp knife for cutting dough
– Pastry brush for butter application
Prep Time & Cooking Schedule
– Prep Time: 15 minutes (active work)
– Rising Time: 60–90 minutes (first rise) + 30 minutes (second rise)
– Bake Time: 12–15 minutes at 400°F (200°C)
– Total Time: Approximately 2 hours
Planning Tip: Start the dough while preparing your main dish. The first rise is perfect for prepping sauces or salads. For busy weeknights, you can refrigerate the dough after the first rise for up to 24 hours—simply punch it down, wrap tightly, and continue when ready.
Step-by-Step Instructions
1. Activate the yeast: In a small bowl, combine warm water and sugar. Sprinkle yeast on top and let sit for 5–10 minutes until frothy. If no foam appears, your yeast may be expired—start fresh.
2. Mix the dough: In a large bowl, combine flour and salt. Add the yeast mixture and olive oil. Stir until a shaggy dough forms. Turn onto a floured surface and knead for 6–8 minutes until smooth and elastic. The dough should spring back when poked.
3. First rise: Place dough in a lightly oiled bowl, cover with a damp towel, and let rise in a warm spot (75–85°F) for 60–90 minutes until doubled in size.
4. Shape the breadsticks: Punch down the dough and divide into 12 equal pieces. Roll each piece into 6–8 inch ropes. Place on a parchment-lined baking sheet, leaving 1 inch between each. For perfectly uniform Breadsticks, use a ruler—this ensures even baking.
5. Second rise: Cover loosely with plastic wrap and let rise for 30 minutes. The dough should puff up noticeably.
6. Bake: Preheat oven to 400°F. For extra-crispy Garlic breadsticks, brush with melted butter mixed with minced garlic before baking. Bake for 12–15 minutes until golden brown. Rotate the pan halfway for even color.
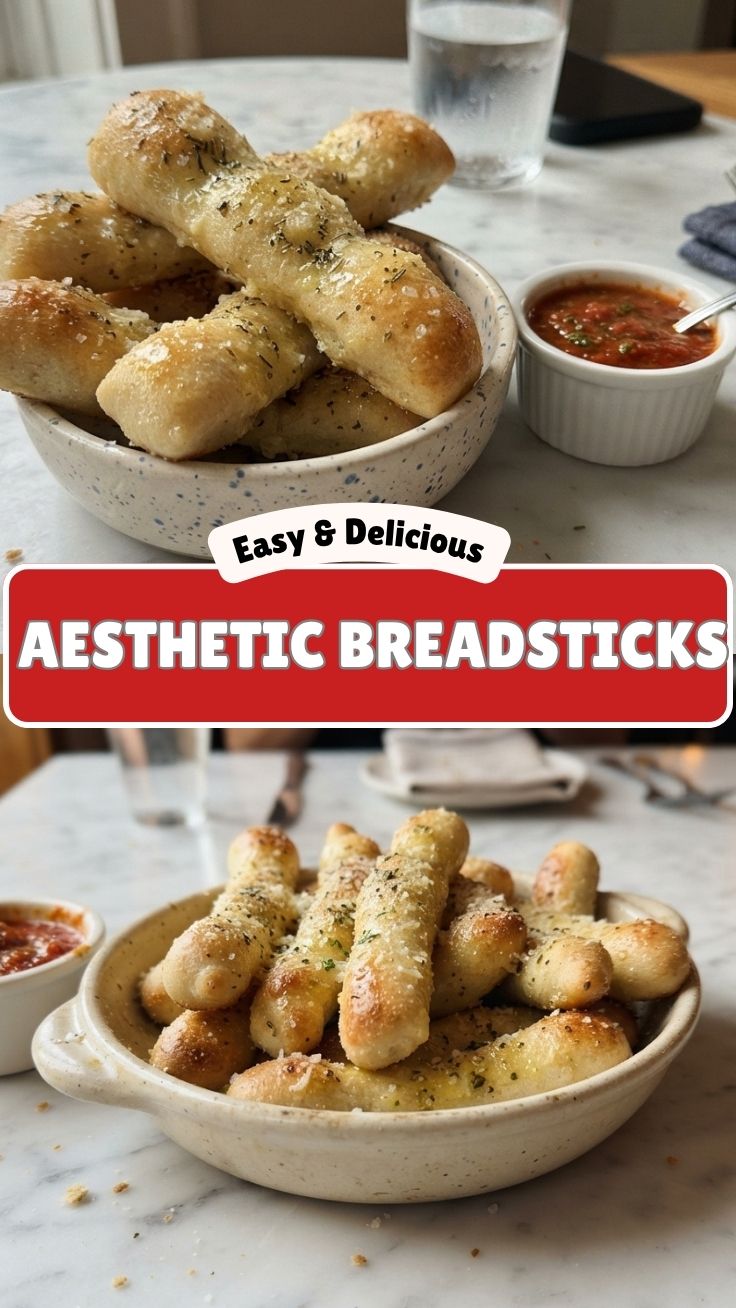
7. Finish: Brush with additional melted butter immediately after baking. Sprinkle with sea salt or parmesan while hot. Let cool on a wire rack for 5 minutes before serving.
Pro Texture Cue: Tap the bottom of a breadstick—it should sound hollow when fully baked. If it sounds dense, return to the oven for 2 more minutes.
Nutritional Benefits & Advantages
Homemade breadsticks offer surprising nutritional advantages over processed alternatives. One breadstick (about 1.5 oz) contains approximately 120 calories, 3g protein, 20g carbohydrates, and 3g fat—making them a balanced side dish. The olive oil provides heart-healthy monounsaturated fats, while the yeast fermentation breaks down phytic acid, improving mineral absorption. Unlike store-bought versions loaded with preservatives, your homemade Breadsticks contain no artificial additives. Pairing them with soup or salad creates a satisfying meal with fiber and complex carbohydrates. For a protein boost, sprinkle with flax seeds or hemp hearts before baking.
Tips Variations & Cooking Advice
Flavor Variations
– Classic Garlic: Add 2 minced garlic cloves to melted butter for brushing
– Herb-Infused: Mix 1 tsp dried rosemary, thyme, or basil into the dough
– Cheese Crust: Roll breadsticks in grated parmesan before the second rise
– Spicy Kick: Add ½ tsp red pepper flakes and 1 tsp smoked paprika
Cooking Methods
– Air Fryer: Bake at 350°F for 8–10 minutes, flipping halfway—perfect for small batches
– Skillet: Cook in a cast-iron pan over medium-low heat for 4–5 minutes per side (stovetop version)
Dietary Adaptations
– Gluten-Free: Use a 1:1 gluten-free flour blend with xanthan gum; reduce water by 2 tbsp
– Dairy-Free: Substitute olive oil for butter in brushing and use plant-based butter
– Whole Wheat: Replace 50% of all-purpose flour with whole wheat; add 2 tbsp extra water
Common Mistakes to Avoid
| Mistake | Problem | Solution |
|———|———|———-|
| Over-kneading | Tough, dense texture | Knead only until smooth; stop when dough springs back |
| Skipping second rise | Flat, dense breadsticks | Always let shaped dough rest for 30 minutes |
| Cold oven placement | Uneven browning | Preheat fully; place rack in middle position |
| Undersized portions | Dry, hockey puck sticks | Roll each piece to ½-inch thickness |
| Over-baking | Crusty exterior, dry interior | Check at 12 minutes; remove when golden, not dark brown |
| Using cold water | Yeast fails to activate | Always use warm water (110°F) for activation |
Storage & Meal Prep Tips
Short-Term Storage (Room Temperature)
– Store in an airtight container or bread box for up to 3 days
– Add a slice of fresh bread to the container to absorb excess moisture
– Avoid refrigeration—it dries out breadsticks faster
Freezing (Long-Term)
– Cool completely, then wrap individually in plastic wrap
– Place in a freezer-safe bag (remove air) for up to 3 months
– Label with date and type (plain, garlic, etc.)
Reheating Instructions
– Oven: 350°F for 5–7 minutes (best for crispy texture)
– Air Fryer: 300°F for 3 minutes (fast and crispy)
– Microwave: 15–20 seconds wrapped in damp paper towel (softens)
– Pro Tip: For day-old Garlic breadsticks, brush with water and reheat in a toaster oven—they’ll taste freshly baked
Conclusion
Mastering homemade Breadsticks is a game-changer for any home cook. With this simple recipe, you can create restaurant-quality sides that are fresher, healthier, and far more satisfying than anything from a box. The key takeaways: activate your yeast properly, give the dough adequate rise time, and don’t skip the butter brushing for that golden finish. Whether you’re making classic Breadsticks or experimenting with Garlic breadsticks, the result will be a warm, aromatic addition to any meal. We encourage you to try this recipe tonight—share your creations on social media with #HomemadeBreadsticks and tag us. Your family will thank you, and you’ll never buy store-bought again!
FAQs
1. Can I use instant yeast instead of active dry yeast?
Yes! Instant yeast doesn’t require activation in water—simply mix it directly with the dry ingredients. Reduce the rising time by about 15–20 minutes since instant yeast works faster.
2. Why did my breadsticks turn out hard and dry?
This usually happens from over-baking or using too much flour. Check your oven temperature with an oven thermometer—it might run hot. Also, measure flour using the spoon-and-level method (don’t scoop directly from the bag) to avoid compacted flour.
3. How can I make my breadsticks extra soft and fluffy?
Add 2 tbsp of milk powder to the dry ingredients and substitute ¼ cup of water with warm milk. This adds tenderness and richness. Also, ensure your dough is hydrated enough—if it feels stiff, add 1 tbsp of water at a time.
4. Can I use a bread machine for this recipe?
Absolutely! Use the dough cycle (no baking cycle). Add ingredients in the order recommended by your machine manufacturer. After the cycle completes, shape, second rise, and bake as directed.
5. How do I prevent my garlic breadsticks from burning?
Garlic burns easily due to its high sugar content. Mix garlic with melted butter and apply only during the last 5 minutes of baking, or sprinkle dried garlic powder instead of fresh minced garlic for more control.
Proven way to grow your own 7 Breadsticks
Ingredients
Equipment
Method
- In a small bowl, dissolve the yeast and sugar in warm water, then let it sit for about 5 minutes until it becomes foamy.
- In a large mixing bowl, combine the flour and salt. Add the yeast mixture and olive oil to the dry ingredients, mixing until a shaggy dough forms.
- Turn the dough out onto a lightly floured surface and knead for 5-7 minutes until it is smooth and elastic.
- Place the kneaded dough in a lightly oiled bowl, cover it with plastic wrap or a clean kitchen towel, and let it rise in a warm place for 1 to 1.5 hours, or until it has doubled in size.
- Gently punch down the risen dough and divide it into 7 equal portions. Roll each portion into a long, thin breadstick, approximately 8-10 inches in length.
- Arrange the shaped breadsticks on a baking sheet lined with parchment paper, cover loosely, and let them rise again for 20-30 minutes.
- Preheat your oven to 400°F (200°C). Bake the breadsticks for 15-20 minutes, or until they are golden brown and cooked through.
- Once baked, transfer the breadsticks to a wire rack to cool completely before serving.