Master the Art of the Perfect Homemade Pulled Sandwich
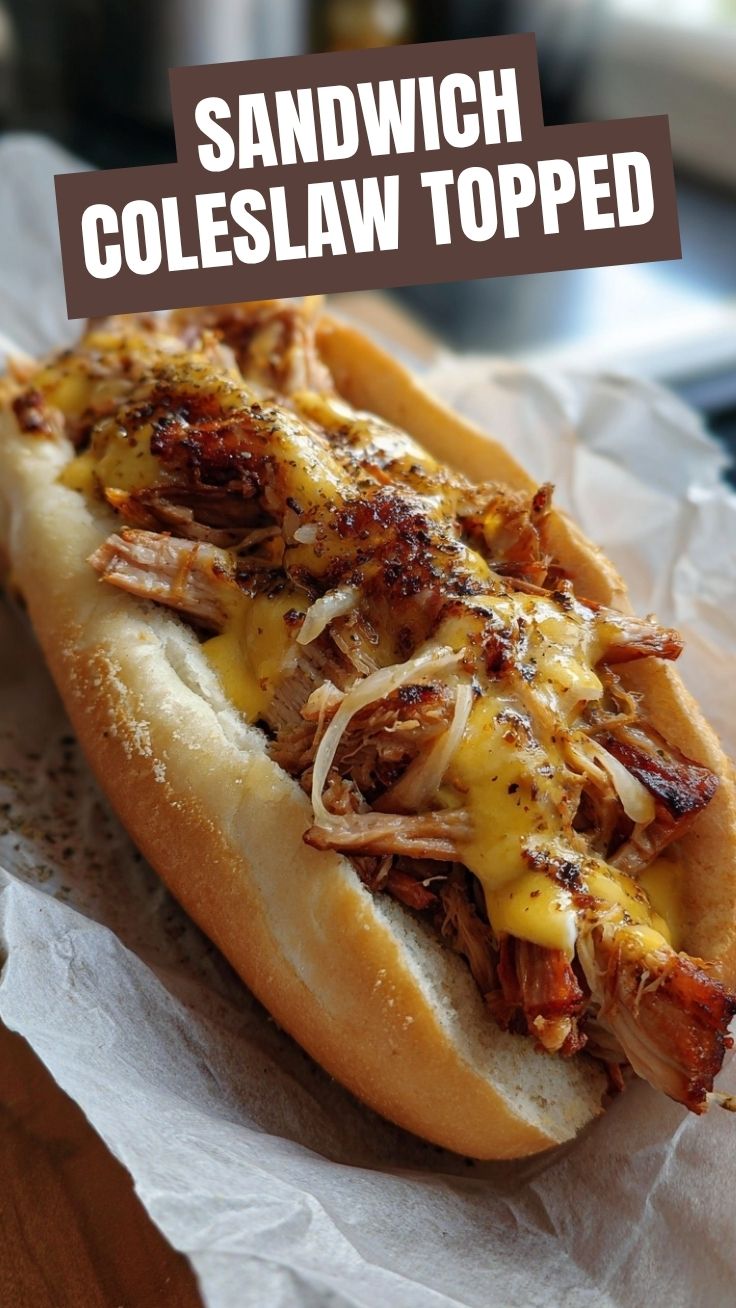
Ever dreamed of sinking your teeth into a Pulled Sandwich so tender and flavorful it practically melts in your mouth? While restaurant versions entice with their smoky aromas and succulent textures, preparing this culinary delight at home offers unparalleled satisfaction and control over ingredients. The magic truly happens when you craft every element yourself, from the perfectly seasoned meat to the carefully chosen Sandwich Spreads. This comprehensive guide will empower you to create a legendary Pulled Sandwich that will impress even the most discerning palates, allowing you to customize it to your exact preferences.
Ingredients & Kitchen Tools
- For the Pulled Meat (Chicken or Pork Shoulder):
2-3 lbs boneless, skinless chicken thighs or pork shoulder (boneless for convenience). Provides a rich, moist base for your pulled meat.*
2 tbsp olive oil. For searing and building flavor.*
1 large onion, chopped. Adds sweetness and depth.*
3 cloves garlic, minced. Aromatic essential for any savory dish.*
1 cup chicken or vegetable broth. Keeps the meat moist and tender during cooking.*
1/2 cup BBQ sauce (your favorite brand). The backbone of the flavor profile. Choose wisely!*
2 tbsp apple cider vinegar. Adds a crucial tang and helps tenderize the meat.*
1 tbsp brown sugar. Balances the acidity and enhances caramelization.*
1 tsp smoked paprika. Provides an authentic smoky flavor.*
1/2 tsp chili powder (optional, for a kick). Adds a subtle warmth.*
Salt and black pepper to taste. Essential for seasoning.*
- For the Sandwich Assembly:
Hamburger buns or brioche rolls. Soft yet sturdy enough to hold the generous filling.*
Coleslaw (homemade or store-bought). Adds a refreshing crunch and tangy contrast.*
Pickles or pickled onions. Offers a sharp, acidic counterpoint to the rich meat.*
- Kitchen Tools:
Large Dutch oven or slow cooker. Ideal for slow, even cooking of the meat.*
Shredding claws or two forks. For effortlessly pulling apart the cooked meat.*
Measuring cups and spoons. For accurate ingredient proportions.*
Cutting board and sharp knife. For prep work.*
Spatula or tongs. For searing and handling meat.*
Prep Time & Cooking Schedule
- Prep Time: 20-30 minutes (includes chopping vegetables and seasoning meat).
- Cooking Time:
* Dutch Oven: 2.5-3 hours (for chicken), 3-4 hours (for pork shoulder), or until fork-tender.
* Slow Cooker: 4-6 hours on high, or 6-8 hours on low (for both chicken and pork).
Resting Time: 10-15 minutes after cooking. Allows juices to redistribute for maximum moisture.*
- Total Time: Approximately 3-8 hours, depending on cooking method.
This recipe is perfect for a weekend cook-up or a make-ahead meal. The longer cooking times, especially with a slow cooker, ensure maximum tenderness and flavor development, making it an excellent option for busy weeknights when you want minimal hands-on time.
Step-by-Step Instructions
1. Prepare the Meat: Pat your chosen meat (chicken thighs or pork shoulder) dry with paper towels. Season generously with salt and black pepper.
2. Sear (Dutch Oven Method): Heat olive oil in a large Dutch oven over medium-high heat. Sear the meat on all sides until nicely browned. This crucial step deepens the flavor. Remove the meat and set aside. (Skip this step if using a slow cooker).
3. Sauté Aromatics: Add chopped onion to the Dutch oven (or slow cooker if not searing) and cook until softened, about 5-7 minutes. Add minced garlic and cook for another minute until fragrant.
4. Deglaze & Simmer: Pour in chicken or vegetable broth, apple cider vinegar, and brown sugar. Bring to a simmer, scraping up any browned bits from the bottom of the Dutch oven. Stir in BBQ sauce, smoked paprika, and chili powder (if using).
5. Cook the Meat: Return the seared meat to the Dutch oven, ensuring it’s partially submerged in the liquid. If using a slow cooker, place the meat directly into the slow cooker, then pour the sauce mixture over it.
6. Slow Cook:
* Dutch Oven: Cover and transfer to a preheated oven at 300°F (150°C) for the specified cooking time, or simmer gently on the stovetop over low heat.
* Slow Cooker: Cover and cook on high for 4-6 hours or low for 6-8 hours, until the meat is incredibly tender and easily shredded with a fork.
7. Shred the Meat: Once cooked, carefully remove the meat from the pot/slow cooker and transfer it to a large bowl. Using two forks or shredding claws, pull the meat apart into desired consistency.
8. Combine & Adjust Flavor: Return the shredded meat to the pot with the cooking liquid. Stir well to coat all the meat in the delicious sauce. Taste and adjust seasonings if necessary, adding more BBQ sauce, salt, or pepper to your preference. This ensures your Pulled Sandwich has the perfect flavor balance.
9. Assemble the Sandwich Spreads: Lightly toast your buns. Spoon a generous amount of pulled meat onto the bottom bun. Top with coleslaw and pickles. Crown with the top bun and serve immediately.
Nutritional Benefits & Advantages
This homemade Pulled Sandwich offers a balanced meal. Chicken or pork shoulder provides an excellent source of lean protein, essential for muscle repair and satiety. Onions and garlic contribute antioxidants and flavor without adding significant calories. By making your own BBQ sauce (or choosing a low-sugar option), you can control sugar and sodium levels. Adding coleslaw introduces fiber and vitamins, especially if made with fresh cabbage and a lighter, vinegar-based dressing.
Tips, Variations & Cooking Advice
- Flavor Boosts: For extra depth, add a splash of liquid smoke or a tablespoon of Worcestershire sauce to the cooking liquid.
- Spicier Kick: Incorporate a pinch of cayenne pepper or a chopped jalapeño with the onions for a fiery version.
- Vegetarian Option: Substitute chickpeas or jackfruit for the meat. Follow the same cooking process and sauce, adjusting cooking times accordingly.
- Gluten-Free: Ensure your BBQ sauce is gluten-free and serve on gluten-free buns or lettuce wraps.
- Dairy-Free: This recipe is naturally dairy-free (just ensure your buns are dairy-free if needed).
- Alternative Cooking Methods: While we focus on Dutch oven and slow cooker, this can also be done in an Instant Pot (follow manufacturer’s instructions for pressure cooking pulled meat).
Common Mistakes to Avoid
Undercooking the Meat: The biggest mistake! The meat must* be fork-tender to shred easily. If it’s tough, keep cooking.
- Not Searing: Skipping the searing step (for Dutch oven) means missing out on crucial flavor development and a deeper caramelized crust.
- Too Much Liquid: Don’t drown the meat. The liquid should come up about halfway to two-thirds of the way. You want to braise, not boil.
- Over-seasoning with BBQ Sauce: Start with the suggested amount and add more at the end after shredding, as taste can change.
- Ignoring Resting Time: Don’t pull the meat immediately after cooking. A short rest allows the juices to redistribute, resulting in a more succulent product.
Storage & Meal Prep Tips
Leftover pulled meat stores beautifully. Once cooled, transfer to an airtight container and refrigerate for up to 3-4 days. For longer storage, freeze the pulled meat in a freezer-safe bag or container for up to 3 months. Thaw overnight in the refrigerator before reheating.
To reheat, gently warm the pulled meat in a saucepan over medium-low heat, adding a splash of broth or water if it seems dry. You can also microwave in short bursts, stirring often. Assemble fresh sandwiches with newly toasted buns and fresh coleslaw for the best experience.
Conclusion
Crafting a homemade Pulled Sandwich is a rewarding culinary journey that promises tender, flavorful results every time. By following these steps and paying attention to the details, you’ll be able to create an unforgettable meal that rivals any restaurant offering. Remember, the true magic lies in the slow cooking process that transforms simple ingredients into a succulent dish, perfectly paired with your choice of Sandwich Spreads. We encourage you to try this recipe, experiment with your favorite BBQ sauces, and share your delicious creations! What are your go-to toppings for a perfect pulled sandwich?
FAQs
Q1: Can I use frozen meat?
A1: Yes, you can. However, ensure it’s fully thawed before beginning the recipe. Do not attempt to sear or slow cook frozen meat as it can cook unevenly.
Q2: What’s the best type of bun for a pulled sandwich?
A2: Brioche buns are popular for their slight sweetness and soft texture. Sturdy hamburger buns or even crusty rolls also work well. A toasted bun prevents sogginess.
Q3: How can I make my own BBQ sauce?
A3: A basic homemade BBQ sauce typically combines ketchup, apple cider vinegar, brown sugar, Worcestershire sauce, smoked paprika, garlic powder, onion powder, and a pinch of cayenne. Simmer until thickened.
Q4: My meat isn’t shredding easily; what went wrong?
A4: This usually means the meat needs more cooking time. Continue cooking until it’s falling apart with minimal effort. Don’t rush the process!
Q5: Can I prepare the pulled meat ahead of time for a party?
A5: Absolutely! The pulled meat can be cooked, shredded, and stored in the refrigerator for up to 3-4 days. Gently reheat on the stovetop or in a slow cooker on low before serving.
How to grow Pulled Sandwich in 20 minutes
Ingredients
Equipment
Method
- Heat the cooked pulled meat in a skillet over medium heat until warmed through, about 5 minutes.
- Stir in the BBQ sauce and continue to cook for another 2-3 minutes, allowing the sauce to meld with the meat.
- Lightly toast the hamburger buns. This can be done in a toaster, oven, or on a dry skillet.
- Divide the pulled meat mixture evenly among the toasted buns.
- If desired, top each sandwich with coleslaw and pickle slices.
- Serve immediately and enjoy your quick pulled sandwich!