The Ultimate Guide to Making the Perfect Classic Apple Pie at Home
Have you ever wondered why store-bought pies never quite capture that magical blend of buttery crust and spiced apple filling? The answer lies in the love and technique of homemade baking. Preparing an Apple Pie (Classic) from scratch isn’t just about following a recipe—it’s about creating a sensory experience that fills your kitchen with warmth and nostalgia. In this guide, you’ll discover not only how to achieve that golden, flaky crust and perfectly tender filling, but also the secrets behind a truly memorable classic apple pie. Whether you’re a seasoned baker or a beginner, learning this timeless dessert will elevate your home baking game and impress every guest. Plus, I’ll share a cherished Grandma’s apple pie recipe variation that brings a touch of family tradition to each slice.
Ingredients & Kitchen Tools
To create a stunning classic apple pie, you’ll need the following ingredients and equipment. Each item plays a vital role in texture and flavor, so I’ve added brief clarifications.
For the pie crust (double crust):
– 2½ cups all-purpose flour (use a kitchen scale for accuracy; 312g)
– 1 teaspoon salt (fine sea salt preferred)
– 1 tablespoon granulated sugar (a touch of sweetness for the dough)
– 1 cup cold unsalted butter (cut into cubes; chilling is key for flakiness)
– 6–8 tablespoons ice water (add gradually until dough holds together)
For the apple filling:
– 6–7 medium apples (mix Granny Smith for tartness and Honeycrisp for sweetness)
– ¾ cup granulated sugar (adjust based on apple sweetness)
– 2 tablespoons all-purpose flour (thickening agent)
– 1 tablespoon lemon juice (prevents browning and adds brightness)
– 1½ teaspoons ground cinnamon (classic spice)
– ¼ teaspoon ground nutmeg (freshly grated if possible)
– ¼ teaspoon salt
Kitchen tools:
– 9-inch pie dish (glass or ceramic for even baking)
– Rolling pin (preferably wooden)
– Pastry blender or two forks (for cutting butter into flour)
– Large mixing bowls, measuring cups and spoons
– Parchment paper (for easy cleanup)
– Sharp knife or apple peeler
– Pastry brush (for egg wash)
– Cooling rack
Optional substitutions:
– Gluten-free flour blend (use a 1:1 ratio with xanthan gum for crust)
– Coconut oil or vegan butter (swap in equal weight for dairy-free crust)
– Brown sugar instead of granulated (adds deeper, caramel-like flavor)
Prep Time & Cooking Schedule
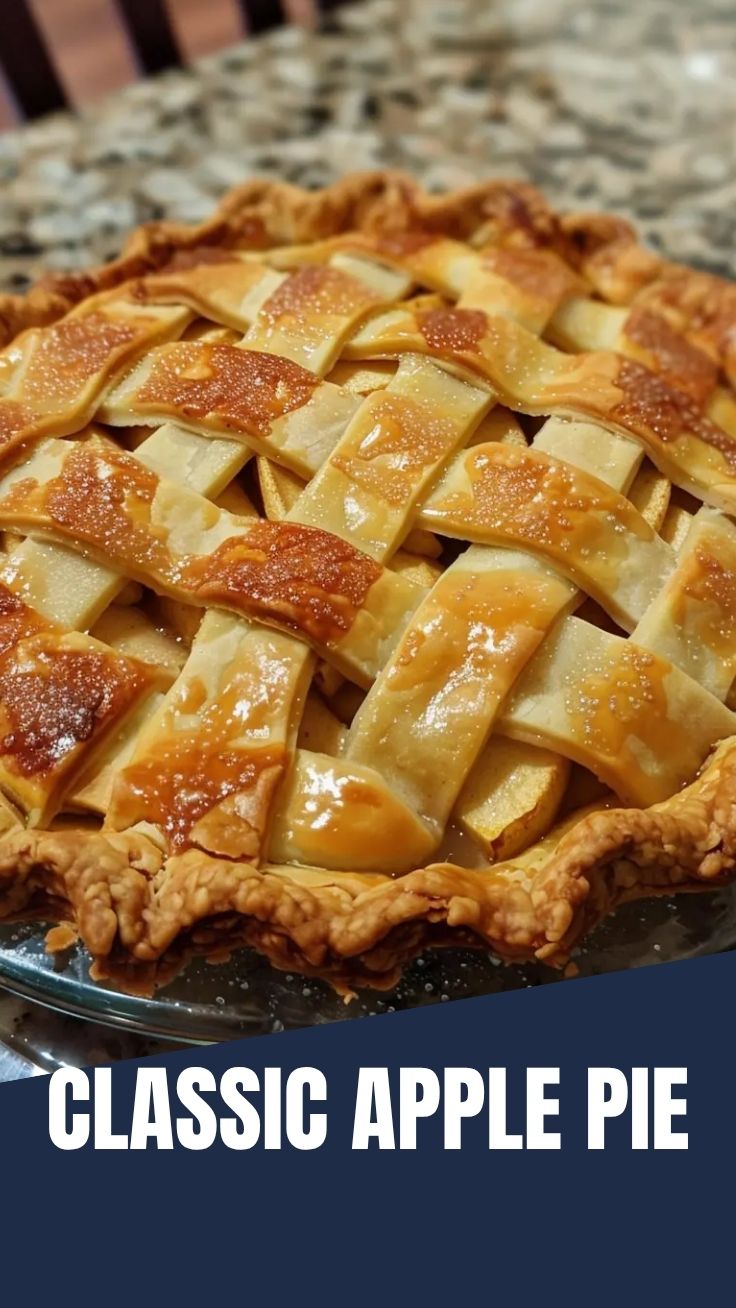
Planning your time ensures a stress-free baking session. Here’s a realistic timeline:
– Prep time: 30–40 minutes (making dough, peeling and slicing apples)
– Chill time (dough): At least 1 hour (or overnight for better flavor)
– Assembling the pie: 10–15 minutes
– Baking time: 50–60 minutes (including initial 20 minutes at 400°F, then reduce to 375°F)
– Cooling time: At least 2 hours (essential for the filling to set; don’t skip this!)
Pro tip: Start the dough the night before. Cold dough is easier to roll and yields a flakier crust. Also, prep your apples just before assembling to prevent browning. This classic apple pie can be made a day ahead—it actually tastes better after resting overnight.
Step-by-Step Instructions
Follow these steps to achieve a bakery-worthy classic apple pie. I’ve included practical tips on temperature, texture, and seasoning to help you nail every stage.
1. Make the crust: In a large bowl, whisk flour, salt, and sugar. Add cold butter cubes. Using a pastry blender, cut the butter into the flour until pea-sized crumbs form (some larger pieces are fine). Drizzle ice water over mixture, 1 tablespoon at a time, tossing with a fork until dough just comes together. Divide in half, flatten into discs, wrap in plastic, and refrigerate for at least 1 hour.
2. Prepare the filling: While dough chills, peel, core, and slice apples into ¼-inch thick wedges. In a large bowl, toss apples with lemon juice, sugar, flour, cinnamon, nutmeg, and salt. Let macerate for 10 minutes. The flour will absorb excess juice, preventing a soggy bottom.
3. Roll the crust: On a lightly floured surface, roll one disc to a 12-inch circle (about ⅛-inch thick). Gently transfer to pie dish, pressing into edges. Trim overhang to ½ inch. Refrigerate while rolling the top crust.
4. Assemble the pie: Pour apple filling into the bottom crust, mounding slightly in the center. Dot with 1 tablespoon butter cubes (optional but adds richness). Roll the second disc and place over filling. Crimp edges decoratively (use your fingers or a fork). Cut 4–5 vents on top for steam to escape.
5. Apply egg wash and bake: Beat one egg with 1 tablespoon water. Brush over top crust. Sprinkle with coarse sugar for sparkle. Place pie on a baking sheet (catches drips). Bake at 400°F for 20 minutes, then reduce to 375°F and bake 30–35 more minutes, until crust is deep golden and filling bubbles. Temperature control: If edges brown too quickly, cover with foil tent after 25 minutes. Texture cue: The filling should be visibly thick and bubbly—not watery—when done.
6. Cool completely: Transfer to a wire rack. Let it rest at least 2 hours before slicing. This sets the juices, preventing a runny pie. For extra flavor, prepare Grandma’s apple pie recipe variation by adding a pinch of allspice and swapping half the sugar for maple syrup—bake as directed.
Nutritional Benefits & Advantages
Beyond its irresistible taste, this classic apple pie offers some surprising nutritional perks—especially when you control the ingredients. Apples are rich in dietary fiber (especially pectin), vitamin C, and antioxidants like quercetin. Using a whole-grain alternative or reducing sugar (apples are naturally sweet) makes this dessert more diet-friendly. The butter provides fat-soluble vitamins A and D, while cinnamon may help regulate blood sugar. Compared to store-bought pies, your homemade version has no preservatives or hydrogenated oils. For a lighter slice, serve with unsweetened Greek yogurt instead of ice cream.
Tips, Variations & Cooking Advice
– Flavor variations: Add ½ cup dried cranberries or chopped walnuts for texture. Try a pinch of ginger or cardamom for a twist.
– Ingredient swaps: Use pears or nectarines for a different fruit profile. Replace all-purpose flour with cornstarch (use 1 tablespoon instead of 2) for a clearer glaze.
– Alternative cooking methods: Make mini hand pies (bake at 375°F for 18–22 minutes) or a galette (free-form tart) for a rustic look.
– Dietary adaptations: For gluten-free, use a certified GF flour blend with a binder. For dairy-free, replace butter with coconut oil or vegan butter and use a plant-based egg wash (non-dairy milk + maple syrup).
– Portion changes: Double the recipe for a 10-inch deep-dish pie or large crowd; adjust baking time by 10 minutes.
Common Mistakes to Avoid
1. Soggy bottom crust. Solution: Pre-bake (blind bake) the bottom crust for 10 minutes at 400°F before adding filling, or brush the bottom with egg white.
2. Tough pastry. Solution: Don’t overwork the dough. Handle as little as possible, and keep everything cold.
3. Filling too runny. Solution: Let the filling sit after tossing with flour/sugar—the starch needs time to activate. Use a mix of firm apples like Granny Smith.
4. Burnt edges. Solution: Use a pie shield or aluminum foil folded over the rim during the last 20 minutes.
5. Crust shrinking. Solution: Let the dough rest in the fridge before rolling, and avoid stretching it into the pan. Chill the assembled pie for 15 minutes before baking.
Storage & Meal Prep Tips
Refrigeration: Store leftover pie (covered loosely with foil) at room temperature for up to 2 days or in the fridge for up to 5 days. Freezing: Wrap the fully baked, cooled pie tightly in plastic wrap and then foil. Freeze for up to 3 months. Reheat directly from frozen at 350°F for 20–25 minutes, covering edges if needed. Reheating slices: Microwave for 30 seconds, then finish in a toaster oven at 350°F for 5 minutes to restore crispness. For make-ahead prep, you can freeze the unbaked pie—bake directly from frozen, adding 15–20 extra minutes.
Conclusion
Baking a homemade classic apple pie is more than a recipe—it’s a craft that rewards patience with an unforgettable dessert. From the crisp, buttery crust to the tender, spiced apples, every slice tells a story of tradition and love. I encourage you to try this method and share your results. And if you’re craving a taste of nostalgia, don’t forget to check out that special Grandma’s apple pie recipe for a cozy twist. Whether served warm with vanilla ice cream or cold from the fridge, this pie will quickly become your signature. Happy baking!
FAQs
1. Can I use pre-made pie crust for this recipe?
Yes, store-bought crusts work in a pinch. However, homemade crust yields a flakier, more buttery texture. If using pre-made, skip the blind-baking step, but brush the bottom with egg white to avoid sogginess.
2. What’s the best apple variety for a classic apple pie?
A mix of Granny Smith (tart, firm) and Honeycrisp or Fuji (sweet, juicy) gives balanced flavor and structure. Avoid Red Delicious—they turn mushy.
3. How do I know when my pie is fully baked?
Look for a deep golden-brown crust, visible bubbling through the vents, and an internal temperature of 195°F–200°F in the filling (use an instant-read thermometer).
4. Why did my pie filling turn out watery?
You may have used too many juicy apples or not enough thickener. Try adding an extra tablespoon of flour or letting the filling sit for 15 minutes before assembling.
5. Can I make this gluten-free or dairy-free?
Absolutely. Use a 1:1 gluten-free flour blend with xanthan gum for the crust, and replace butter with cold vegan butter or solid coconut oil. Adjust baking time slightly—gluten-free crusts brown faster.
Best way to make a perfect Apple Pie (Classic)
Ingredients
Equipment
Method
- In a large bowl, whisk together flour, sugar, and salt, then cut in the cold, cubed butter until the mixture resembles coarse crumbs.
- Gradually add ice water, mixing until the dough just comes together, then divide it in half, flatten each into a disk, wrap in plastic, and refrigerate for at least 30 minutes.
- In a large bowl, combine sliced apples with both sugars, flour, cinnamon, nutmeg, and lemon juice, ensuring the apples are evenly coated.
- On a lightly floured surface, roll out one disk of dough into a 12-inch circle and carefully transfer it to a 9-inch pie dish.
- Pour the apple filling into the crust-lined pie dish, dotting the top with the small pieces of butter.
- Roll out the second disk of dough and either place it over the filling, crimping the edges to seal, or cut into strips for a lattice top.
- If desired, whisk the egg and water for an egg wash, then brush it over the top crust and sprinkle with a tablespoon of granulated sugar.
- Preheat your oven to 425°F (220°C); place the pie on a baking sheet to catch any drips, then bake for 15 minutes at this temperature.
- Reduce the oven temperature to 375°F (190°C) and continue baking for an additional 35-45 minutes, or until the crust is golden brown and the filling is bubbly.
- Allow the pie to cool completely on a wire rack for at least 2-3 hours before serving to let the filling set.