Here is a comprehensive, SEO-optimized blog post tailored to your exact structural and keyword requirements.
—
Is there anything more universally satisfying than the clatter of a golden, crispy cutlet hitting a bed of rich marinara, crowned with a blanket of bubbling, molten mozzarella? For decades, this beloved dish has bridged the gap between casual family dinners and five-star restaurant cravings. While it might seem like a menu item best left to the professionals, learning to perfect this recipe at home is surprisingly straightforward. Not only does it allow you to control the quality of the ingredients, but it also turns an ordinary weeknight into a culinary event. By mastering the techniques outlined here, you will be able to produce a version of Chicken Parmesan that rivals any trattoria, celebrating the rustic, comforting essence of Italian cuisine right from your own stove.
Ingredients & Kitchen Tools
To ensure a seamless cooking experience, gather your mise en place beforehand. Here is exactly what you need to get that perfect crunch and savory depth:
– 2 large boneless, skinless chicken breasts (about 1.5 lbs total). Clarification: Pound these to an even ½-inch thickness for uniform cooking.
– 1 cup all-purpose flour (for dredging).
– 2 large eggs, beaten (this acts as the glue for the crust).
– 1 ½ cups Italian-style breadcrumbs (or Panko for extra crunch).
– 1 cup grated Parmesan cheese (freshly grated works vastly better than pre-shredded for flavor).
– 8 oz low-moisture mozzarella, sliced or shredded.
– 1 ½ cups high-quality marinara sauce (look for a low-sugar variety).
– 1 tsp garlic powder, 1 tsp dried oregano, salt & black pepper.
– ½ cup neutral oil (vegetable or canola for frying).
– Fresh basil leaves for garnish.
Kitchen Tools: A meat mallet or rolling pin, three shallow bowls for the dredging station, a large heavy-bottomed skillet, a wire rack, tongs, and a 9×13-inch baking dish.
Prep Time & Cooking Schedule
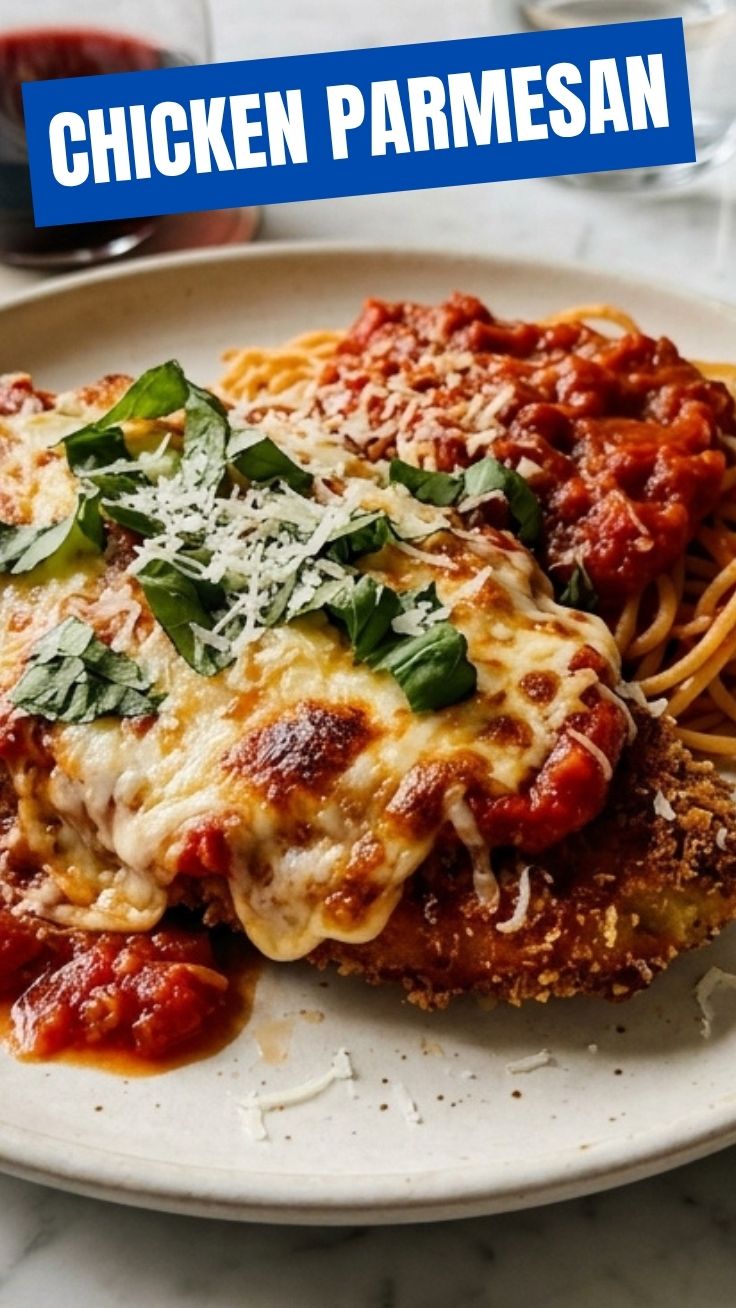
Time management is key in the kitchen. This recipe requires roughly 20 minutes of active preparation, followed by 20 minutes of cooking time, and a critical 5-minute resting period after baking. In total, you are looking at about 45 minutes from start to finish. Whether you are squeezing this in on a busy Tuesday or taking your time during a lazy Sunday, this schedule is designed to be forgiving. Pro tip: Set up your dredging station first and preheat your oven to 400°F (200°C) early to avoid a last-minute rush.
Step-by-Step Instructions
1. Prepare the Cutlets: Place the chicken breasts between two sheets of plastic wrap and pound them to an even ½-inch thickness. Season both sides generously with salt, pepper, and garlic powder.
2. Set the Assembly Line: Set up three shallow dishes. In the first, combine the flour with a pinch of salt and pepper. In the second, whisk the eggs. In the third, mix the breadcrumbs with the grated Parmesan and dried oregano.
3. Dredge Properly: Working one piece at a time, coat the chicken in the flour (shaking off excess), dip it into the egg wash until fully coated, and then press it firmly into the breadcrumb mixture. Ensure a complete, even crust.
4. Sear to Golden Perfection: Heat the oil in a large skillet over medium-high heat until it shimmers (around 350°F). Carefully lay the cutlets in the pan. Cook for 3–4 minutes per side until deeply golden brown and crispy. The crust should feel firm to the touch. Transfer the cutlets to a wire rack to drain.
5. Bake and Finish: Spread a thin layer of marinara sauce on the bottom of the baking dish. Place the seared chicken on top. Ladle the remaining sauce over the chicken, avoiding soaking the edges of the crust to retain crispness. Top generously with mozzarella slices.
6. Melt and Broil: Bake in the preheated oven for 10 minutes, or until the cheese is melted and the internal temperature of the chicken reaches 165°F. Switch the oven to broil for the final 2 minutes to achieve a bubbly, bronzed cheese topping.
By following these restaurant secrets, you will create a succulent, state-of-the-art rendition of Chicken Parmesan that honors the rustic soul of Italian cuisine—with a satisfying crunch in every single bite.
Nutritional Benefits & Advantages
This dish isn’t just a comfort food indulgence; it offers legitimate nutritional perks. Chicken breast serves as an exceptional source of lean protein, providing over 40 grams of protein per serving, which is vital for muscle synthesis and satiety. The marinara sauce supplies a healthy dose of lycopene, an antioxidant that studies suggest may support heart health and reduce inflammation—and cooking the tomatoes actually increases its bioavailability. Furthermore, the calcium and phosphorus from the Parmesan and mozzarella contribute to strong bone density. When portioned correctly (pairing it with a side salad or sautéed spinach instead of a mountain of pasta), it easily fits into a balanced, macro-conscious diet.
Tips Variations & Cooking Advice
The beauty of this classic lies in its versatility. To keep things dietary-friendly, you can execute a gluten-free version by swapping the flour for almond flour or a 1:1 gluten-free baking blend, and using gluten-free Panko breadcrumbs. For a dairy-free adaptation, substitute the cheese with high-quality vegan mozzarella and nutritional yeast in the breading. If you want to turn up the heat, incorporate a teaspoon of red pepper flakes into the sauce or swap the chicken for thin slices of eggplant (Eggplant Parmigiana) for a vegetarian twist. To take the flavor profile into a more rustic realm, add a splash of balsamic glaze over the top just before serving, or bake the chicken directly on top of the marinara to create a pseudo-braised effect.
Common Mistakes to Avoid
– Soggy Crust: This is the most frequent pitfall. It usually happens when the oil is not hot enough, causing the chicken to steam instead of fry. Verify the temperature with a thermometer (a drop of breadcrumbs should sizzle immediately).
– Curdled or Greasy Cheese: Broiling for too long can leave you with rubbery cheese. Watch the oven diligently during the broiling step—it can go from golden to burnt in seconds.
– Unevenly Cooked Chicken: Failing to pound the chicken breasts to an even thickness results in a dry exterior and undercooked center. A uniform ½-inch thickness guarantees perfect doneness.
– Overcooking: Remember that residual heat continues to cook the chicken after it leaves the oven. Pull the dish out when the internal temperature hits exactly 165°F to preserve moisture.
Storage & Meal Prep Tips
Proper storage ensures you can enjoy the leftovers without compromising quality. Allow the Chicken Parmesan to cool completely to room temperature (but do not leave it out for more than 2 hours). Store it in an airtight container with a light drizzle of olive oil to keep the sauce moist—it will remain fresh in the refrigerator for up to 4 days. For long-term preservation, you can freeze it for up to 3 months; simply wrap the assembled, unbaked dish tightly in plastic wrap and foil. When ready to reheat, the oven is your best friend. Place the leftovers in a 375°F oven for 10–15 minutes (thawed) or 25–30 minutes (frozen). Avoid the microwave if possible, as it will turn the crispy exterior into a sticky mess.
Conclusion
There is a profound satisfaction that comes from pulling a bubbling, golden dish out of your own oven. This unhurried, deliberate approach to cooking transforms simple, humble ingredients into an unforgettable Chicken Parmesan—capturing the heart of Italian cuisine right in your own kitchen. It is a dish that commands attention, encourages communal dining, and leaves a lasting impression. So, go ahead—pound those cutlets, heat that oil, and celebrate the magnificent magic of homemade cooking. We would love to hear how your culinary adventure turns out. Let us know in the comments below, and don’t hesitate to share your golden, cheesy masterpiece!
FAQs
1. Can I use chicken thighs instead of breasts?
Yes, absolutely. Boneless, skinless thighs offer a richer flavor and are harder to dry out. Just adjust the cooking time by roughly 5–7 minutes in the searing stage to ensure they are cooked through.
2. Why is my breadcrumb crust falling off?
The crust usually fails when the chicken is not pressed firmly enough into the breadcrumbs during the final dredge. Additionally, letting the coated cutlets rest on a wire rack for 5 minutes before frying allows the egg wash to set, acting as a strong adhesive.
3. Can I prepare Chicken Parmesan ahead of time for a party?
Absolutely. You can fully assemble the dish (up to the baking step) up to 24 hours in advance. When you are ready to serve, simply add 5–10 minutes to the baking time to ensure the heat penetrates the cold center.
4. What is the best way to keep the crust crispy when serving a crowd?
Do not cover the baked dish with foil, as the trapped steam will soften the crust. Instead, keep it warm on a wire rack over a baking sheet in a 200°F oven with the door slightly cracked open.
5. Can I use a store-bought marinara, or should I make my own?
A high-quality store-bought marinara is a fantastic time-saver. Look for brands with no added sugar and a high ratio of tomatoes to oil. If you prefer a deeper flavor, simmer the sauce with a splash of red wine and a pinch of fresh oregano before adding it to the dish.
Quick way to grow Chicken Parmesan Dish
Ingredients
Equipment
Method
- Preheat your oven to 400°F (200°C) and lightly grease a baking dish.
- Pound the chicken breasts to an even thickness of about 1/2 inch, then season both sides with salt and pepper.
- Set up a dredging station with three shallow dishes: one for flour, one for beaten egg, and one for breadcrumbs.
- Dredge each chicken breast in flour, then dip in egg, and finally coat thoroughly with breadcrumbs.
- Heat olive oil in a large skillet over medium-high heat, then pan-fry the breaded chicken for 3-4 minutes per side until golden brown.
- Transfer the seared chicken to the prepared baking dish and spoon marinara sauce over each piece.
- Top with shredded mozzarella and grated Parmesan cheese, then bake for 15-20 minutes until the cheese is melted and bubbly and the chicken is cooked through.
- Remove from oven and let stand for a few minutes before serving hot, optionally garnished with fresh basil or parsley.