The Ultimate Guide to Perfect Homemade Biscuits: Flaky, Buttery, and Irresistible
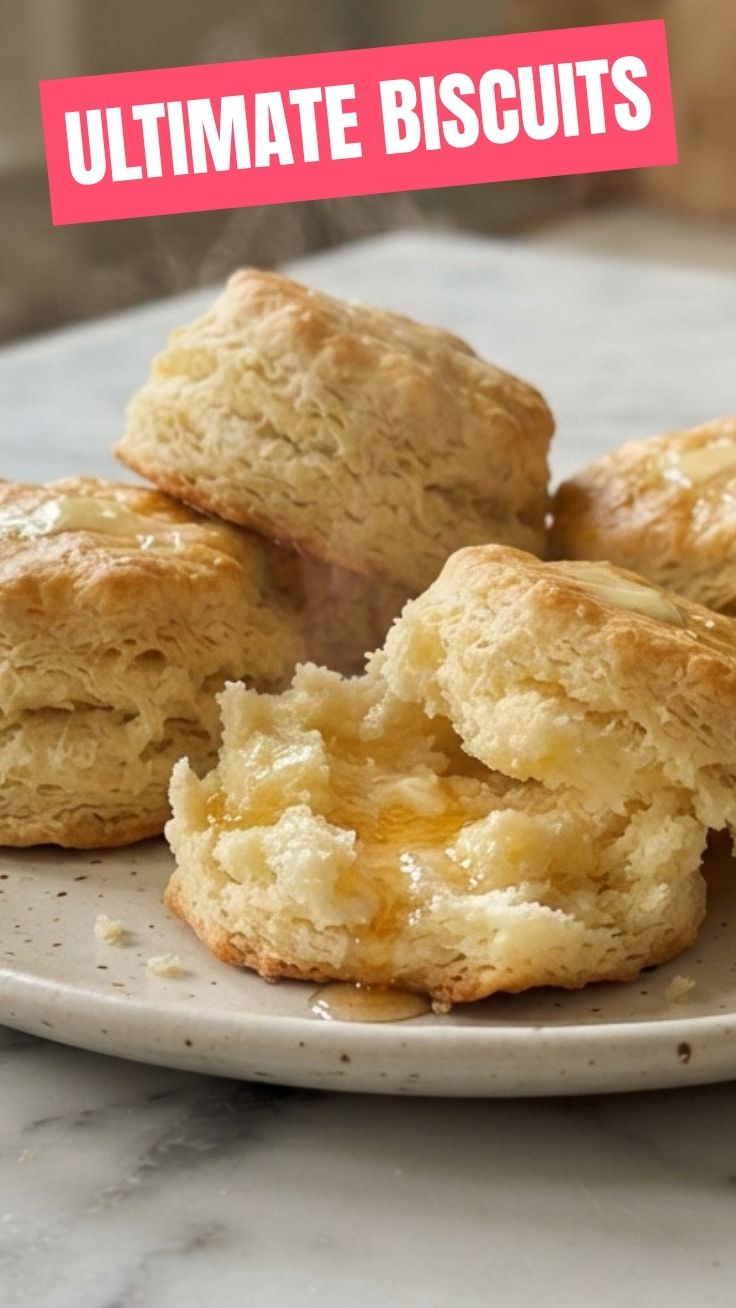
Have you ever pulled a tray of golden-brown Biscuits from the oven, only to find them dense, dry, or flat? You are not alone. The quest for that perfect, flaky, and buttery interior is a culinary challenge many home bakers face. Preparing homemade biscuits from scratch is not only incredibly satisfying but also allows you to control the quality of ingredients, avoid preservatives, and customize the flavor to your liking. In this comprehensive guide, we will unlock the science behind the perfect biscuit, ensuring every batch you bake is a triumph. We will also explore Biscuits and how they can be transformed into indulgent Chocolate biscuits, elevating your baking game to a whole new level.
Ingredients & Kitchen Tools
Before you begin, having the right ingredients and tools is essential for consistent results.
Ingredients:
– 2 cups All-Purpose Flour: Provides structure. For a tender crumb, use a low-protein flour like White Lily.
– 1 tablespoon Baking Powder: The primary leavening agent. Ensure it is fresh for maximum rise.
– 1 teaspoon Salt: Enhances flavor and balances the fat.
– 1 teaspoon Sugar (optional): Adds a subtle sweetness and aids browning.
– 1/2 cup (1 stick) Cold Unsalted Butter: The key to flakiness. Cut into small cubes and keep frozen until use.
– 3/4 cup Cold Buttermilk: The acid reacts with baking powder for lift and adds tenderness. Substitute with 3/4 cup milk + 1 tablespoon lemon juice.
Kitchen Tools:
– Large Mixing Bowl & Pastry Cutter: For cutting butter into flour.
– Bench Scraper: For handling sticky dough and portioning.
– 2.5-inch Round Biscuit Cutter: Use a sharp cutter; twisting seals the edges and prevents rise.
– Baking Sheet: Line with parchment paper for easy cleanup.
– Pastry Brush: For applying melted butter on top.
Prep Time & Cooking Schedule
– Prep Time: 15 minutes (plus 10 minutes resting in the fridge)
– Cook Time: 12–15 minutes
– Total Time: Approximately 40 minutes
Context for Planning: This recipe moves quickly once you start, so read through all steps first. The key is keeping the butter and dough cold. Chill your mixing bowl and flour if your kitchen is warm. You can prepare the dry mix ahead and store it in the fridge for up to 3 days, then add the wet ingredients just before baking.
Step-by-Step Instructions
1. Preheat & Prep: Preheat your oven to 425°F (220°C). Line a baking sheet with parchment paper.
2. Combine Dry Ingredients: In a large bowl, whisk together flour, baking powder, salt, and sugar.
3. Cut in the Butter: Add the cold butter cubes. Use a pastry cutter or two knives to cut the butter into the flour until the mixture resembles coarse meal with pea-sized butter pieces. Pro Tip: Work quickly to prevent the butter from warming.
4. Add Buttermilk: Make a well in the center. Pour in the cold buttermilk. Stir with a fork just until the dough comes together. Do not overmix.
5. Knead & Fold: Turn the dough onto a lightly floured surface. Gently bring it together with a bench scraper. Pat it into a 1-inch thick rectangle. Fold it in half, then pat down again. Repeat 3-4 times. This creates those beautiful flaky layers.
6. Cut the Biscuits: Pat the dough to 1-inch thickness. Press the biscuit cutter straight down—do not twist. Place biscuits on the prepared baking sheet, touching each other for softer sides or 1 inch apart for crispier edges.
7. Bake: Bake for 12–15 minutes, until the tops are golden brown and the sides are set. While baking, prepare a batch of Chocolate biscuits if desired, by brushing the baked biscuits with a honey-chocolate glaze. The key to flaky Biscuits is the cold fat and minimal handling, while Chocolate biscuits require an extra layer of indulgence after baking.
Nutritional Benefits & Advantages
Homemade biscuits offer significant nutritional advantages over store-bought versions. You control the fat—using grass-fed butter provides healthy conjugated linoleic acid (CLA) and vitamin A, a crucial nutrient for eye health. Buttermilk adds probiotics and calcium, supporting bone density. By baking from scratch, you avoid trans fats, high fructose corn syrup, and preservatives commonly found in packaged mixes. Additionally, biscuits can be adapted to be gluten-free or vegan, making them accessible for various dietary needs.
Tips, Variations & Cooking Advice
– Flavor Variations: Add 1 cup shredded sharp cheddar and 1/2 teaspoon cayenne for savory cheddar bay biscuits. For sweet, fold in 1/2 cup chocolate chips or dried fruit.
– Gluten-Free Option: Replace all-purpose flour with a 1:1 gluten-free baking blend containing xanthan gum. Reduce baking powder to 2 teaspoons.
– Dairy-Free: Use cold coconut oil or vegan butter (solid) and oat milk mixed with 1 tablespoon apple cider vinegar as the buttermilk substitute.
– Alternative Cooking: For extra-crispy bottoms, bake on a preheated cast-iron skillet.
Common Mistakes to Avoid
– Warm Butter: Warm butter melts into the flour, creating a dense, shortbread-like texture instead of flaky layers. Keep butter frozen until the last second.
– Overworking the Dough: Gluten develops rapidly with handling, leading to tough biscuits. Mix only until combined and handle gently.
– Twisting the Cutter: Twisting seals the edges, preventing the biscuit from rising evenly. Press straight down and lift.
– Skipping the Rest: Letting the dough rest in the fridge for 10 minutes before baking relaxes the gluten and chills the butter for a better rise.
Storage & Meal Prep Tips
– Room Temperature: Store baked biscuits in an airtight container for up to 2 days. Reheat in a 350°F oven for 5 minutes to restore crispness.
– Freezing Unbaked: Place cut biscuits on a baking sheet, freeze until solid (about 2 hours), then transfer to a freezer bag. Bake from frozen for 15–18 minutes without thawing.
– Freezing Baked: Cool completely, wrap individually in plastic wrap, then place in a freezer bag. They will keep for up to 2 months. Reheat directly from frozen in a 300°F oven for 10 minutes.
– Reheating Tip: Avoid microwaving, which makes biscuits rubbery. A toaster oven or standard oven is best.
Conclusion
Mastering the art of homemade biscuits is a rewarding journey that transforms simple ingredients into something truly spectacular. By focusing on technique—keeping everything cold, handling the dough gently, and cutting without twisting—you can achieve bakery-quality results every time. Whether you enjoy them plain with butter, as a base for breakfast sandwiches, or as a canvas for decadent Biscuits turned into Chocolate biscuits, these flaky wonders are sure to impress. Try this recipe this weekend, share your results in the comments, or experiment with variations like adding herbs or cheese. Your perfect biscuit journey starts now!
FAQs
1. Why did my biscuits turn out tough?
Overworking the dough develops too much gluten. Mix until just combined and handle gently. Using buttermilk also helps tenderize via its acidity.
2. Can I use self-rising flour?
Yes! Self-rising flour already contains baking powder and salt. Omit the baking powder and salt from the recipe, and use 2 cups self-rising flour directly. You will still need cold butter and buttermilk.
3. How do I get taller, higher-rising biscuits?
Keep the butter very cold, bake at a high temperature (425°F), and space biscuits 1 inch apart on the sheet. Placing them close together forces them to rise upward.
4. What if I don’t have buttermilk?
Easily make a substitute by adding 1 tablespoon of lemon juice or white vinegar to 3/4 cup of milk. Let it sit for 5 minutes before using. This mimics the acidity of buttermilk perfectly.
5. Can I make these ahead for a holiday breakfast?
Absolutely. Prepare the dry mix the night before. In the morning, cut in the butter, add the buttermilk, shape, and bake fresh. Alternatively, freeze the shaped unbaked biscuits for up to 3 months.
How to grow Perfect Biscuits in 5 Minutes
Ingredients
Equipment
Method
- Preheat your oven to 450°F (230°C) and lightly grease a baking sheet.
- In a large bowl, whisk together the flour, baking powder, sugar, and salt.
- Pour in the milk and melted butter, mixing until just combined and a soft dough forms.
- Drop spoonfuls of dough onto the prepared baking sheet, spacing them evenly.
- Bake for 12-15 minutes, or until golden brown on top.
- Remove from oven and serve warm with your favorite toppings.