Sugar Cookies with Frosting: The Ultimate Guide to Perfectly Sweet, Bakery-Style Treats
Have you ever sunk your teeth into a soft, buttery sugar cookie topped with a glossy layer of frosting and wondered, Why can’t mine turn out this good at home? The truth is, making bakery-quality Sugar Cookies with Frosting from scratch isn’t just possible—it’s surprisingly simple when you understand the science behind the dough and the icing. Whether you’re preparing for a holiday cookie exchange, a birthday party, or just a cozy weekend baking session, mastering this classic recipe gives you total control over flavor, texture, and ingredients. You also save money and avoid the preservatives found in store-bought versions. Let’s dive into everything you need to know, from mixing the perfect dough to achieving that Instagram-worthy frosting finish. And remember, the best starting point is a reliable Sugar Cookie Recipe that balances sweetness with a tender crumb.
Ingredients & Kitchen Tools
For the Cookies
– All‑purpose flour – 2¾ cups (spooned and leveled for accuracy)
– Baking powder – 1½ teaspoons (ensures a gentle rise)
– Salt – ½ teaspoon (enhances flavor and balances sugar)
– Unsalted butter – 1 cup (2 sticks), softened to room temperature
– Granulated sugar – 1½ cups (creates that classic sweet profile)
– Large egg – 1, at room temperature (binds the dough)
– Vanilla extract – 2 teaspoons (pure, not imitation, for depth)
– Optional substitution – Swap ½ cup all‑purpose flour with almond flour for a nuttier flavor; add 1 extra tablespoon of butter for moisture.
For the Frosting (Buttercream)
– Unsalted butter – ½ cup (1 stick), softened
– Powdered sugar – 3 cups (sifted to avoid lumps)
– Vanilla extract – 1 teaspoon
– Milk or heavy cream – 2–3 tablespoons (adjust for consistency)
– Food coloring – gel preferred (does not thin the frosting)
– Optional substitution – Use cream cheese instead of butter for a tangier frosting.
Kitchen Tools
– Stand mixer or hand mixer
– Large mixing bowls
– Measuring cups and spoons
– Whisk
– Rubber spatula
– Baking sheets (lined with parchment or silicone mats)
– 2‑inch round cookie cutter (or any shape you prefer)
– Cooling rack
– Piping bags and tips (or a zip‑top bag with snipped corner)
Prep Time & Cooking Schedule
Planning ahead ensures your cookies are perfectly soft and your frosting sets without melting. Here’s the timeline:
– Prep time: 20 minutes (mix dough, chill)
– Chill time: 1 hour (minimum) – do not skip; it prevents spreading.
– Bake time: 8–10 minutes per batch (rotating trays halfway)
– Cool time: 15 minutes on the sheet, then 30 minutes on a rack
– Frosting time: 10 minutes to whip the buttercream, plus 15 minutes to decorate per batch
– Total active time: about 1 hour (plus chilling)
– Yield: 24–30 cookies (2‑inch rounds)
Why the schedule matters: Chilling the dough firms the butter, reducing spread. Baking at 375°F (190°C) gives a golden bottom and a soft center. If you’re short on time, you can refrigerate the dough overnight.
Step-by-Step Instructions
1. Cream the butter and sugar – In a stand mixer fitted with the paddle attachment, beat 1 cup softened butter with 1½ cups granulated sugar on medium speed for 3–4 minutes until light and fluffy. Scrape down the bowl. The mixture should look pale and airy—this traps air for a tender crumb.
2. Add egg and vanilla – Beat in the room‑temperature egg and 2 teaspoons vanilla extract until fully combined. Scrape the bowl again. Pro tip: Room‑temperature egg emulsifies better, creating a smoother dough.
3. Whisk dry ingredients – In a separate bowl, whisk together 2¾ cups all‑purpose flour, 1½ teaspoons baking powder, and ½ teaspoon salt. This aerates the flour and evenly distributes the leavener.
4. Combine wet and dry – Add the flour mixture to the butter mixture in two additions, mixing on low speed until just combined. Overmixing develops gluten, making cookies tough. Stop when no flour streaks remain.
5. Chill the dough – Divide dough into two discs, wrap in plastic wrap, and refrigerate for at least 1 hour. This step is non‑negotiable for shape retention.
6. Preheat and shape – Preheat oven to 375°F (190°C). On a lightly floured surface, roll one disc to ¼‑inch thickness. Cut out cookies and transfer to parchment‑lined baking sheets, spacing 2 inches apart. For best texture, bake immediately after rolling.
7. Bake – Bake for 8–10 minutes, rotating the sheet halfway. Edges should be just set and bottoms lightly golden. Temperature control tip: If your cookies spread too much, your dough wasn’t cold enough—pop the cookie sheet in the fridge for 10 minutes before baking. Once baked, let cookies rest on the sheet for 10 minutes, then move to a wire rack to cool completely.
8. Make the frosting – While cookies cool, prepare a classic buttercream. Beat ½ cup softened butter until creamy, then gradually add 3 cups sifted powdered sugar, 1 teaspoon vanilla, and 2 tablespoons milk. Beat on high for 2 minutes until light and fluffy. Adjust consistency with more milk or sugar as needed.
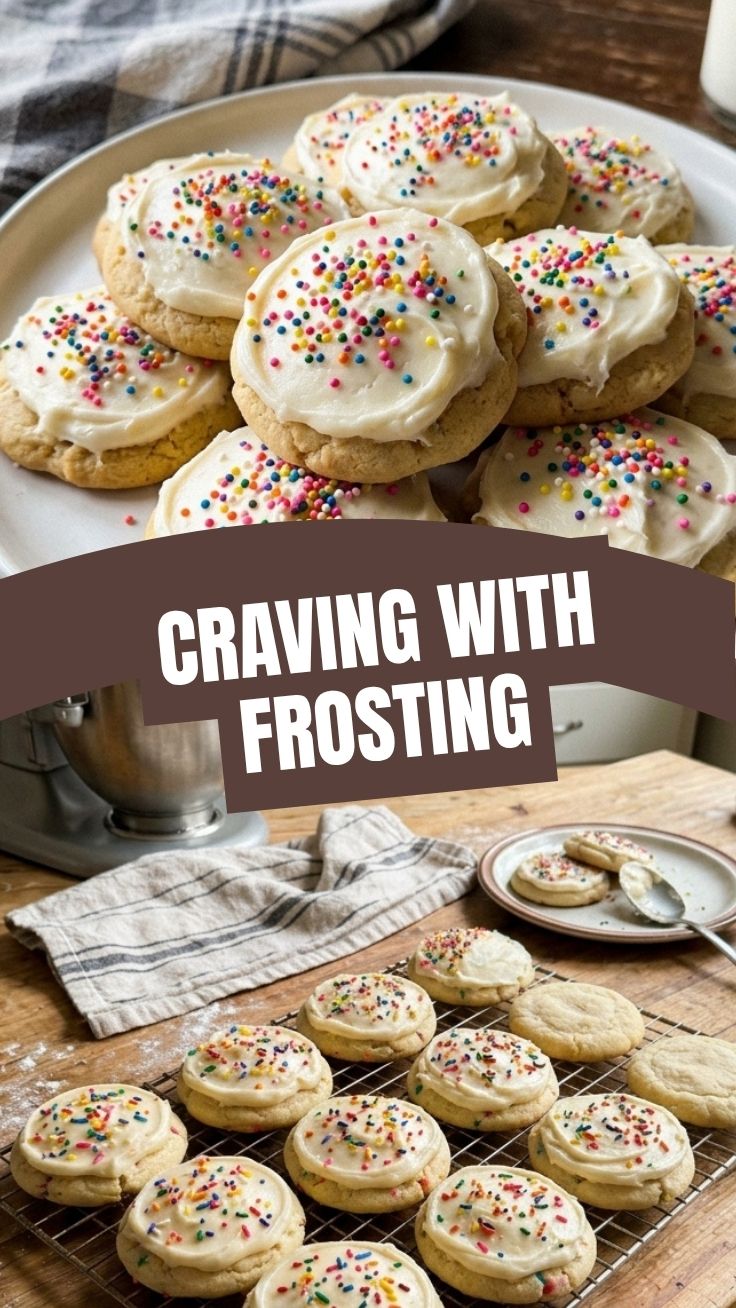
9. Decorate – Once cookies are fully cool (no warmth at all, or the frosting will melt), pipe or spread the frosting. Add sprinkles immediately if desired. For a truly bakery‑style finish, use a round piping tip and apply even pressure. This is where your Sugar Cookies with Frosting shine — the balance of soft cookie and sweet topping is irresistible.
10. Set the frosting – Let frosted cookies sit at room temperature for 30 minutes before stacking or storing. The frosting will form a slight crust while staying soft inside. Following this Sugar Cookie Recipe ensures consistent results every time.
Nutritional Benefits & Advantages
While sugar cookies are a treat, they offer some surprising advantages when made from scratch. One cookie (without frosting) contains about 120 calories, 5g fat, and 18g carbohydrates. Using butter provides vitamin A and healthy fats that support nutrient absorption. You can also boost nutrition by incorporating whole‑wheat pastry flour (substitute up to half the all‑purpose flour) for extra fiber and minerals like selenium and magnesium. The frosting, while indulgent, can be made with less sugar by using powdered monk fruit blend. Homemade cookies also avoid artificial trans fats and high‑fructose corn syrup found in many store‑bought versions. Plus, baking at home lets you control portion sizes—use a smaller cutter for kid‑friendly treats.
Tips Variations & Cooking Advice
– Flavor variations: Add 1 teaspoon lemon zest or almond extract to the dough. For a holiday twist, stir in ½ teaspoon cinnamon and ¼ teaspoon nutmeg.
– Ingredient swaps: Replace butter with vegan butter or coconut oil (use ¾ cup because coconut oil is softer). For dairy‑free frosting, use vegan butter and plant‑based milk.
– Alternative methods: Instead of rolling and cutting, make drop cookies by scooping chilled dough into balls and flattening slightly. Bake 1–2 minutes longer.
– Dietary adaptations: For gluten‑free, use a 1:1 gluten‑free flour blend with xanthan gum. Add 1 extra tablespoon of milk to the dough.
– Portion changes: Make mini cookies with a 1‑inch cutter for party platters, or jumbo cookies (4‑inch) for a bakery look (bake 2–3 minutes longer).
– Colorful decorating: Use a damp paintbrush to dust edible gold powder over dried frosting for a stunning finish.
Common Mistakes to Avoid
1. Not chilling the dough – Warm dough spreads into flat, thin cookies. Always chill at least 1 hour, and re‑chill scraps between batches.
2. Overmixing the dough – Develops gluten, yielding tough cookies. Mix just until flour disappears.
3. Baking on a hot sheet – The dough begins to melt before the oven heat sets the shape. Always use room‑temperature or cooled baking sheets.
4. Frosting warm cookies – The buttercream will melt into a puddle. Wait until cookies are completely cool (touch the center).
5. Skipping the sifter for powdered sugar – Lumpy frosting is hard to pipe and looks unprofessional. Always sift powdered sugar.
Storage & Meal Prep Tips
– Room temperature storage: Store unfrosted cookies in an airtight container at room temperature for up to 1 week. Frosted cookies should be placed in a single layer between wax paper sheets, refrigerated for up to 5 days.
– Freezing: Unbaked cookie dough discs can be frozen for up to 3 months. Thaw overnight in the refrigerator before rolling and baking. Baked, unfrosted cookies freeze beautifully for up to 2 months. Wrap tightly in plastic wrap and foil.
– Reheating: To refresh softness, place frozen baked cookies in a 300°F (150°C) oven for 5 minutes. For thawed cookies, bring to room temperature before serving.
– Meal prep tip: Bake dough on a weekend, freeze the baked cookies, then thaw and frost the day before an event. The frosting keeps its texture if you add 1 tablespoon of cornstarch to the buttercream.
Conclusion
Baking sugar cookies from scratch is more than a recipe—it’s an experience that fills your kitchen with warmth and gives you the power to create truly memorable treats. By following the steps outlined here, you’ll achieve that sought‑after soft center, crisp edge, and luscious buttercream topping that defines perfect Sugar Cookies with Frosting. The beauty of this Sugar Cookie Recipe lies in its adaptability—you can change flavors, shapes, and dietary needs without losing the core magic. I encourage you to try this recipe, share your decorated creations on social media, or experiment with the variations above. Happy baking!
FAQs
Q1: Can I make the dough ahead of time and refrigerate it for more than 24 hours?
Yes, the dough can be chilled for up to 3 days. Wrap tightly to prevent drying. Let it sit at room temperature for 10 minutes before rolling if it feels too firm.
Q2: Why did my cookies spread too much?
Most likely, the dough wasn’t chilled long enough, or your butter was too soft. Chill the shaped cookies on the baking sheet for 15 minutes before baking. Also, ensure your baking powder is fresh (check expiration date).
Q3: How do I get perfectly smooth frosting without bubbles?
Use a paddle attachment on low speed after adding the powdered sugar. Beat on medium for 30 seconds only. To remove air bubbles, let the frosting rest for 10 minutes, then stir gently with a spatula.
Q4: Can I use a royal icing instead of buttercream?
Absolutely. Royal icing (made with egg whites or meringue powder and powdered sugar) dries hard and is ideal for detailed designs. However, buttercream gives a softer, creamier texture that contrasts nicely with the cookie.
Q5: What’s the best way to color the frosting without making it too thin?
Gel food coloring is concentrated and doesn’t add extra liquid. Use a toothpick to add small amounts and mix thoroughly. If the frosting becomes slightly runny, add 1–2 tablespoons of sifted powdered sugar to thicken it back.
Quick way to grow delicious Sugar Cookies with Frosting
Ingredients
Equipment
Method
- Preheat your oven to 375°F (190°C) and line baking sheets with parchment paper.
- Whisk together flour, baking powder, and salt in a medium bowl, then set aside.
- In a large bowl, cream together butter and granulated sugar until light and fluffy.
- Beat in the egg and vanilla extract until well combined.
- Gradually add the dry ingredients to the wet ingredients, mixing until just combined and a soft dough forms.
- Roll the dough out on a lightly floured surface to about 1/4-inch thickness, then cut into desired shapes using cookie cutters.
- Place cookies on the prepared baking sheets and bake for 8-10 minutes, or until the edges are lightly golden.
- Let the cookies cool on the baking sheets for a few minutes before transferring them to a wire rack to cool completely.
- In a medium bowl, beat softened butter until creamy.
- Gradually add powdered sugar, milk or cream, and vanilla extract, beating until smooth and fluffy.
- If desired, add a few drops of food coloring and mix until fully incorporated.
- Once cookies are completely cool, spread or pipe the frosting onto them.