Indulge in the Ultimate Peanut Butter Fudge: A Creamy, Irresistible Treat
Have you ever craved a dessert that’s both decadent and incredibly simple to make? I’m talking about the magic that happens when sweet, salty, and creamy converge in one bite. That’s exactly what this Peanut Butter Fudge delivers. Learning how to perfect this classic confection at home is a game-changer for any sweet tooth. You control the quality of ingredients, skip the preservatives, and save money. Plus, exploring homemade Fudge Recipes opens up a world of customizable flavors. This peanut butter version is the perfect starting point—rich, velvety, and ready in minutes. Let’s dive into the details so you can whip up a batch today.
Ingredients & Kitchen Tools
Ingredients (yields 16 squares)
– 1 cup creamy peanut butter – Use natural or commercial; avoid “no-stir” types with added oils for best texture.
– 1 cup unsalted butter – Salted butter works, but skip additional salt. Cut into cubes for even melting.
– 2 cups powdered sugar – Sift to prevent lumps; it thickens the fudge.
– 1 tsp vanilla extract – Pure vanilla enhances depth; imitation works but tastes less rich.
– ½ tsp sea salt – Optional but balances sweetness; flaked salt for topping is lovely.
Kitchen Tools
– 8×8-inch baking pan
– Parchment paper (or foil)
– Medium saucepan
– Wooden spoon or silicone spatula
– Mixing bowl (heatproof)
– Whisk
– Knife for scoring
Optional Substitutions
– Dairy-free: Use vegan butter and dairy-free powdered sugar. Ensure peanut butter is pure.
– Lower sugar: Substitute powdered erythritol or monk fruit sweetener, but texture may be grainier.
– Chunky peanut butter: Adds crunch; use same amount.
Prep Time & Cooking Schedule
– Prep time: 5 minutes (measure ingredients, line pan)
– Cooking time: 5 minutes on stove
– Cooling time: 2 hours in refrigerator (or 1 hour in freezer)
– Total inactive time: ~2 hours 10 minutes
Plan ahead: Make the fudge in the morning and enjoy it by afternoon. It’s a perfect last-minute dessert for unexpected guests.
Step-by-Step Instructions
1. Line the pan: Grease an 8×8-inch pan lightly or line with parchment paper, leaving overhang on two sides for easy removal.
2. Melt butter and peanut butter: In a medium saucepan over low heat, combine butter and peanut butter. Stir constantly until fully melted and smooth. Do not boil; remove from heat as soon as mixture is homogenous.
3. Incorporate dry ingredients: Sift powdered sugar into a heatproof bowl. Pour the warm peanut butter mixture over the sugar. Add vanilla and salt. Whisk vigorously until no streaks remain—about 1 minute. The batter will thicken quickly.
4. Transfer and press: Scrape the fudge into the prepared pan. Use a spatula or your hands (lightly oiled) to press it evenly into corners. Smooth the top.
5. Chill: Refrigerate for at least 2 hours until firm. For faster results, freeze for 1 hour.
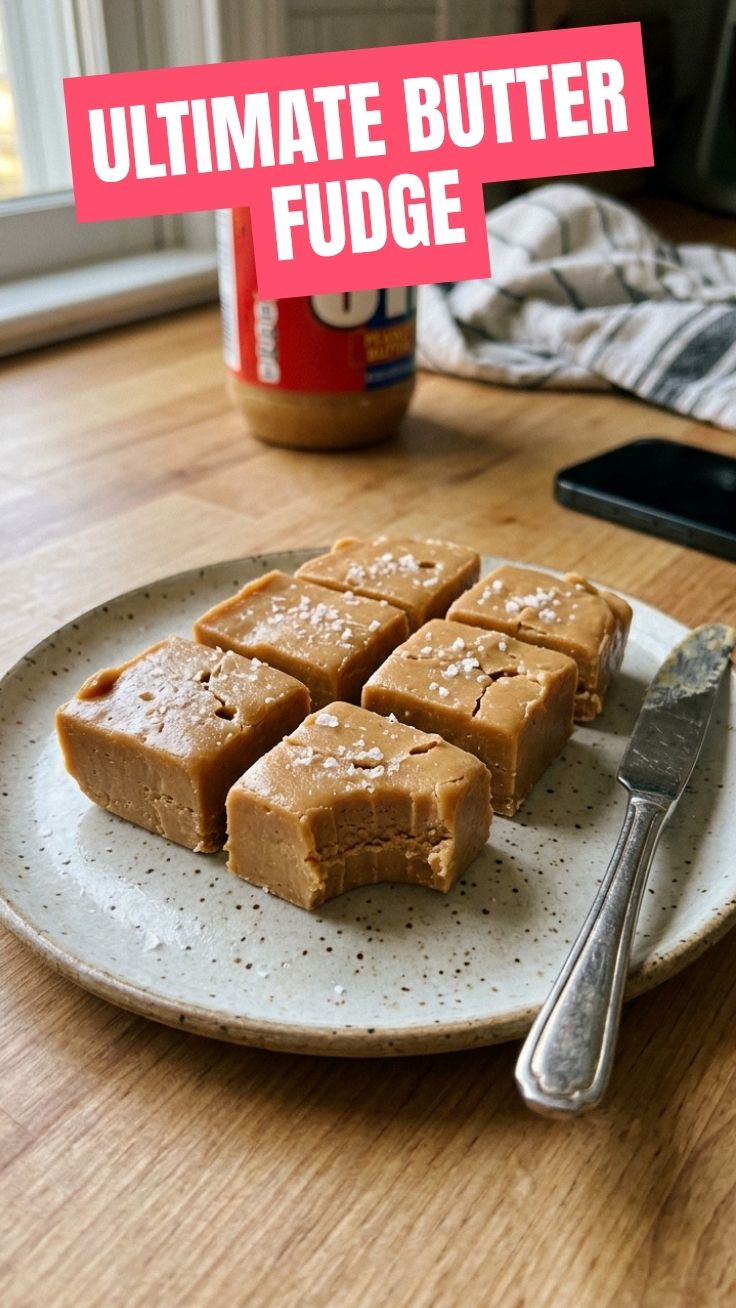
6. Cut and serve: Lift the fudge slab using parchment overhang. Use a sharp knife to cut into 16 squares. For clean edges, run the knife under hot water, wipe dry, then cut.
Tip: If the mixture seems too crumbly, you may have overheated it. Next time, remove from heat earlier. This Peanut Butter Fudge is foolproof when you follow the low heat rule. For more variety, browse other Fudge Recipes that use similar techniques.
Nutritional Benefits & Advantages
Peanut butter is packed with plant-based protein, healthy monounsaturated fats, and vitamin E. This fudge provides a quick energy boost, and because you make it at home, you control the sugar level—reducing it by 20% still yields delicious results. Compared to store-bought versions, homemade fudge lacks artificial stabilizers and hydrogenated oils. Enjoy it as an occasional treat that supports satiety and satisfies cravings with wholesome ingredients.
Tips, Variations & Cooking Advice
– Flavor boost: Add ½ teaspoon cinnamon or a pinch of cayenne for a spicy kick.
– Chocolate swirl: Melt ¼ cup dark chocolate chips, drizzle over fudge before chilling, then swirl with a knife.
– Vegan version: Replace butter with coconut oil (refined for neutral flavor) – use ¾ cup coconut oil for 1 cup butter.
– Gluten-free: This recipe is naturally gluten-free; just check your peanut butter label.
– White chocolate peanut butter fudge: Melt 1 cup white chocolate chips with the butter mixture for added sweetness.
– Portion control: Use a mini muffin tin lined with paper cups to create bite-sized fudge pieces.
– No-bake shortcut: Melt butter and peanut butter in the microwave (30-second bursts), then proceed.
Common Mistakes to Avoid
– Overheating the mixture: High heat can cause separation of oils, leading to grainy fudge. Always use low heat and stir constantly.
– Not sifting powdered sugar: Lumps ruin the smooth texture. Sift even if you’re in a hurry.
– Cutting too early: Fudge must be fully chilled. Cutting warm fudge yields messy, sticky squares.
– Using natural peanut butter that has separated: If oils are on top, stir thoroughly before measuring. Otherwise, the fudge may be greasy.
– Skipping the salt: Salt enhances the peanut flavor—don’t omit unless using salted butter.
Storage & Meal Prep Tips
– Refrigerator: Store in an airtight container between layers of parchment paper for up to 2 weeks.
– Freezer: Wrap each square individually in plastic wrap, then place in a freezer bag. Thaw in the fridge overnight before serving. Fudge freezes well for up to 3 months.
– Reheating: Not necessary; serve cold or at room temperature. If you prefer a softer texture, let the fudge sit out for 10 minutes before eating.
– Meal prep: Double the recipe and freeze half. Perfect for holiday gifting or quick dessert emergencies.
Conclusion
Making Peanut Butter Fudge at home is a rewarding experience that yields a rich, creamy confection with minimal effort. We covered the key steps: low-heat melting, proper chilling, and clean cutting. This treat fits seamlessly into any dessert rotation, and you can easily customize it with chocolate, spices, or dietary swaps. Remember to experiment with other Fudge Recipes once you master the basics. I encourage you to try this recipe today, share your results on social media, and explore more sweet creations. Your perfect peanut butter fudge awaits!
FAQs
1. Can I use crunchy peanut butter instead of creamy?
Yes, you can substitute equal amounts. The texture will be slightly chunkier, but it works beautifully. Just ensure the peanut butter is well-stirred.
2. My fudge turned out crumbly—what went wrong?
Crumbly fudge usually results from overheating the mixture or using too much powdered sugar. Next time, melt gently and measure accurately. You can also add 1–2 tablespoons of milk to salvage it.
3. How do I make this dairy-free?
Replace butter with a high-quality vegan butter or coconut oil (use ¾ cup). Ensure your peanut butter contains no dairy additives. The fudge will still set firmly.
4. Can I reduce the sugar without ruining the texture?
Yes, reduce powdered sugar by up to ¼ cup. The fudge will be slightly softer but still delicious. For a sugar-free version, use powdered erythritol—note that it may have a cooling aftertaste.
5. Why did my fudge have an oily layer on top?
This happens when the butter and peanut butter separate due to high heat. Always cook on low and stir constantly. If it occurs, whisk the mixture vigorously before pouring into the pan.
Best way to grow 3-lb Peanut Butter Fudge
Ingredients
Equipment
Method
- Line a 9x13 inch pan with parchment paper, leaving an overhang on the sides for easy removal.
- Combine sugar and milk in a large saucepan over medium heat, stirring until the sugar dissolves.
- Bring the mixture to a rolling boil and continue boiling for 5 minutes without stirring.
- Remove the saucepan from heat and quickly stir in peanut butter, marshmallow fluff, butter, and vanilla extract until completely smooth and combined.
- Pour the hot fudge into the prepared pan, spreading it evenly.
- Allow the fudge to cool completely at room temperature or in the refrigerator until firm, then cut into squares and serve.