Unleash Your Inner Grill Master: The Ultimate Burger Recipe for a Perfect Smash Burger at Home
Tired of lackluster takeout burgers that just don’t hit the spot? Imagine sinking your teeth into a juicy, flavorful Smash Burger, with crispy edges and a perfectly seasoned patty, all made in your own kitchen. Mastering the art of the Burger Recipe at home isn’t just about saving money; it’s about crafting an experience tailored to your exact preferences, from the quality of the beef to the freshness of the toppings. This comprehensive guide will equip you with everything you need to create a restaurant-quality burger that will have your taste buds singing. We’ll delve into the secrets of achieving that iconic smash, ensuring a delectable result every time.
Ingredients & Kitchen Tools
Building an exceptional burger starts with quality ingredients and the right gear.
- Ground Beef (80/20 Chuck): 1.5 – 2 lbs, cold. The fat content is crucial for juiciness and flavor in a Smash Burger.
- Burger Buns: 4-6 brioche, potato, or sesame seed buns. Toasted for optimal texture and to prevent sogginess.
- Cheese Slices: 4-6 slices American, cheddar, or provolone. Melts beautifully.
- Red Onion: 1/2, thinly sliced or finely diced. Adds a sharp, fresh bite.
- Dill Pickle Slices: 1/2 cup. Essential for that classic burger tang.
- Lettuce: 4-6 leaves, romaine or iceberg. For a refreshing crunch.
- Tomatoes: 1-2, sliced. Juicy and acidic counterpoint.
- Butter: 2 tbsp, unsalted. For toasting buns and adding richness to the patties.
- Salt (Kosher or Sea Salt): To taste. Enhances the beef’s natural flavor.
- Black Pepper (Freshly Ground): To taste. Adds a subtle heat.
- Optional Sauces: Ketchup, mustard, mayonnaise, or a homemade burger sauce.
- Cast Iron Skillet or Flat-Top Griddle: Essential for achieving the best smash and sear.
- Sturdy Spatula: Preferably one with a thin edge for easily scraping the patty off the cooking surface.
- Heavy Flat Object (Burger Press, Another Skillet, or Large Lid): For smashing the patties.
- Mixing Bowl: For seasoning the beef (optional).
- Small Wire Rack: For resting cooked burgers (optional).
Prep Time & Cooking Schedule
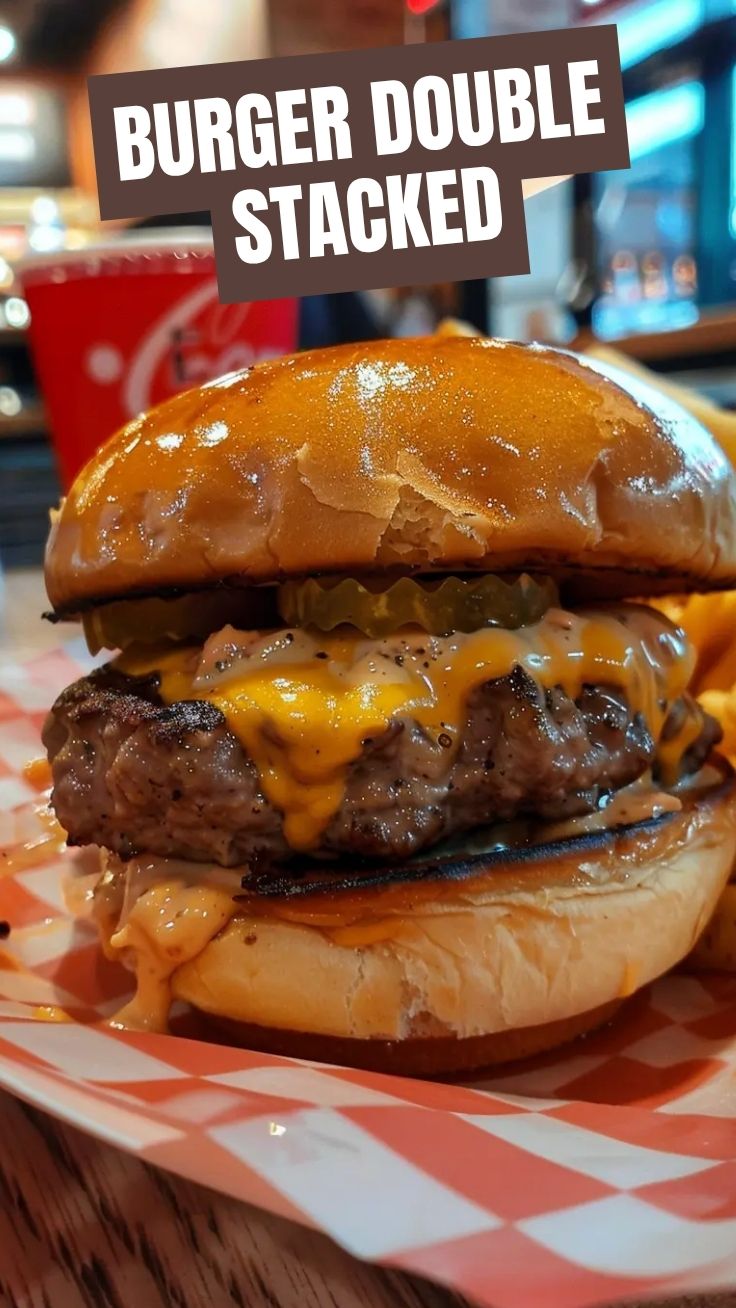
- Prep Time: 15 minutes. This includes prepping all toppings and forming the beef patties.
- Cooking Time: 10-15 minutes. Smash burgers cook incredibly fast due to their thinness.
- Resting Time: 1-2 minutes. Allows cheese to melt fully and juices to redistribute slightly within the burger stack.
To plan your session efficiently, have all your toppings prepped and ready on a tray. Form your beef balls (not patties yet!) just before you start cooking. This way, you can focus on the high-heat cooking process without interruption.
Step-by-Step Instructions
1. Prepare Your Toppings & Buns: Slice all your vegetables and arrange them. Lightly butter the cut sides of your burger buns and toast them in a separate pan or on the griddle until golden brown, then set aside. This step truly elevates the final product of your Burger Recipe.
2. Form the Beef Balls: Divide your cold ground beef into 4-6 equal portions, roughly 2.5-3 ounces each. Gently form them into loose balls – do not compress them into patties yet! This is crucial for the smash technique to work effectively.
3. Heat the Griddle: Place your cast iron skillet or flat-top griddle over high heat. Allow it to preheat for at least 5-7 minutes until it’s smoking slightly. A screaming hot surface is key to an incredible Smash Burger.
4. Add Fat & Patties: Add a small amount of butter or neutral oil to the hot surface. Immediately place the beef balls far enough apart that they won’t stick together.
5. Smash Time!: Place a piece of parchment paper over each beef ball (optional, but helps with sticking). Using your sturdy spatula and heavy flat object, press down firmly and evenly on each beef ball for about 10 seconds, flattening it into a thin patty about 1/4 inch thick. Scrape the parchment paper off if used.
6. Season & Sear: Season generously with salt and pepper immediately after smashing. Let it cook undisturbed for 2-3 minutes until a deep brown crust forms and the edges are crispy. You’ll see juices bubbling up.
7. Flip & Cheese: Carefully scrape under the patty with your spatula, ensuring you get all the delicious crust. Flip the patty. Immediately place a slice of cheese on top of each patty.
8. Second Side Cook: Cook for another 1-2 minutes until the cheese is melted and the second side has a good sear.
9. Assemble: Transfer the cooked patties to your toasted buns. Layer with your desired toppings and sauces. Serve immediately.
Nutritional Benefits & Advantages
Beyond the incredible flavor, homemade smash burgers offer several benefits. You control the quality of the ingredients, particularly the beef, avoiding fillers or preservatives often found in pre-made patties. Opting for leaner ground beef can slightly reduce calorie count, while loading up on fresh vegetables like lettuce, tomatoes, and onions adds vitamins, minerals, and fiber. Choosing whole-wheat buns can also increase dietary fiber.
Tips, Variations & Cooking Advice
- Double Down: For a truly indulgent burger, make two thinner patties per bun.
- Onion Smash: For a caramelized onion flavor, place a thin slice of onion on the beef ball before smashing, then smash the onion into the patty.
- Spice It Up: Add a pinch of garlic powder or onion powder to your beef before forming balls for an extra layer of flavor. A dash of cayenne pepper can provide a subtle kick.
- Gourmet Cheeses: Experiment with Gouda, Swiss, or blue cheese for different flavor profiles.
- Portion Control: Adjust the size of your beef balls for smaller sliders or larger, more substantial burgers.
- Gluten-Free: Serve on gluten-free buns or in a lettuce wrap.
Common Mistakes to Avoid
- Overworking the Beef: Handling the ground beef too much before forming balls can make the patties tough.
- Not Enough Heat: A lukewarm griddle will result in a steamed burger, not a crispy, seared smash. Ensure your cooking surface is blazing hot.
- Flipping Too Soon: Resist the urge to flip the patty before a proper crust has formed. The crust is where much of the flavor resides.
- Using Lean Beef: While healthier, overly lean beef (e.g., 90/10) won’t yield the same juicy, flavorful results for a smash burger. The fat is crucial.
- Too Much Moisture on Toppings: Ensure lettuce and pickles are patted dry to prevent a soggy bun.
Storage & Meal Prep Tips
While smash burgers are best enjoyed fresh off the griddle, any leftover cooked patties can be stored in an airtight container in the refrigerator for 2-3 days. Reheat gently in a skillet over medium-low heat or in the oven to avoid drying them out. We don’t recommend freezing cooked patties as the texture can suffer. For meal prep, you can pre-slice all your toppings and store them in separate containers in the fridge, making assembly quick and easy when it’s time to cook.
Conclusion
There you have it – your definitive guide to crafting the perfect at-home Smash Burger. By following these steps and understanding the nuances of high-heat cooking and proper smashing technique, you’ll be able to create a memorable meal that rivals any restaurant. This Burger Recipe is more than just cooking; it’s an art form that delivers incredible flavor and satisfaction with every bite. Don’t hesitate to give it a try, experiment with your favorite toppings, and share your delicious creations with friends and family!
FAQs
Q1: Can I use a regular frying pan instead of cast iron?
A1: While a cast-iron skillet or griddle is ideal due to its superior heat retention, a heavy-bottomed stainless steel frying pan can work if heated sufficiently. Avoid non-stick pans as they typically cannot withstand the high heat required.
Q2: How do I prevent the patties from sticking to the spatula when smashing?
A2: Using a piece of parchment paper between the beef and your smashing tool helps immensely. Alternatively, some chefs lightly oil the bottom of their smashing tool.
Q3: What’s the best way to get crispy edges on my smash burger?
A3: A very hot cooking surface (smoking hot!) and not moving the patty during the initial sear are key. The Maillard reaction creates that delicious crust.
Q4: Can I add seasoning to the ground beef before forming the balls?
A4: You can, but it’s generally recommended to season immediately after smashing. This allows the salt and pepper to directly adhere to the surface where the crust is forming, maximizing flavor.
Q5: What’s the ideal thickness for a smash burger patty?
A5: Aim for approximately 1/4 inch thick. This allows for quick cooking, crispy edges, and optimal meat-to-topping ratio.
Best way to grow your Smash Burger brand in 3 steps
Ingredients
Method
- Develop a compelling brand story that highlights what makes your smash burgers special, focusing on unique aspects like sourcing, preparation, or a signature flavor to resonate with your target audience and stand out from competitors.
- Actively engage with your community through local events, pop-ups, and a strong online presence to build brand loyalty and generate buzz around your smash burgers, encouraging interaction and feedback through social media campaigns and collaborations.
- Ensure every smash burger consistently meets high standards in taste, presentation, and service, as consistent quality is crucial for customer retention and positive word-of-mouth, reinforcing your brand's reputation.