The Perfect Homemade Apple Pie: A Classic Dessert That Never Fails
Have you ever bitten into a store-bought Apple Pie and felt something was missing? That’s because nothing compares to the warmth of a homemade version—golden, flaky crust hugging tender, cinnamon-kissed apples. Preparing this iconic dessert at home not only fills your kitchen with an irresistible aroma but also lets you control sweetness, spice levels, and ingredient quality. Whether you’re a novice or a seasoned baker, mastering the art of Apple Pie elevates your home baking game and impresses every guest. In this guide, we’ll walk through every step—from choosing the best apples to achieving that perfectly browned crust—so you can create a memorable dessert that tastes like it came from a rustic bakery.
—
Ingredients & Kitchen Tools
For the Crust (makes one double crust)
– 2½ cups all-purpose flour – Sifted for lightness.
– 1 tsp salt – Balances sweetness.
– 1 cup cold unsalted butter – Cubed; keeps crust flaky.
– 6–8 tbsp ice water – Adds moisture without melting butter.
For the Filling
– 6–7 medium apples (Granny Smith, Honeycrisp, or Braeburn) – A mix of tart and sweet for depth.
– ¾ cup granulated sugar – Adjust based on apple sweetness.
– 2 tbsp all-purpose flour – Thickens juices.
– 1 tsp ground cinnamon – The classic spice.
– ¼ tsp nutmeg – Adds warmth.
– 1 tbsp lemon juice – Prevents browning and brightens flavor.
– 1 tbsp unsalted butter – Dot on top before baking.
Kitchen Tools
– 9-inch pie dish (glass or ceramic for even heating)
– Rolling pin
– Pastry cutter or two forks
– Sharp knife or apple peeler
– Mixing bowls
– Aluminum foil or pie shield
Optional Substitutions
– Gluten-free crust: Use 1:1 gluten-free flour blend + xanthan gum.
– Vegan version: Substitute butter with cold coconut oil or vegan shortening.
– Sugar alternative: Coconut sugar or monk fruit sweetener (reduce liquid slightly).
—
Prep Time & Cooking Schedule
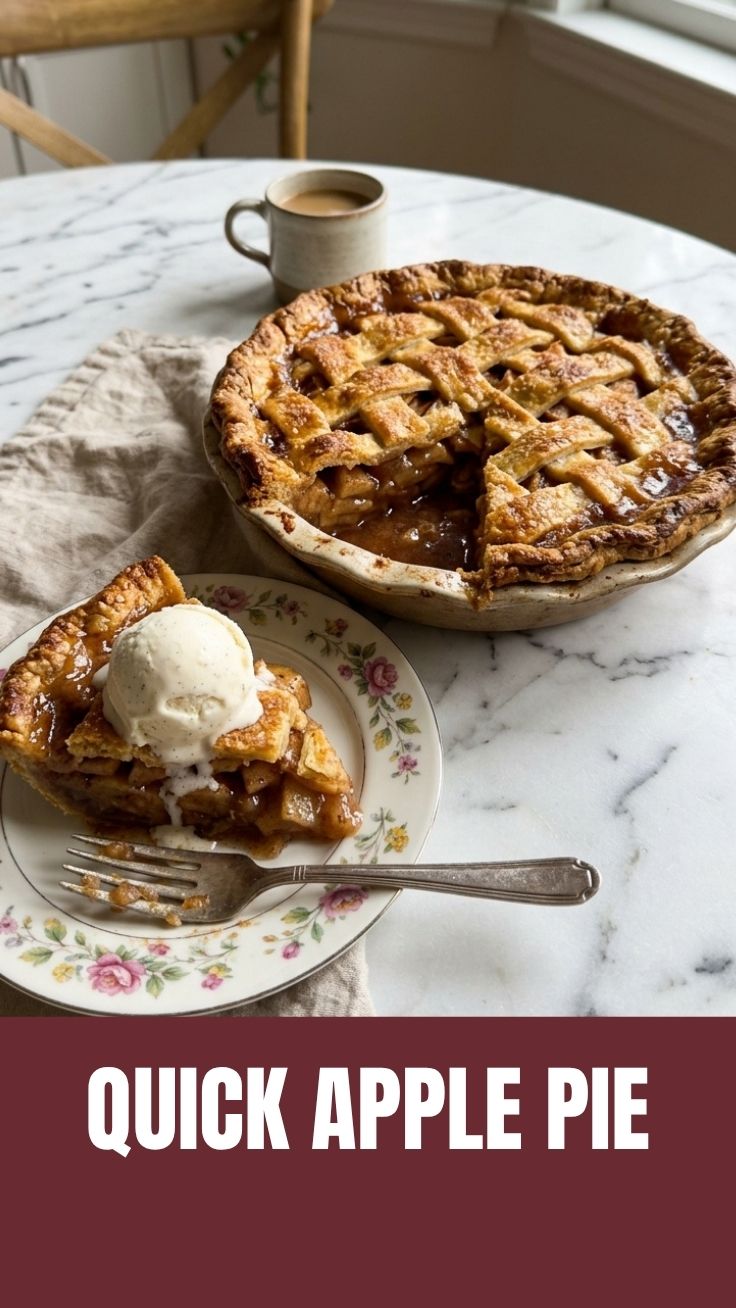
– Prep time: 30 minutes (including crust chilling)
– Cook time: 50–60 minutes at 375°F (190°C)
– Resting time: At least 2 hours after baking – crucial for the filling to set so slices hold shape.
– Total time: About 3 ½ hours (including resting).
Plan ahead: The crust benefits from a 30‑minute chill in the fridge before rolling. If you’re short on time, make the dough a day in advance.
—
Step-by-Step Instructions
1. Make the pie crust: In a bowl, whisk flour and salt. Cut in cold butter using a pastry cutter until pea-sized crumbs form. Drizzle ice water, 1 tablespoon at a time, and mix gently until dough holds together. Divide in half, flatten into discs, wrap in plastic, and refrigerate for at least 30 minutes.
2. Prepare the filling: Peel, core, and slice apples into ¼‑inch thick wedges. In a large bowl, toss apples with sugar, flour, cinnamon, nutmeg, and lemon juice. Let sit for 15 minutes so juices release.
3. Roll out bottom crust: On a lightly floured surface, roll one dough disc into a 12‑inch circle. Transfer to pie dish, pressing gently without stretching. Trim overhang to ½ inch.
4. Assemble: Spoon apple filling into crust, mounding slightly in center. Dot with 1 tablespoon butter.
5. Roll top crust and place over filling. Crimp edges together and cut 4–5 steam vents on top. Brush with egg wash (1 egg + 1 tbsp water) for a golden sheen. Sprinkle with coarse sugar if desired.
6. Bake: Place pie on a baking sheet to catch drips. Bake at 375°F for 20 minutes, then reduce to 350°F and bake 30–40 minutes more, until crust is golden and juices bubble through vents. If edges brown too quickly, cover with foil or a pie shield after 30 minutes.
7. Cool completely on a wire rack for at least 2 hours before slicing. This patience ensures every bite of your Apple Pie holds together, and the dessert shines with a silky, not runny, filling.
> Pro tip: For a crisp bottom crust, preheat the baking sheet in the oven during the last 10 minutes of chilling.
—
Nutritional Benefits & Advantages
A slice of homemade Apple Pie (1/8 of a 9‑inch pie) contains roughly:
– Calories: 350–400 (dependent on crust thickness and sugar)
– Fiber: 3–4g from apples (pectin supports digestion)
– Vitamin C: 8–10% DV per slice from fresh apples and lemon juice
– Potassium: ~150mg
Apples are rich in antioxidants like quercetin, which may reduce inflammation. Using a whole‑wheat or almond‑flour crust can boost fiber and healthy fats. Compared to store‑bought versions, your homemade pie has no preservatives, artificial flavors, or high‑fructose corn syrup. Portion control is easier too—you decide the slice size.
—
Tips, Variations & Cooking Advice
– Flavor variations: Add ½ tsp cardamom or 1 tbsp bourbon for adult depth. Toss in ½ cup dried cranberries or chopped pecans for texture.
– Texture swaps: Replace 1 cup apples with sliced pears for a softer bite.
– Alternative methods: Try a lattice top or use a cast‑iron skillet for extra crust crispiness.
– Dietary adaptations:
– Gluten‑free: Use the substitution above; chill thoroughly for easy rolling.
– Dairy‑free: Use cold vegan butter or coconut oil; the crust will be slightly crumblier but delicious.
– Low‑sugar: Reduce sugar to ⅓ cup and use apples like Fuji or Gala that are naturally sweet.
– Portion changes: Bake mini hand pies or a 6‑inch tart for smaller gatherings.
—
Common Mistakes to Avoid
| Mistake | Solution |
|——–|———-|
| Soggy bottom crust | Blind‑bake the crust for 10 minutes at 400°F before adding filling. Also, avoid overfilling with too much liquid; let apples macerate and drain excess juice. |
| Burnt edges but raw center | Use a pie shield or foil ring after the first 30 minutes. Reduce temperature after initial 20 minutes. |
| Filling too runny | Add an extra tablespoon of flour or cornstarch. Let the pie rest the full 2 hours after baking. |
| Crust tough | Handle dough minimally; over‑kneading develops gluten. Keep butter cold—if it softens, refrigerate again. |
| Apples not tender | Slice apples no thicker than ¼ inch and bake until juices bubble vigorously. Par‑cooking apples for 5 minutes before assembling ensures tenderness. |
—
Storage & Meal Prep Tips
– Room temperature: Cover pie loosely with foil and keep on counter for up to 2 days. Reheat individual slices in a 350°F oven for 8 minutes.
– Refrigeration: Store in an airtight container for up to 5 days. The crust will soften slightly but remains delicious.
– Freezing: Wrap entire cooled pie (or unbaked) tightly in plastic wrap, then foil. Freeze for up to 3 months. To bake from frozen: add 20–30 minutes to baking time (unbaked) or thaw overnight in fridge (baked). Reheat at 350°F for 15 minutes.
– Meal prep: Make the dough and freeze it in discs. Prep apple slices up to a day ahead, toss with lemon juice to prevent browning, and store in the fridge.
—
Conclusion
Baking an Apple Pie from scratch is more than a recipe—it’s an experience that brings warmth, nostalgia, and a sense of accomplishment to your table. With the right apples, a tender flaky crust, and patient cooling, you’ll create a dessert that rivals any bakery. We’ve covered key techniques to avoid common pitfalls, offered variations for every diet, and shared storage tips so you can enjoy every last crumb. Now it’s your turn: preheat the oven, roll up your sleeves, and bake a pie that tells your story. Share your golden creation with friends or tag us in your photos—we’d love to see your homemade masterpiece!
—
FAQs
1. What are the best apples for apple pie?
A mix of tart (Granny Smith) and sweet (Honeycrisp, Braeburn) gives the best flavor and texture. Avoid Red Delicious as they turn mushy.
2. Can I use pre‑made pie crust?
Absolutely—store‑bought works in a pinch, but homemade crust delivers superior flakiness and flavor. If using pre‑made, brush with egg wash for a golden finish.
3. How do I prevent my pie from boiling over?
Place a baking sheet on the lower rack to catch drips, or bake on a foil‑lined sheet. Cutting steam vents also reduces pressure.
4. Why is my apple pie filling too watery?
You may have used too‑juicy apples without draining. Macerate apples with sugar and let sit; then toss out excess liquid before filling. Adding 1 tbsp cornstarch helps thicken.
5. Can I make apple pie ahead of time?
Yes! Bake a day before and store at room temperature (covered). Reheat slices just before serving. You can also freeze the assembled unbaked pie for later.