Homemade Blackberry Jam: Better Than Store-Bought in 45 Minutes
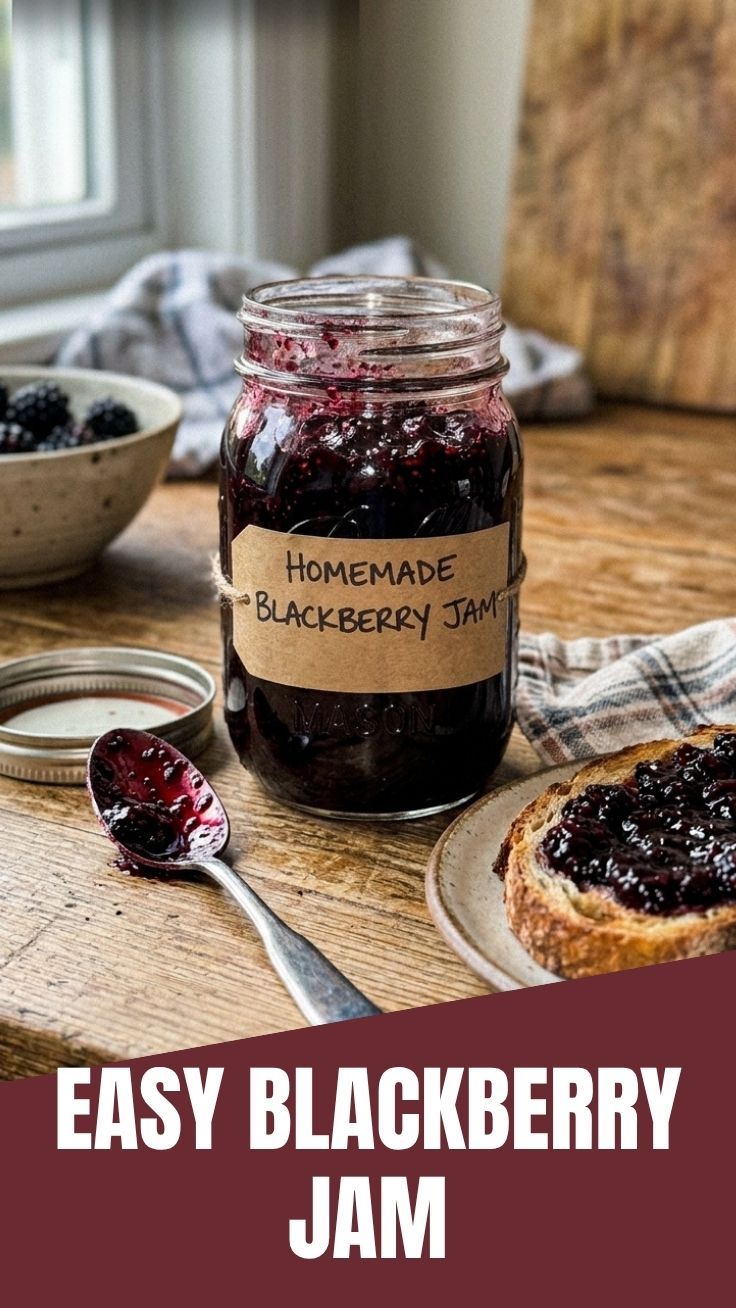
Have you ever tasted a sun-warmed blackberry straight from the vine, bursting with sweet-tart juice that stains your fingers purple? That’s the flavor I capture in every jar of my Blackberry Jam (Homemade). Store-bought versions rely on artificial pectin, high-fructose corn syrup, and preservatives that mute the fruit’s natural personality. When you make jam at home, you control the sweetness, adjust the texture, and infuse every batch with pure berry essence. Whether you’re spreading it on warm buttermilk biscuits, swirling it into yogurt, or gifting jars to neighbors during the holidays, this recipe transforms simple ingredients into something magical. In this guide, I’ll walk you through the entire process—from selecting the ripest berries to achieving the perfect set—so you can create a pantry staple that tastes like summer year-round. And if you’re looking to expand your repertoire, this method doubles as a fantastic Blackberry preserves recipe with just a few texture adjustments.
Ingredients & Kitchen Tools
For the Jam:
– 4 cups fresh or frozen blackberries – Fresh berries offer brighter flavor; frozen work well and break down faster during cooking. Avoid underripe berries as they lack natural pectin.
– 2 cups granulated sugar – Standard white sugar provides the best crystallization for gelling. You can reduce to 1½ cups for a tarter jam, but the set will be looser.
– 1 tablespoon fresh lemon juice – The acidity activates pectin and balances sweetness. Bottled lemon juice works in a pinch but lacks brightness.
– 1 teaspoon vanilla extract (optional) – Adds warmth and depth without overwhelming the berry flavor.
Kitchen Tools:
– Heavy-bottomed stainless steel or enamel pot (at least 4-quart capacity)
– Wooden spoon or silicone spatula (metal can react with acidic fruit)
– Potato masher or immersion blender
– Candy thermometer (optional but helpful for precise gel point)
– Clean glass jars with airtight lids (sterilized by boiling for 10 minutes)
– Canning funnel and jar lifter (for safety)
Substitutions:
– Sugar alternatives: Use honey, agave, or coconut sugar, but expect a softer set. Add 1 tablespoon powdered pectin if using low-sugar options.
– Pectin boost: For a firmer jam without commercial pectin, add ½ grated green apple (rich in natural pectin) during cooking.
Prep Time & Cooking Schedule
| Stage | Time | Notes |
|——-|——|——-|
| Berry washing & sorting | 5 minutes | Discard any moldy or crushed berries |
| Maceration (optional) | 30 minutes | Toss berries with sugar to draw out juice |
| Active cooking | 20–25 minutes | Includes boiling and stirring phases |
| Gel point testing | 2–3 minutes | Plate test or thermometer check |
| Jar filling & sealing | 10 minutes | Work quickly while jam is hot |
| Cooling & resting | 12–24 hours | Allow jam to set undisturbed |
Total active time: approximately 40–45 minutes. Plan your canning session for a morning when you can leave jars undisturbed for several hours. The optional maceration period (30 minutes) lets sugar penetrate the berries, resulting in a more evenly textured jam with whole fruit suspended throughout.
Step-by-Step Instructions
1. Prepare the Berries – Rinse fresh blackberries under cool water and drain thoroughly. Spread them on a clean kitchen towel to remove excess moisture (water dilutes the jam). For frozen berries, let them thaw slightly but don’t drain the released juice—it’s pure flavor.
2. Macerate the Berries – In your heavy pot, combine berries and sugar. Gently toss with your wooden spoon until every berry is coated. Let the mixture sit for 30 minutes if time allows. During this period, the sugar draws out natural pectin and juice, creating a syrupy base that shortens cooking time.
3. Begin Cooking – Place the pot over medium heat and stir constantly until the sugar dissolves completely (about 3 minutes). Once the mixture comes to a full rolling boil, reduce heat to medium-low. Use your potato masher to crush about half the berries—this releases pectin while leaving some fruit intact for texture.
4. Monitor the Gel Point – Continue cooking at a gentle boil, stirring frequently to prevent scorching. After 15 minutes, start testing for doneness. The simplest method: place a small plate in the freezer; when you think the jam is close, drop a teaspoon of jam onto the cold plate. Wait 30 seconds, then push it with your finger. If it wrinkles and holds its shape, it’s done. If it runs like syrup, cook another 3–5 minutes and test again. A candy thermometer should read 220°F (104°C) at sea level—adjust for altitude by subtracting 2°F per 1,000 feet.
5. Add Flavor & Finish – Remove the pot from heat. Stir in lemon juice and vanilla extract. Skim off any foam that has formed on the surface (it’s edible but makes the jam cloudy). Let the jam rest for 5 minutes, then gently stir to distribute fruit that may have settled.
6. The magic of homemade preservation lies in this moment: you’ve transformed berries into a spread that embodies the essence of summer. This Blackberry Jam (Homemade) delivers intense fruit-forward flavor. If you prefer a chunkier result, simply crush fewer berries during cooking, and you’ll have a fantastic Blackberry preserves recipe that’s perfect for pairing with cheese boards.
7. Fill the Jars – Using a canning funnel, ladle hot jam into sterilized jars, leaving ¼-inch headspace. Wipe the rims clean with a damp paper towel to ensure a proper seal. Screw on lids until fingertip-tight (don’t overtighten, as air needs to escape during processing).
8. Process for Shelf Stability – For long-term storage, process filled jars in a boiling water bath for 10 minutes (adjust for altitude). Remove with jar lifter and place on a towel-covered counter. Listen for the satisfying “pop” of lids sealing as they cool. Unsealed jars should be refrigerated and used within 3 weeks.
Nutritional Benefits & Advantages
Blackberries are nutritional powerhouses disguised as indulgent treats. A single tablespoon of homemade jam contains approximately 25 calories (versus 50+ in commercial versions) because you control the sugar ratio. Each serving delivers significant antioxidants called anthocyanins—the compounds responsible for that deep purple hue—which combat oxidative stress and support brain health. Blackberries provide vitamin C (half the daily recommended intake per cup), vitamin K for bone health, and soluble fiber that promotes digestive regularity. The lemon juice adds a boost of immune-supporting vitamin C while enhancing iron absorption from the berries. Because this recipe uses no commercial pectin, you avoid processed additives while still achieving a beautiful set through the fruit’s natural gelling properties. For those watching their sugar intake, the optional reduced-sugar variation maintains antioxidant benefits with minimal glycemic impact.
Tips Variations & Cooking Advice
Flavor Variations:
– Herbaceous blackberry jam: Add 3 sprigs of fresh thyme or 2 bruised sage leaves during cooking. Remove before jarring for subtle earthy undertones.
– Spiced blackberry jam: Toss in 1 cinnamon stick, 3 whole cloves, and a star anise during the first boil. Strain or leave whole for decorative jars.
– Bourbon-blackberry jam: Stir in 2 tablespoons of bourbon after removing from heat. The alcohol cooks off, leaving warm vanilla-oak notes.
Texture Adjustments:
– For jam with whole berries: macerate without crushing, and use a slotted spoon to transfer fruit to jars before pouring liquid.
– For seedless jam: press the cooked mixture through a fine-mesh sieve or food mill. Return the pulp-free liquid to the stove and simmer until thickened.
Dietary Adaptations:
– Low-sugar version: Use 1 cup sugar + 2 tablespoons chia seeds (chia seeds gel naturally without pectin). Cook for only 10 minutes—overcooking breaks down chia’s thickening power.
– Keto-friendly: Substitute ½ cup allulose or monk fruit sweetener. Add 1 tablespoon gelatin dissolved in ¼ cup cold water, stirred in after cooking.
– Vegan: This recipe is naturally plant-based; skip any honey substitutions if following strict vegan guidelines.
Cooking Advice: Always taste the raw berries before starting. If they’re exceptionally sweet, reduce sugar by ¼ cup. If they’re tart, add ½ cup extra sugar or a pinch of salt to balance acidity. Cooking in a wide, shallow pot speeds evaporation and reduces cooking time, preserving brighter flavor.
Common Mistakes to Avoid
1. Overcooking the Jam – The difference between perfect jam and a rubbery, caramelized mess is about 90 seconds. When foam starts appearing thicker and the jam bubbles become smaller and more violent, test immediately. Overcooked jam loses fresh berry flavor and develops an unpleasant burnt sugar taste. Never leave the pot unattended during the final 10 minutes of cooking.
2. Undercooking the Jam – Runny jam is a common frustration. Trust the plate test over cooking time—ambient humidity, berry ripeness, and pot diameter all affect how fast water evaporates. If your jam refuses to set after 25 minutes, stir in 1 tablespoon of lemon juice (extra acid helps pectin activate) and cook another 5 minutes.
3. Using Unripe or Overripe Berries – Underripe blackberries lack natural pectin and taste sour. Overripe berries have broken down too much pectin and produce weak gel. Choose berries that are deep black with a slight bloom (the dusty coating) and yield gently to pressure. A mix of 70% ripe and 30% slightly underripe yields the best set.
4. Skipping the Sterilization – Dirty jars invite mold and bacteria that can ruin your entire batch. Even if you plan to refrigerate the jam within weeks, sterilize jars by boiling them for 10 minutes (or running them through a dishwasher’s sanitize cycle). Never reuse lids from previous canning—the seal compound degrades after one use.
5. Filling Jars Too Slowly – Jam cools quickly once removed from heat. If you work slowly, the jam thickens before you’ve sealed all jars. Keep a pot of simmering water nearby and rest filled jars in it while you fill the next one. This maintains temperature and ensures proper processing.
Storage & Meal Prep Tips
Refrigeration: Once opened, store jam in the refrigerator for up to 3 months. Always use a clean, dry spoon to scoop—introducing moisture or crumbs can cause mold growth within days. For maximum freshness, portion large jars into smaller containers to minimize air exposure each time you open one.
Freezing: Freezing is the easiest preservation method if you skip water bath processing. Let the jam cool completely, then transfer to freezer-safe containers or heavy-duty zip-top bags (leave ½-inch headspace for expansion). Frozen jam maintains peak quality for 12 months. Thaw overnight in the refrigerator; the texture remains virtually identical to fresh thanks to the sugar’s cryoprotectant properties.
Water Bath Canning (Long-Term Storage): Properly processed, sealed jars store in a cool, dark pantry for 12–18 months. Label each jar with the date and batch notes (such as “cinnamon variation” or “low sugar”). Check seals before opening—the lid should be concave and not flex when pressed in the center. If a jar loses its seal, refrigerate and use within 2 weeks.
Reheating & Serving: Cold jam straight from the fridge can be difficult to spread. Microwave individual portions for 10–15 seconds or submerge the sealed jar in warm water for 5 minutes to loosen. For glazes on meats or roasted vegetables, warm jam in a saucepan with a splash of balsamic vinegar until syrupy.
Meal Prep Pairings: Batch-cook pancakes, waffles, or scones on the weekend and portion jam into small silicone containers for grab-and-go breakfasts. The jam also shines as a filling for homemade pop-tarts, thumbprint cookies, or thumbprint-layered cheesecake bars. Layer it with Greek yogurt and granola for parfaits that keep in the fridge for 5 days.
Conclusion
This Blackberry Jam (Homemade) proves that preserving summer’s bounty doesn’t require advanced skills or mysterious ingredients. You control the sugar, avoid preservatives, and capture the essence of sun-ripened berries in every jar. The techniques you’ve learned here—maceration, gel point testing, and water bath processing—form the foundation for countless fruit preserves, from strawberry to fig. Plus, this exact method serves as a versatile Blackberry preserves recipe when you desire chunkier fruit suspended in syrup. Whether you’re spreading it on toast, gifting jars to loved ones, or incorporating it into sauces and glazes, this recipe delivers consistent, delicious results. I encourage you to make a double batch during blackberry season—you’ll thank yourself during the dark winter months when a taste of summer brightens your morning. Share your creation in the comments below: what variations did you try, and how did you enjoy your first spoonful? Happy preserving.
FAQs
Can I make this jam without added pectin?
Absolutely. This recipe relies on the natural pectin present in blackberries and lemon juice. The key is using berries that are not overripe and cooking to the proper gel point. If your jam doesn’t set, you can stir in 1 tablespoon of powdered pectin dissolved in 2 tablespoons of water and bring it to a boil again for 2 minutes.
Why did my jam turn out too runny?
Several factors could be at play: undercooking (the most common cause), using overripe berries, or adding too much water during rinsing. To fix runny jam after it’s cooled, pour it back into the pot, add 1 tablespoon lemon juice, and simmer until it passes the plate test. Alternatively, use it as ice cream topping or pancake syrup.
How can I make seedless blackberry jam?
Cook the berries and sugar as directed, then press the hot mixture through a fine-mesh sieve or food mill. Return the seedless liquid to the pot, add the lemon juice, and cook at a boil until thickened (usually 5–8 minutes less than the seeded version). You’ll lose some volume but gain a silky-smooth texture.
Can I use frozen blackberries for this recipe?
Frozen berries work beautifully—they’re often picked at peak ripeness and flash-frozen, preserving flavor. Thaw them completely and include all released juice in the cooking pot. Reduce cooking time by about 5 minutes since frozen berries break down faster. Do not drain the juice, as it contains valuable pectin.
How long will homemade blackberry jam last?
Refrigerated, open jars last up to 3 months. Unopened, water-bath-canned jars remain shelf-stable for 12–18 months. Frozen jam stays perfect for up to 1 year. Always check for signs of spoilage: mold, off odors, or bulging lids indicate the jam should be discarded immediately.
Quick way to grow Blackberry Jam (Homemade)
Ingredients
Equipment
Method
- Wash and sort the fresh blackberries, discarding any stems or damaged fruit.
- Combine the blackberries, sugar, and lemon juice in a large, heavy-bottomed pot.
- Bring the mixture to a boil over medium-high heat, stirring constantly.
- Reduce heat and simmer, stirring occasionally, until the jam thickens.
- To test for doneness, place a small amount of jam on a chilled plate; if it wrinkles when pushed, it's ready.
- Carefully ladle the hot jam into sterilized jars, leaving 1/4 inch headspace.
- Process the filled jars in a boiling water bath for 10 minutes to seal.
- Remove jars and let cool completely on a wire rack; check seals after 24 hours.