The Ultimate Guide to Perfect Garlic Green Beans: A Crunchy, Flavorful Side Dish
Are you tired of limp, bland green beans that never seem to impress? Imagine a side dish so vibrant, so aromatic, and so irresistibly crunchy that it steals the spotlight from the main course. Whether you’re a busy weeknight cook or a seasoned home chef, mastering the art of Garlic Green Beans transforms a simple vegetable into a show-stopping accompaniment. Preparing this dish at home isn’t just about saving money—it’s about controlling freshness, tailoring flavors to your palate, and unlocking the nutritional powerhouse of green beans without sacrificing taste. Let’s dive into a recipe that promises bold, garlicky goodness in under 15 minutes.
Ingredients & Kitchen Tools
Produce:
– 1 lb fresh green beans, trimmed (or frozen, thawed)
– 6–8 garlic cloves, thinly sliced (adjust to taste)
– 1 shallot, thinly sliced (optional, for extra depth)
Pantry Staples:
– 2 tbsp olive oil or avocado oil
– ½ tsp red pepper flakes (adjust for heat preference)
– ½ tsp salt (plus more to taste)
– ¼ tsp black pepper
– 1 tbsp soy sauce or tamari (for umami boost)
– 1 tbsp sesame seeds (optional, for garnish)
Kitchen Tools:
– Large skillet or wok (non-stick or stainless steel)
– Sharp chef’s knife + cutting board
– Colander (for rinsing)
– Tongs or spatula for flipping
– Small bowl for prepping garlic
Optional Substitutions:
– Oil swap: Coconut oil or butter for a richer flavor.
– Soy-free: Use coconut aminos.
– Low-sodium: Skip added salt and rely on soy sauce.
Prep Time & Cooking Schedule
Prep Time: 10 minutes (trimming green beans, slicing garlic/shallot)
Cook Time: 6–8 minutes
Total Time: 16–18 minutes
Note: If using frozen green beans, thaw and pat dry thoroughly to avoid steaming. Plan to serve immediately—this dish doesn’t hold its crunch well when reheated.
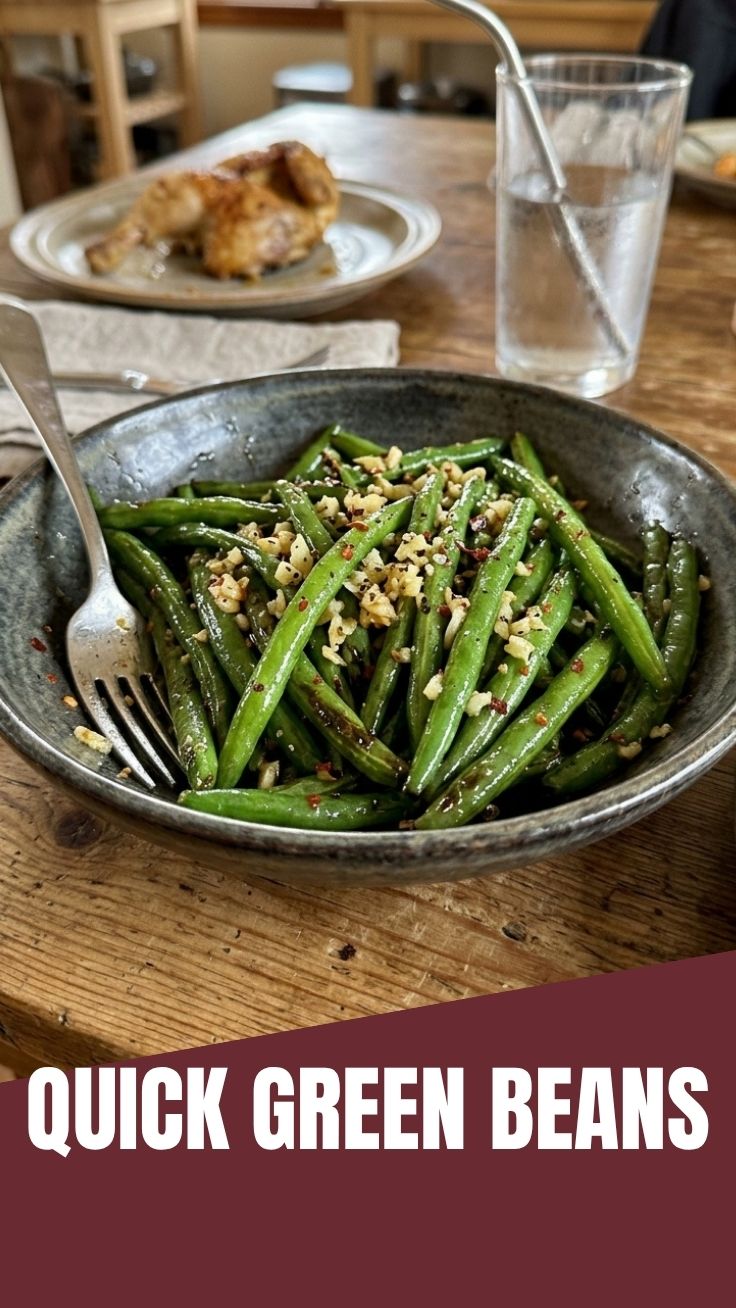
Step-by-Step Instructions
1. Blanch for Brightness: Bring a large pot of salted water to a rolling boil. Add green beans and cook for exactly 2 minutes (they should turn vibrant green and remain crisp). Immediately transfer to an ice bath to stop cooking. Drain and pat completely dry—moisture kills the sauté crunch.
2. Sear the Aromatics: Heat a large skillet over medium-high heat. Add 1½ tbsp oil. Once shimmering, add sliced garlic and shallot (if using). Sauté for 30 seconds until fragrant but not browned—burnt garlic turns bitter.
3. Char the Beans: Add the blanched green beans in a single layer. Let them sit undisturbed for 1–2 minutes to develop a slight char. Toss and repeat for another 2 minutes. The goal? Blistered edges with a tender-crisp interior.
4. Season and Finish: Push beans to one side. In the cleared space, add remaining ½ tbsp oil, red pepper flakes, and soy sauce. Stir for 10 seconds, then toss everything together. Season with salt and pepper. Sprinkle sesame seeds if desired. Total skillet time: 6–8 minutes from start to finish.
Pro Tip: For an even richer flavor, consider making Garlic Butter Green Beans—simply replace the oil with 3 tbsp butter in step 2 and skip the soy sauce for a milder, buttery profile.
Nutritional Benefits & Advantages
Green beans are a fiber-rich superfood packed with vitamin C, vitamin K, and manganese. A single serving supports immune function and bone health while keeping calories low (just ~40 per cup). Garlic adds allicin, a compound linked to heart health and reduced inflammation. This dish is naturally gluten-free, low-carb, and vegan-friendly when using oil instead of butter. The quick cooking method preserves more nutrients compared to boiling or steaming.
Tips Variations & Cooking Advice
– Spice it up: Add 1 tsp sriracha or gochujang to the soy sauce for a Korean twist.
– Nutty crunch: Toss with toasted almonds or cashews before serving.
– Citrus zing: Finish with lemon zest or a squeeze of fresh lime.
– Protein upgrade: This pairs beautifully with grilled chicken, salmon, or tofu.
– Dietary adaptations: For a dairy-free/vegan version, use olive oil or vegan butter. For low-FODMAP, remove garlic and use garlic-infused oil.
Common Mistakes to Avoid
– Overcrowding the pan: Beans need space to char, not steam. Cook in batches if necessary.
– Skipping the blanch: Raw beans may be too tough, while overcooked ones turn mushy. Blanching ensures perfect texture.
– Adding garlic too early: Garlic burns in seconds. Add it only after the beans have started to sear.
– Not drying beans after blanching: Wet beans won’t brown. Pat them with a clean kitchen towel.
– Soggy leftovers: This dish is best fresh. If reheating, use high heat in a dry skillet.
Storage & Meal Prep Tips
– Refrigeration: Store cooled leftovers in an airtight container for up to 3 days. Place a paper towel inside to absorb excess moisture.
– Freezing: Not recommended—texture will become mushy upon thawing.
– Reheating: Reheat in a dry skillet over high heat for 1–2 minutes. Avoid microwaving, which turns beans limp.
– Meal prep shortcut: Blanch and trim beans up to 2 days ahead. Keep in the fridge, then sauté just before serving.
Conclusion
Crisp-tender Garlic Green Beans are the weeknight hero you’ve been searching for—ready in under 20 minutes, packed with crunch and bold flavor, and endlessly adaptable. By mastering this simple technique, you’ll never settle for bland vegetables again. Whether you stick with the classic soy-garlic version or try the buttery richness of Garlic Butter Green Beans, this dish proves that healthy eating doesn’t mean sacrificing taste. Give it a try tonight, snap a photo, and share your version with us—we’d love to see how you make it your own!
FAQs
1. Can I use frozen green beans without blanching?
Yes, but skip the blanching step. Instead, thaw and pat dry thoroughly, then sauté directly over high heat until tender-crisp. Be sure to cook off excess moisture.
2. Why are my green beans tough/rubbery?
They’re likely undercooked. Blanching for exactly 2 minutes followed by a proper sauté is crucial. Overcooking also causes toughness—watch the clock.
3. Can I make this dish nut-free?
Absolutely. Omit sesame seeds and use any neutral oil. The recipe is naturally nut-free otherwise.
4. How do I adjust the spice level?
Reduce or omit red pepper flakes for mild heat. For extra kick, add a dash of chili oil or finely chopped Thai bird chili.
5. What’s the best way to reheat without ruining texture?
Use a dry, very hot skillet for 1 minute only. Avoid the microwave—it creates steam that wilts the beans.
Quick way to grow Garlic Green Beans in 7 days. Garlic Green Beans
Ingredients
Equipment
Method
- Fill your chosen planter with well-draining potting soil, leaving about an inch of space from the rim.
- Plant green bean seeds about 1 inch deep and 2-3 inches apart, then gently cover them with soil.
- Water the seeds thoroughly after planting, ensuring the soil is consistently moist but not waterlogged.
- Once sprouts appear, around day 3-4, sprinkle minced garlic around the base of the plants to infuse a subtle garlic flavor as they grow.
- Continue to water regularly, keeping the soil moist, and provide at least 6-8 hours of direct sunlight daily.
- After approximately 7 days, your garlic green beans should be ready for harvest when they are firm and about 4-6 inches long.
- Snip or pluck the beans carefully to avoid damaging the plant, encouraging further growth.