Master the Art of Texas BBQ: Crafting Authentic BBQ Brisket (Texas Style) at Home
Have you ever dreamt of that melt-in-your-mouth, smoky perfection that defines genuine Texas BBQ? The kind that makes your taste buds sing and instantly transports you to a roadside smokehouse in the heart of the Lone Star State? Mastering a BBQ Brisket (Texas Style) at home might seem daunting, but with the right approach, it’s not only achievable but incredibly rewarding. Forget overpriced restaurant versions – preparing this iconic dish yourself guarantees unparalleled freshness, flavor control, and the irresistible aroma of expertly smoked brisket filling your kitchen. This comprehensive guide will walk you through every step, demystifying the process and empowering you to create a culinary masterpiece that will impress even the most discerning BBQ aficionados.
Ingredients & Kitchen Tools
Crafting the perfect brisket requires a few key items. Precision and quality make all the difference.
- Brisket (Full Packer, 12-16 lbs): This refers to the whole brisket cut, including both the “flat” (leaner muscle) and the “point” (fattier muscle). Essential for classic Texas BBQ.
- Coarse-Ground Black Pepper (1/2 cup): The backbone of Texas bark. Don’t skimp on quality.
- Kosher Salt (1/4 cup): Provides essential seasoning and helps draw out moisture for better bark formation.
- Smoker or Pellet Grill: Absolutely crucial for achieving that signature smoky flavor and tender texture.
- Wood Chunks/Pellets (Oak or Post Oak recommended): Oak is the traditional choice for Texas brisket, offering a robust yet clean smoke flavor.
- Large Roasting Pan or Aluminum Foil Pan: For catching drippings and resting the brisket.
- Meat Thermometer (Leave-in probe and instant-read): Non-negotiable for monitoring internal temperature and ensuring perfect doneness.
- Butcher Paper (Pink, untreated): Ideal for wrapping the brisket during the “stall” phase, allowing it to breathe while retaining moisture. Aluminum foil is an optional substitute but creates a different bark texture.
- Sharp Boning Knife: For trimming the brisket properly.
- Heat-Resistant Gloves: For handling hot brisket and smoker grates.
- Spray Bottle (optional): For spritzing with apple cider vinegar, water, or beef broth during the cook to keep the surface moist.
Prep Time & Cooking Schedule
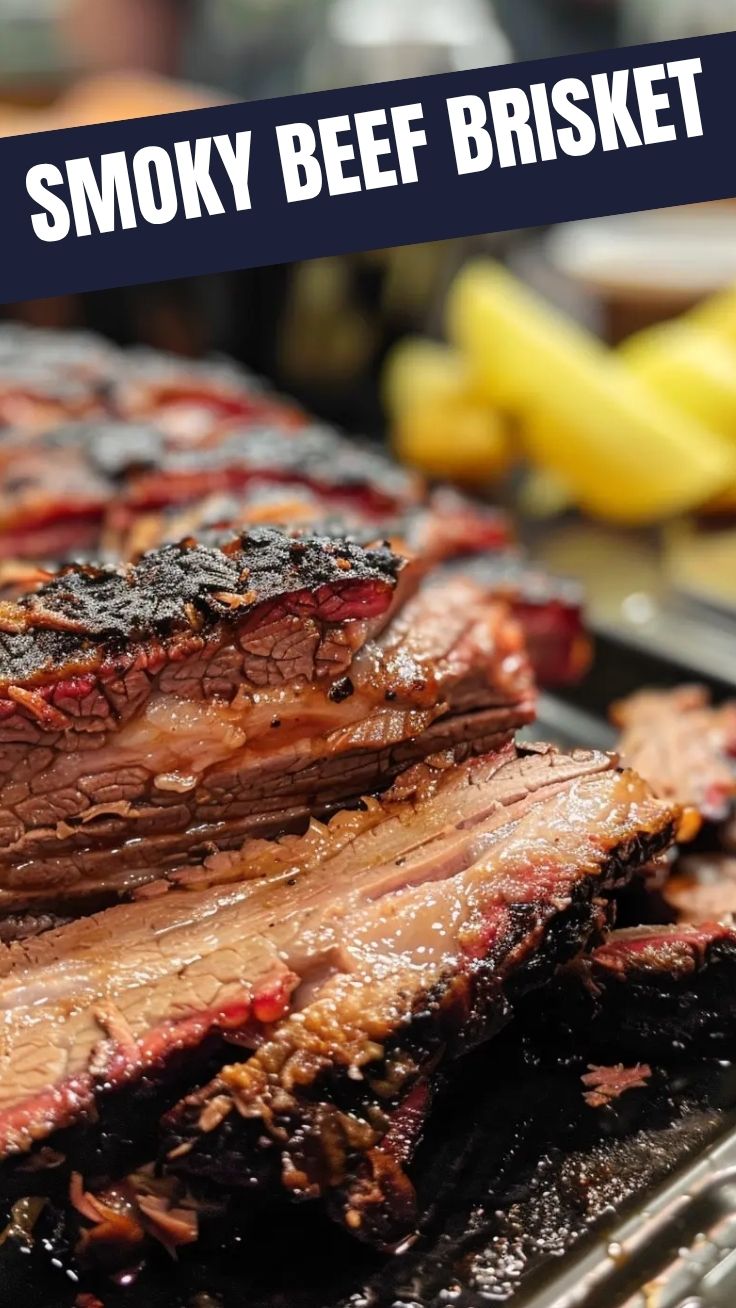
Texas brisket is a labor of love that requires patience and planning. This isn’t a quick weeknight meal!
- Prep Time: 30-45 minutes (for trimming and seasoning)
- Cooking Time: 10-18 hours (depending on brisket size, smoker temperature, and consistency)
- Resting Time: 2-4 hours (essential for juicy results)
- Total Time: 13-22 hours
Plan to start your brisket early in the morning or even the night before to ensure it’s ready for your desired mealtime. Overnight cooks on a stable smoker are often the most convenient.
Step-by-Step Instructions
1. Trim the Brisket (30-45 minutes): Chill the brisket for 30 minutes to make trimming easier. Remove hard fat and silver skin from the flat. Trim the fat cap on the point down to about 1/4 to 1/2 inch thick, shaping it to be aerodynamic. This ensures even cooking and promotes good bark development. Less is more, but don’t remove all the fat, as it provides moisture and flavor.
2. Season Generously (5 minutes): Pat the brisket dry with paper towels. Combine the coarse-ground black pepper and Kosher salt to create a simple yet classic Texas rub (often called a “Dalmatian rub”). Apply it liberally on all sides, ensuring full coverage. Don’t be shy; the bark needs it.
3. Preheat Your Smoker (30-60 minutes): Set your smoker or pellet grill to a consistent temperature of 250-275°F (121-135°C). Use oak wood chunks or pellets for that authentic Texas flavor. A stable temperature is key to a perfectly cooked BBQ Brisket (Texas Style).
4. Smoke the Brisket (6-8 hours, “Naked”): Place the seasoned brisket fat-side up on the smoker grates. Insert a leave-in probe into the thickest part of the flat, avoiding major fat pockets. Let it smoke, undisturbed, until the internal temperature reaches 165-175°F (74-79°C). This is the “stall” phase, where evaporation cools the meat. The surface should develop a beautiful, dark mahogany color, indicative of a good bark taking shape. Resist the urge to peek often and maintain consistent smoke.
5. Wrap the Brisket (5 minutes): Once the internal temperature hits the stall and the bark is set, take the brisket off the smoker. Wrap it tightly in two layers of butcher paper. If using foil, add a splash of beef broth or apple juice to the foil packet for extra moisture – this creates a more steamed product, but still delicious. The wrap helps push through the stall and tenderize the meat. This also helps keep the smoked brisket from drying out towards the end.
6. Continue Cooking (4-10 hours): Return the wrapped brisket to the smoker. Continue cooking at 250-275°F (121-135°C) until the brisket is probe-tender. This means an instant-read thermometer should slide into the thickest part of both the flat and the point with very little resistance, like pushing it into warm butter. This typically occurs between 200-205°F (93-96°C) internal temperature, but tenderness is the ultimate guide, not just temperature.
7. Rest the Brisket (2-4 hours): This is perhaps the most critical step for juicy results. Once probe-tender, remove the brisket from the smoker (still wrapped). Place it in an empty cooler or an oven (turned off, but warmed to 150°F initially) for at least 2 hours, and ideally 3-4 hours. This allows the muscle fibers to relax and reabsorb juices, making for an incredibly tender and moist final product.
8. Slice and Serve: Carefully unwrap the brisket. Separate the flat and the point (the fat layer between them makes this easy). Slice the flat against the grain into pencil-thick slices. For the point, you can slice it, chop it for burnt ends, or leave it whole. Serve immediately and enjoy your masterpiece!
Nutritional Benefits & Advantages
Brisket, particularly the leaner flat, offers valuable protein and essential nutrients. As a red meat, it’s a good source of iron, zinc, and B vitamins, crucial for energy production and overall health. The slow-smoking process allows much of the fat to render out, leaving behind a flavorful and tender cut. Additionally, preparing it at home gives you complete control over ingredients, allowing you to avoid additives and excessive sugars often found in store-bought BBQ sauces.
Tips, Variations & Cooking Advice
- Don’t Over-Trim: While trimming is important, a little fat goes a long way in keeping the brisket moist.
- The Spritz: Some pitmasters like to spritz the brisket every 1-2 hours during the “naked” phase with apple cider vinegar, water, or beef broth. This keeps the surface moist and helps with bark development.
- Burnt Ends: The fatty point of the brisket is perfect for making burnt ends. After separating, cube the point, toss with some BBQ sauce and rub, then return to the smoker for another 1-2 hours until caramelized and sticky.
- Different Woods: While oak is traditional, mesquite offers a more aggressive flavor, and hickory is a popular alternative. Experiment to find your favorite.
- Temperature Consistency: Invest in a good thermometer and monitor your smoker’s temperature closely. Fluctuations can lead to longer cook times and less consistent results.
- Probe Tender, Not Temperature: Remember, temp is a guide, but tenderness is the true indicator of doneness.
- Gluten-Free/Dairy-Free: This recipe is naturally gluten-free and dairy-free as long as your rub doesn’t contain hidden ingredients and you choose appropriate BBQ sauces if adding at the end.
Common Mistakes to Avoid
- Not Resting Long Enough: Rushing the rest will result in dry, tough brisket as juices will pour out when sliced. Patience is key!
- Cooking to Temperature Alone: Brisket needs to be “probe tender,” not just hit a specific internal temperature. Don’t pull it off the smoker just because it reached 200°F if it’s still resistant when probed.
- Opening the Smoker Too Often: “If you’re lookin’, it ain’t cookin’.” Every time you open the lid, heat escapes, extending the cooking time and potentially affecting smoke penetration.
- Over-Trimming Fat: Fat adds flavor and moisture. Trim carefully but don’t strip it bare.
- Using the Wrong Wood: While personal preference plays a role, highly resinous woods like mesquite can overpower the brisket if not used sparingly. Start with oak for a classic profile.
Storage & Meal Prep Tips
Leftover brisket (if there is any!) stores beautifully.
- Refrigeration: Store sliced or unsliced brisket in an airtight container in the refrigerator for up to 3-4 days. For best results, keep it in any rendered drippings to maintain moisture.
- Freezing: For longer storage, wrap individual portions tightly in plastic wrap, then aluminum foil, and place in a freezer-safe bag or container. It can be frozen for up to 2-3 months.
- Reheating: Thaw frozen brisket in the refrigerator overnight. To reheat, place slices in a baking dish with a splash of beef broth or water, cover tightly with foil, and warm in a 300°F (150°C) oven until heated through. Alternatively, use a sous vide bath for incredibly tender reheating. Avoid microwave reheating if possible, as it can dry out the meat.
Conclusion
Creating a sensational BBQ Brisket (Texas Style) at home is a testament to culinary dedication and patience. By meticulously following these steps, from thoughtful trimming to the crucial resting phase, you’re not just cooking meat; you’re crafting an experience. The unparalleled flavor, the perfect bark, and the tender, juicy texture of a perfectly smoked brisket will make every moment of the extensive cook worth it. Don’t hesitate to embark on this delicious journey. Try this recipe, share your impressive results in the comments, and discover the joy of authentic pitmaster-level BBQ in your own backyard!
FAQs
Q1: What’s the best type of wood for Texas-style brisket?
A1: Post oak or white oak are the traditional choices for their clean, moderate smoke flavor that complements the beef beautifully without overpowering it. Hickory is a good alternative.
Q2: My brisket hit 200°F but still feels tough. What should I do?
A2: Keep cooking! Temperature is a guide, but tenderness is key. The brisket still needs more time to break down connective tissues. Continue cooking until an instant-read thermometer probes like soft butter in multiple spots.
Q3: How do I get a good bark on my brisket?
A3: A good bark comes from a heavy application of coarse salt and pepper rub, consistent smoker temperature in the initial “naked” phase, and allowing enough time for the bark to form before wrapping. Avoid too much moisture on the surface initially, which can soften the bark.
Q4: Can I make this in a regular oven?
A4: While you can technically cook a brisket in an oven, it won’t achieve the signature smoky flavor and bark that’s essential for “Texas Style” BBQ brisket. An electric smoker, pellet grill, or traditional offset smoker is highly recommended for authentic results.
Q5: How do I prevent my brisket from drying out?
A5: Proper trimming (leaving some fat cap), wrapping the brisket during the stall (with butcher paper or foil), maintaining consistent smoker temperature, and most importantly, an adequate, long rest period are all crucial for a moist brisket.
Proven way to grow your BBQ Brisket (Texas Style) in 3 steps
Ingredients
Equipment
Method
- Trim the brisket by removing hard fat and shaping it for even cooking, leaving about 1/4 inch of fat cap.
- Generously season the entire brisket with a mixture of coarse black pepper and kosher salt, ensuring full coverage.
- Preheat your smoker to 250°F (120°C) and add your favorite wood chunks for smoke. Place the seasoned brisket fat-side up in the smoker.
- Smoke the brisket for 6-8 hours or until an internal temperature of 170°F (77°C) is reached and a deep bark has formed.
- Wrap the brisket tightly in butcher paper, adding a splash of warm beef broth if desired, and return it to the smoker.
- Continue cooking until the brisket reaches an internal temperature of 200-205°F (93-96°C) and is probe-tender, then let it rest for 2-4 hours before slicing against the grain and serving.